

Why Ayaka Still Rules the Freeze Meta in 6.1
She's Not Going Anywhere (And Here's Why)
Let's be real – while everyone's chasing the newest shiny DPS, Ayaka quietly maintains her A-tier throne in version 6.1. Her Elemental Burst? Still an absolute monster. We're talking 2302% scaling at level 1, ramping up to roughly 3500% DPS at level 8 through those 20 devastating AoE hits over 5 seconds.
That puts her a solid 15-25% ahead of Ganyu in single-target scenarios – and honestly, that gap only widens when you factor in the new toys we've got to work with.
Speaking of new toys... Escoffier changes everything. That 55% Cryo/Hydro RES shred isn't just impressive on paper – it stacks beautifully with VV (40%) and Shenhe's debuff (-20%) for a jaw-dropping 115% total resistance reduction. When you nail this setup? We're talking SS-tier performance that makes even the whale accounts take notice.
The Dream Team Composition
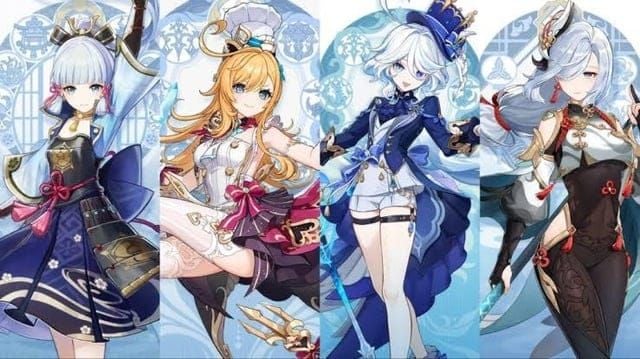
Here's where things get spicy. The optimal lineup runs Ayaka (your star DPS), Shenhe (the Cryo queen who makes everything better), Furina (Hydro enabler with serious damage amps), and Escoffier (sustain plus that ridiculous 55% RES shred).
This isn't just throwing strong characters together – it's about multiplicative bonuses that push you to 90%+ Cryo DMG bonuses when everything clicks. I've seen this comp absolutely demolish content that had players struggling for months.
Now, building this premium setup isn't exactly cheap. If you're looking for cheap Genshin recharge options to grab these characters, BitTopup's got competitive pricing with instant delivery. Makes the whole building the perfect team thing a lot less painful on the wallet.
Don't have the full premium squad? No worries. The traditional Kazuha variant (swapping him for Escoffier) still slaps, especially when you need grouping utility. Budget players can run Rosaria, Xingqiu, and Sucrose for about 70-80% of the premium damage – still more than enough for Abyss clears.
The Magic Behind the Synergy
Here's where the real strategy comes in. Shenhe's Icy Quills aren't just a damage boost – they're 5-7 procs per teammate with a +15-30% Cryo DMG boost that transforms Ayaka from strong to unstoppable. Meanwhile, Furina's doing double duty with consistent Hydro application and those Fanfare stacks building up to 21% team DMG bonus.
The 4-piece Blizzard Strayer interaction is where things get mathematically beautiful. +40% CRIT Rate against Frozen targets, plus Cryo Resonance for another +15% – suddenly you're sitting at +55% CRIT Rate and can focus entirely on stacking CRIT DMG for those 200%+ ratios.
But here's a pro tip most guides miss: Furina opens up 4-piece Marechaussee Hunter as a legitimate alternative. +36% CRIT Rate from HP changes and +15% NA/CA DMG. The flexibility this gives you for substat optimization? Game-changing.
Breaking Down Each Character's Role
Ayaka: Your Damage Dealer Extraordinaire
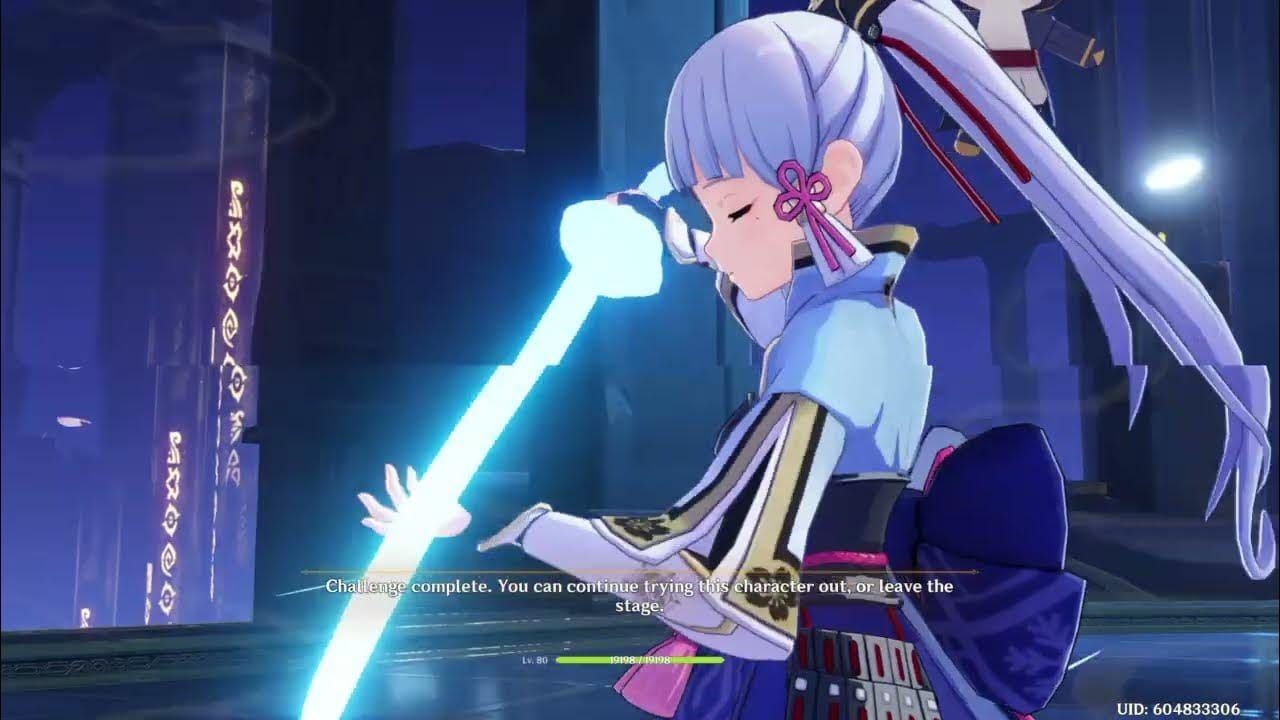
Ayaka owns the field for 8-10 seconds per 20-second rotation, and every second counts. Her kit revolves around that Elemental Burst as the main event, but don't sleep on those infused Normal/Charged Attack combos during downtime.
The optimal sequence? ED(N1)Q for those crucial Mistsplitter stacks, then N2C combos for sustained damage. It's not just button mashing – timing matters.
That Alternate Sprint isn't just mobility. Five seconds of Cryo infusion plus +18% Cryo DMG for 10 seconds through her A4 passive. Her Elemental Skill adds another +30% NA/CA DMG for 6 seconds. See why proper sequencing separates the good Ayaka players from the great ones?
Shenhe: The Cryo Support That Changes Everything
Shenhe's Icy Quill system is unique in Genshin – and frankly, it's what makes her irreplaceable in Cryo comps. Her Skill generates 5-7 Quills per teammate (Tap for 5 lasting 10s, Hold for 7 lasting 15s), each adding flat damage based on her ATK.
With 3000 ATK, you're looking at roughly 1400 flat damage per proc. That translates to a 20-30% DPS uplift for Ayaka – not percentage-based, but flat damage that scales beautifully.
The additional buffs pile on: +15% Skill/Burst DMG via A4, +15% Cryo DMG in her Burst field, and that -20% Cryo RES shred. Energy requirements are hefty though – 170-230% ER at C0, dropping to 180%+ at C1 with that extra Skill charge.
Furina: More Than Just Hydro Application
Furina's familiars provide consistent off-field Hydro every 2 seconds for 30 seconds – that's reliability you can build a rotation around. But the real magic happens with her Burst's Fanfare system.
300 max stacks converting to 0.07% DMG Bonus per point means up to 21% team damage amplification over 18 seconds. The HP drain mechanic that enables Marechaussee Hunter synergy on Ayaka while requiring healing support? That's not a bug, it's a feature.
C2 dramatically improves Fanfare generation with +250% gain from HP changes, but honestly? C0 performs beautifully in freeze comps.
Your Anemo VV Options
Kazuha brings +40% Cryo DMG through his A4 passive alongside VV's 40% RES shred. His grouping utility is unmatched in multi-target scenarios – just watch those Plunge attacks that can cause Shatter reactions.
Planning to Genshin Impact buy Genesis Crystals for Kazuha or other Anemo supports? BitTopup's secure transactions and competitive rates make building optimal comps way less stressful.
Venti excels against lighter enemies with superior grouping and provides +15 Energy refund in multi-target situations. Sucrose delivers EM buffs and that C6 Elemental DMG bonus that shouldn't be underestimated.
Nailing the Perfect Rotation
Setting the Stage
Every great rotation starts before you even begin. Ayaka's Alternate Sprint applies Cryo for VV Swirl – that's your foundation for resistance shred. Energy funneling prep means positioning for optimal particle collection, especially from Shenhe's Skill and any Favonius weapon procs.
The 20-Second Masterpiece
Here's the rotation that separates casual players from Abyss dominators (Ayaka-Shenhe-Furina-Escoffier):
- Furina ED Q - Sets up Hydro application, starts Fanfare stacking
- Escoffier EQ - That massive 55% RES shred plus healing for Fanfare optimization
- Shenhe Q tE - 5-7 Icy Quills deployed, Cryo buffs active
- Ayaka ED(N1) Q - Mistsplitter stack into Burst for maximum pain
- Ayaka N2C combo - Consuming Quills during 8-10s field time
- Shenhe N2 tE - Quill refresh and particle generation
- Ayaka ED N1C - Final damage phase with refreshed buffs
This sequence ensures proper buff snapshotting for Ayaka's Burst while maintaining 100% Freeze uptime. Miss the timing? You'll feel it in your damage numbers.
Don't Make These Rookie Mistakes
I see this constantly: Kazuha's Plunge attack before establishing Hydro aura. Result? Shatter reactions that break Freeze status and tank your damage.
Improper buff timing – like using Ayaka's Burst before Shenhe's Quill application – is another damage killer. Energy overcapping wastes valuable substats too. Use ER calculators, test your rotations, and aim for exact requirements rather than excessive safety margins.
Energy Management: The Math That Matters
Individual ER Breakdowns
Ayaka needs 130-150% ER in Freeze teams, but specifics matter. Triple Cryo setups with Shenhe? 130-140% baseline. Double Cryo configurations need 130-150%. Each Favonius proc reduces these requirements by 10-20%.
Shenhe's the energy-hungry one at 170-230% ER for C0, improving to 180%+ at C1. Furina and Anemo supports typically need 120-140% depending on weapons and constellations.
Team Energy Flow
Particle generation follows predictable patterns: Shenhe's Skill provides 4-5 particles, Ayaka's Skill generates 4-5 on hit, Favonius weapons contribute 3 per proc. Optimal funneling means using Skills during Ayaka's field time for maximum absorption.
That 20-second rotation length? It allows two Skill uses from most characters, doubling particle generation compared to shorter rotations. Extended cycle, reduced ER requirements, maintained buff uptime – it's beautiful when it works.
Artifacts and Weapons: Where Your Investment Pays Off
Ayaka's Artifact Priority
4-piece Blizzard Strayer remains king for most freeze compositions. +40% CRIT Rate against Frozen enemies and +15% Cryo DMG bonus, combined with Cryo Resonance for +55% total CRIT Rate? You can focus entirely on CRIT DMG substats for those 200%+ ratios.

Main stats: ATK% sands, Cryo DMG goblet, CRIT DMG circlet. Substats follow ER to requirement > CRIT DMG > ATK% > CRIT Rate.
4-piece Marechaussee Hunter with Furina teams provides +36% CRIT Rate from HP changes and +15% NA/CA DMG. The flexibility this offers based on substat quality? Invaluable.
Shenhe's Support Build
Shenhe's all about ATK scaling for Icy Quill damage. 4-piece Noblesse Oblige for team Burst DMG bonus, ATK% across sands, goblet, and circlet. Substats prioritize ATK% > ER > CRIT Rate for Favonius procs.
Those ER requirements of 170-230% often demand ER sands or serious substat investment. Balancing ATK scaling with energy needs? That's where artifact quality and weapon selection become crucial.
Weapon Recommendations by Budget
Premium tier:
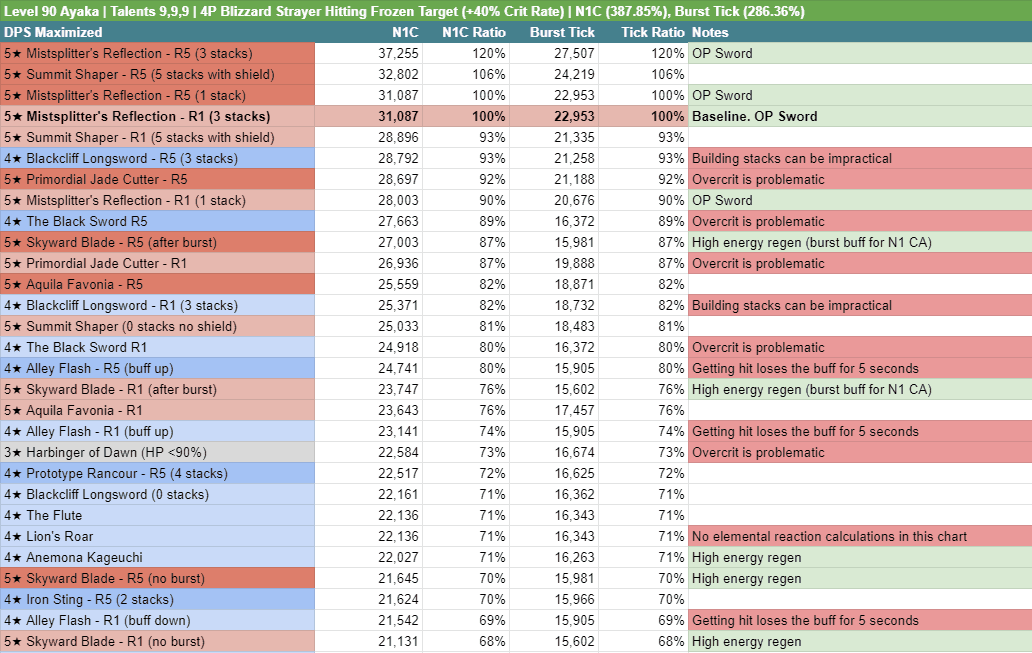
- Ayaka: Mistsplitter Reforged (674 ATK, +28% Elemental DMG at full stacks)
- Shenhe: Calamity Queller (608 ATK, +48% ATK off-field)
- Furina: Splendor of Tranquil Waters or Key of Khaj-Nisut
Budget alternatives:
- Ayaka: Amenoma Kageuchi (454 ATK, +6 Energy per seed at R5)
- Shenhe: Favonius Lance (particle generation, ER substat)
- Furina: Favonius Sword (team energy support)
VV Setup and Elemental Mastery
Understanding VV Mechanics
4-piece VV reduces elemental resistance by 40% for 10 seconds after Swirl reactions – but it requires Anemo contact with the target element. In freeze teams, this means Cryo application before Anemo Skills to establish proper elemental aura.
The stacking mechanics let VV's 40% shred combine with Shenhe's 20% reduction and Escoffier's 55% shred. When you nail this? Maximum resistance reduction that makes enemies melt.
Elemental Gauge Management
Freeze reactions demand precise elemental gauge management to maintain status throughout Ayaka's Burst duration. Furina's 2-second Hydro intervals provide consistent gauge refresh while Ayaka's infused attacks maintain Cryo presence.
Maintaining Freeze means avoiding Shatter-causing reactions from Geo attacks or Anemo Plunges. Positioning and attack timing prevent accidental reaction disruption during your optimal damage phases.
Team Variations That Actually Work
Alternative Hydro Options
Kokomi provides superior Hydro application with 2-second ticks and healing utility, plus TTDS for +48% ATK buff. Mona offers Omen debuff for +20% DMG amplification and extended Freeze duration. Xingqiu serves as the budget option with consistent off-field Hydro through his Burst.
Budget-Friendly Builds
F2P compositions using Ayaka-Rosaria-Xingqiu-Sucrose achieve 70-80% of premium damage while maintaining Abyss viability. Rosaria provides CRIT Rate sharing and Cryo battery function, Sucrose delivers VV shred and EM buffs.
Investment priorities for budget builds? Ayaka's core build first, then Sucrose's VV set, then Rosaria's CRIT Rate optimization.
Spiral Abyss: Where Theory Meets Practice
Floor-Specific Strategies
Floors 9-11 favor AoE compositions with Venti for grouping. Ayaka excels in single-target chambers and boss encounters where her frontloaded damage provides clear time advantages.
Floor 12 typically features boss encounters where Ayaka's single-target optimization shines. Shenhe's damage amplification and Furina's buffs provide the damage scaling needed for 36-star clears at C0 investment levels.
Enemy Matchups
Freezable enemies represent Ayaka's optimal matchups – full Blizzard Strayer effectiveness and guaranteed Burst hit registration. Non-freezable bosses require Mono Cryo adaptations with Bennett replacing Hydro supports for ATK buffs.
Investment Priority: Where to Spend Your Resources
Character Leveling Order
Priority follows Ayaka (90) > Shenhe (80/90) > Furina (80) > Anemo support (70/80). Ayaka benefits most from level 90 due to reaction scaling and base stat increases. Supports show diminishing returns beyond level 80.
Talent investment prioritizes Ayaka's Burst and Normal Attack to levels 9-10, followed by Shenhe's Skill and Burst for Quill scaling.
Constellation Value Analysis
Ayaka C2 provides the highest value constellation with +40% Burst DMG through additional cyclones – significant single-target damage improvement. Shenhe C1 adds crucial utility through additional Skill charges, improving rotation flexibility and energy generation. Furina C2 dramatically improves Fanfare generation with +250% gain from HP changes.
Quick Answers to Common Questions
What's the minimum ER for Ayaka in freeze teams? 130-150% ER depending on team composition. Triple Cryo setups need 130-140%, while 120-130% works with one Favonius proc per rotation.
Is Shenhe worth pulling specifically for Ayaka? Absolutely. Shenhe provides 20-30% DPS uplift through Icy Quills, Cryo DMG buffs, and RES shred. She's the premier Cryo support and transforms freeze team performance.
Can Furina replace Kokomi or Mona? Furina offers superior damage amplification through Fanfare stacks and enables Marechaussee Hunter builds, but needs healing support for optimal performance. Generally better for single-target scenarios.
How crucial is the VV setup? Essential. VV provides 40% Cryo RES shred that significantly increases damage output. Combined with Shenhe's 20% shred and Escoffier's 55% reduction, it enables maximum damage potential.
What's the optimal rotation length? 20-second rotations balance energy generation and buff uptime perfectly. Allows two Skill uses from most characters while maintaining consistent Burst availability.
Should I build Ayaka or Shenhe first? Ayaka first – level 90, talents 9-10, artifacts. She's your main DPS. Then invest in Shenhe for damage amplification. Shenhe's ATK scaling for Quills makes her investment highly valuable once Ayaka's properly built.


