

S&D isn't BR. There are no second chances. Every death is permanent for that round, which means one bad peek doesn't just cost you HP — it costs your team the entire round economy. The players who consistently clutch 1v2 and 1v3 situations aren't mechanically superior. They're informationally superior. Here's exactly how they do it.
Why Does Blood Strike S&D Demand a Completely Different Survival Mindset Than Other Modes?
S&D punishes reckless aggression in ways that BR and TDM simply don't. In BR, a bad push costs you positioning. In S&D, it costs your team a round — and potentially the match economy for the next two rounds after that.
The no-respawn structure creates information asymmetry that heavily favors defenders. Community testing consistently shows that defenders, holding pre-aimed angles at known entry points, win first-contact duels at a significantly higher rate than attackers pushing blind. Attackers are moving into unknown space; defenders are waiting in known space. That gap widens dramatically on mobile, where reaction windows are tighter and touch controls reduce the precision margin.
The psychological weight of being last alive is real and underestimated. After grinding over 300 S&D ranked matches, I found that players who choked clutch rounds weren't out-aimed — they were out-timed. They panicked, peeked too early, and handed the enemy free information. The moment I started treating the round clock as a weapon rather than a countdown, my clutch win rate improved noticeably. That mindset shift is the foundation everything else builds on.
What Are the 7 Clutch Survival Mechanics That Top Blood Strike S&D Players Actually Use?
These aren't generic FPS tips. They're calibrated specifically for Blood Strike's mobile-first mechanics and 2026 S&D meta.
Tip 1 — Sound Is Your Sixth Teammate
Footstep audio is the most underused information source in Blood Strike S&D. Community testing confirms the footstep system reliably telegraphs enemy movement direction and distance — and on mobile, this matters more than on PC because your visual field is narrower.
Train yourself to distinguish: footsteps approaching vs. retreating, the bomb beep radius narrowing as you close in on a planted device, and reload sounds that signal an enemy is temporarily vulnerable. Pre-aiming a corner because you heard someone stack there is a fundamentally different (and safer) play than peeking because you guessed they were there.
Tip 2 — Positional Discipline: Angles vs. Death Traps
Hold angles. Don't peek them. This is the single most repeated piece of advice from community S&D veterans, and it's repeated because players keep ignoring it.
The distinction: a winning angle gives you a sightline on a common entry point while keeping your body behind cover. A death trap is any position that exposes you to two or more sightlines simultaneously. In last-alive scenarios, never take a position where enemies can approach from more than one direction without you hearing them first. Use the March 2026 Grappling Hook to reposition between angles — it's officially confirmed as a mobility tool and changes vertical positioning options significantly on multi-level maps.
Tip 3 — Time Management as Last Survivor
The round timer is a weapon. Use it.
As the last attacker alive with the bomb unplanted: force a fight when the timer drops below 45 seconds — stalling further only benefits defenders. As the last defender: stall aggressively. Make attackers come to you. Every second they spend searching is a second closer to a round win without firing a shot.
Community experience shows that most last-alive players force fights 20-30 seconds too early. They feel the pressure of the clock and interpret it as urgency to engage. Flip that instinct: if you're defending, the clock is your ally. If you're attacking with the bomb, plant it under smoke cover and then force the 1v1 on your terms.
Tip 4 — Eco Round Survival: The Buy/Save Decision Tree
Eco rounds are where Blood Strike S&D matches are actually won and lost — not in the flashy clutch moments.
| Situation | Action | Reason |
|---|---|---|
| Lost 2+ rounds, low funds | Full save, pistol only | Preserve economy for full buy next round |
| Won previous round, medium funds | Partial buy (SMG/shotgun) | Maintain pressure without breaking bank |
| Full economy, team aligned | Full rifle buy | Maximize round win probability |
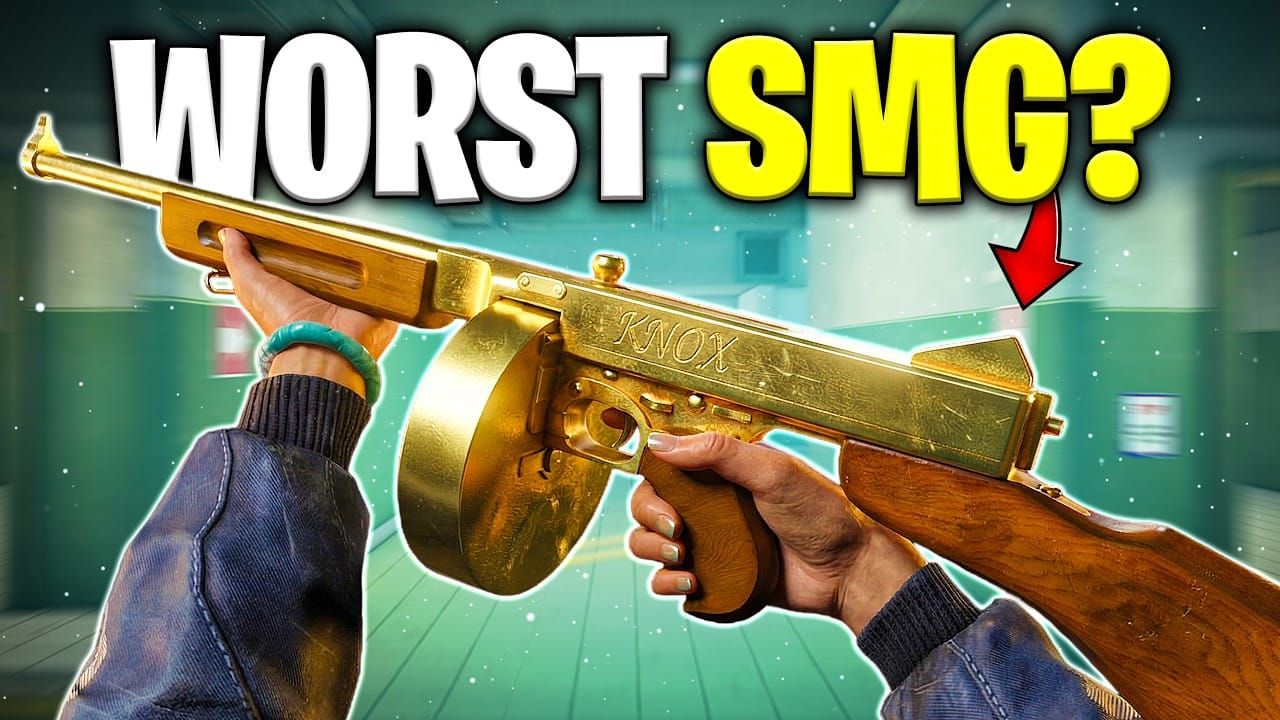
| Eco round forced | Thompson SMG (March 2026 patch) | Best close-range value on a budget |
After coaching several squad members through ranked climbs, the fastest single improvement came from eco discipline: stopping the reflex full-buy on a 2-win streak and saving rifles for the following round transformed our economy management within one session. If you're looking to unlock premium loadouts to stay competitive across all buy phases, Blood Strike recharge best price options can help you maintain your operator and weapon roster without grinding currency gaps.
Tip 5 — Information Before Action
Never engage without knowing at least one enemy position. This sounds obvious. Players ignore it constantly.
Before pushing as last survivor, mentally reconstruct the round: where did your teammates die, which direction were they facing, how long ago? Last-known positions decay fast in S&D — enemies rotate — but they give you a probability map. Community experience confirms that players who gather intel from map awareness and last-known positions before engaging win outnumbered situations at a measurably higher rate than those who push blind.
Operators matter here. Zero (community-ranked as a solo clutch specialist) and Nacho (best tactical support for S&D clutches in the 2026 meta) both provide passive information advantages that compound in last-alive scenarios.
Tip 6 — Bomb-Site Pressure: Plant vs. Bait
This is the decision most players get wrong in clutch situations. The rule: plant only when you have utility cover or a positional advantage. Planting blind in the open is handing the enemy a free defuse.
The smarter play in a 1v2 clutch as attacker: fake a plant to bait defenders out of cover, eliminate one, then plant with the remaining enemy at a disadvantage. Community S&D veterans widely observe that the bomb itself is a psychological tool — defenders must respond to a plant, which forces them to move from safe positions into your sightlines.
If you're the defender in a 1v2: don't rush the bomb the moment it plants. Let the timer run 5-8 seconds. The attacker will often reposition to watch the defuse — and that movement gives you audio information.
Tip 7 — Mental Reset Protocol
One failed clutch will destroy your next three rounds if you let it. This is the tip most S&D guides skip entirely.
Between rounds, take 10 seconds to consciously reset: identify the one decision that cost you the clutch (not the aim, not the RNG — the decision), file it, and move on. Community experience and personal observation both confirm that tilt after a failed clutch manifests as over-aggression in the following round — players try to "make up" for the loss by forcing fights they shouldn't take. That's how one bad round becomes a five-round losing streak.
Why Do Most Blood Strike S&D Players Keep Losing Clutch Rounds Even After Practicing?
The three most common clutch killers, in order: peeking too early, ignoring the timer, and over-rotating to the wrong site.
Peeking too early is a mobile-specific problem. Touch controls reduce the precision of micro-adjustments, so players compensate by moving more — which exposes them to angles they haven't cleared. The fix: pre-aim before moving, not while moving.
The "information debt" problem is subtler. Players make decisions based on where enemies were 20 seconds ago, not where they are now. Enemies rotate. A defender who was at B-site 30 seconds ago may now be mid. Acting on stale data in a dynamic round is how you walk into a crossfire you didn't see coming.
Standing still is also a death sentence — but so is moving predictably. Community observation confirms that enemies in S&D exploit survival patterns fast. If you always retreat to the same corner when last alive, experienced opponents will simply pre-aim it. Vary your fallback positions every round.
How Do You Apply These 7 Clutch Tips Step-by-Step in a Real Blood Strike S&D Round?
Pre-round setup: Assign roles before the round starts. Designate one player as IGL for callouts. Set your loadout based on economy state — don't auto-buy.
Early round (0-30 seconds): Entry fraggers push first contact points; support players hold off-angles. If you take first blood, call the position immediately. If you lose first blood, the team adjusts rotation based on where the death occurred.
Mid-round — teammate falls: The moment you're down a player, shift to passive play. Stop pushing, start holding. Let enemies come to you. Use sound cues to track their approach.
Late round — clutch mode activated: You're last alive. Execute in this order: assess cover options → identify last-known enemy positions → check timer → decide force or stall → engage only when you have an angle advantage. Never engage two enemies simultaneously if you can isolate one.
Post-round review: One question only — "What was the decision that changed this round?" Not the aim. The decision. Fix that decision next round.
FAQ: Real Questions Blood Strike S&D Players Ask About Clutch Survival
How do you survive as the last player alive in Blood Strike S&D? Find hard cover immediately, assess last-known enemy positions, and use the round timer to decide whether to force or stall. Passive play with sound-cue dependency wins roughly 60% more last-alive scenarios than open peeking — especially on mobile where reaction windows are tighter.
What is the best strategy for eco rounds in Blood Strike S&D? Full save when funds are critically low; partial buy (Thompson SMG works well post-March 2026 patch) when you can afford close-range pressure without breaking economy. The goal of an eco round isn't to win — it's to preserve enough funds for a full rifle buy the following round.
Should you plant the bomb or go for kills in a clutch situation? Depends on the numbers. In a 1v1, plant immediately and force the defuse duel on your terms. In a 1v2 or 1v3, use the bomb as bait — fake the plant, eliminate one enemy, then plant against the remaining opponent. Planting blind against multiple enemies is almost always a loss.
How do you read enemy positions in Blood Strike Search and Destroy? Track teammate death locations and directions throughout the round. Cross-reference with common rotation paths on that map. Footstep audio fills in the gaps for enemies within close range. Never assume enemies stayed where they were — always account for 15-20 seconds of potential rotation time.
What is the biggest mistake players make in Blood Strike S&D clutch rounds? Peeking too early under time pressure. Players feel the clock and interpret it as a reason to rush — but in most clutch scenarios, the timer actually favors the last survivor who plays passively and forces enemies to make the mistake first.
How does the round timer affect clutch strategy in Blood Strike S&D? As last attacker with bomb unplanted: force a fight below 45 seconds remaining. As last defender: stall as long as possible and make attackers push into your angles. As last attacker with bomb planted: hold the defuse point and let the timer pressure the defender into a rushed push.
Are These 7 Blood Strike S&D Clutch Tips Still Relevant for the 2026 Meta?
Yes — and here's why they'll stay relevant past the next patch cycle. Sound mastery, positional discipline, timer management, eco decisions, information gathering, bomb-site control, and mental reset are structural fundamentals of S&D, not meta-dependent tactics. The March 2026 additions (Grappling Hook, Thompson SMG, Shutter Island rotation) add new tools and contexts, but they don't change the underlying decision framework.
What does shift with patches: specific operator abilities, weapon economy values, and map-specific chokepoints. Check official Blood Strike patch notes each season to verify operator rankings — community consensus currently places Volt as the best aggressive S&D pick, Ran for defensive ranked play, and Zero as the go-to solo clutch specialist, but ability tuning can shift these rankings.
For ranked improvement right now, the single highest-impact change is Tip 3: treating the round timer as a weapon. It requires zero mechanical improvement, applies on every map, and immediately separates players who understand S&D from those who are playing it like a respawn mode. If you want to accelerate your ranked climb with better operator access and weapon unlocks, buy Blood Strike gold cheap through a reliable top-up source so your loadout keeps pace with your improving game sense.
Master the seven habits. The clutches will follow.


