

Why Chevreuse Overloaded National Actually Works
The Team That Shouldn’t Work (But Does)
Here’s the thing about Chevreuse Overloaded National – on paper, it sounds like someone’s fever dream. You’re ditching the tried-and-true Hydro units for pure Overload chaos, and somehow it works brilliantly. This SS-tier composition hinges on Chevreuse’s A1 Passive, which shreds 40% Pyro and Electro RES whenever you trigger those satisfying Overload reactions.
But wait, there’s more. Her A4 Passive is where things get spicy – you get a percentage-based ATK buff (1% per 1,000 Max HP, maxing out at 40% with 40,000 HP) that lasts a generous 30 seconds after firing those Overcharged Balls. It’s like Bennett’s buff had a baby with a HP-scaling character.
The team absolutely demolishes heavy enemies and bosses that laugh at knockback attempts. Spiral Abyss multi-wave encounters? Child’s play. Overload deals AoE Pyro damage that scales with Level and Elemental Mastery, functions as a Blunt Attack against those annoying Geo shields, and benefits from Pyro RES reduction. Pretty neat package, honestly.
For players looking to expand their rosters during challenging content phases, Overloaded team pulls top up through BitTopup offers competitive pricing and instant delivery – perfect timing for those I need this character NOW moments.
Who Does What (And Why It Matters)
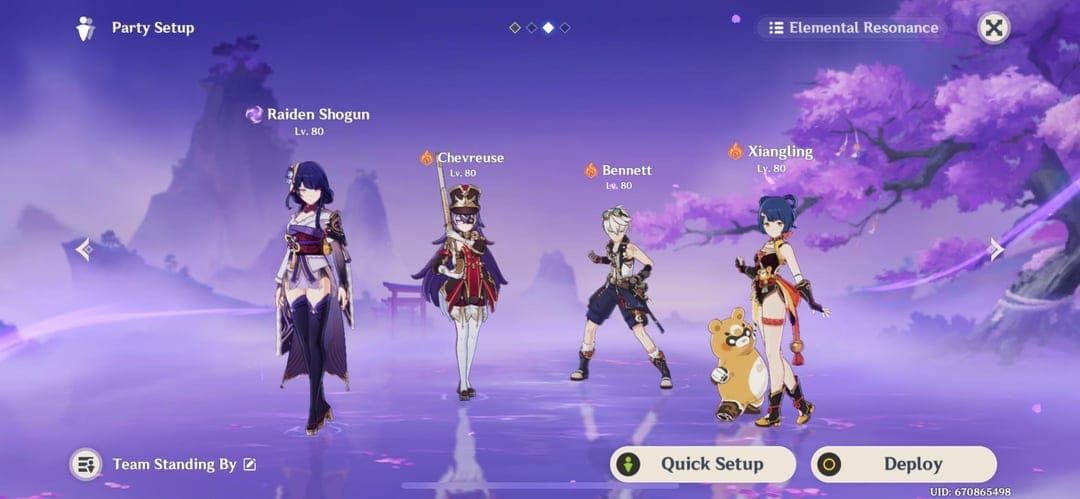
Raiden Shogun: Your on-field powerhouse and team battery rolled into one. She provides energy restoration through her 7-second Burst while applying consistent off-field Electro every 0.9 seconds. Think of her as the engine that keeps everything running.
Xiangling: The off-field Pyro queen. Her Pyronado snapshots Bennett’s ATK buff and applies Pyro every 0.25 seconds – which means constant Overload procs when paired with Raiden’s Electro application.
Bennett: The foundation. ATK buff through base ATK scaling, healing when things go sideways, and Xiangling’s personal battery service.
Chevreuse: Your damage amplifier extraordinaire. Both her passives are doing heavy lifting here, but remember – she demands a pure Pyro/Electro party composition. No exceptions.
Building Your Dream Team
The Standard Setup (What Actually Works)
Raiden: 4pc Emblem of Severed Fate is non-negotiable
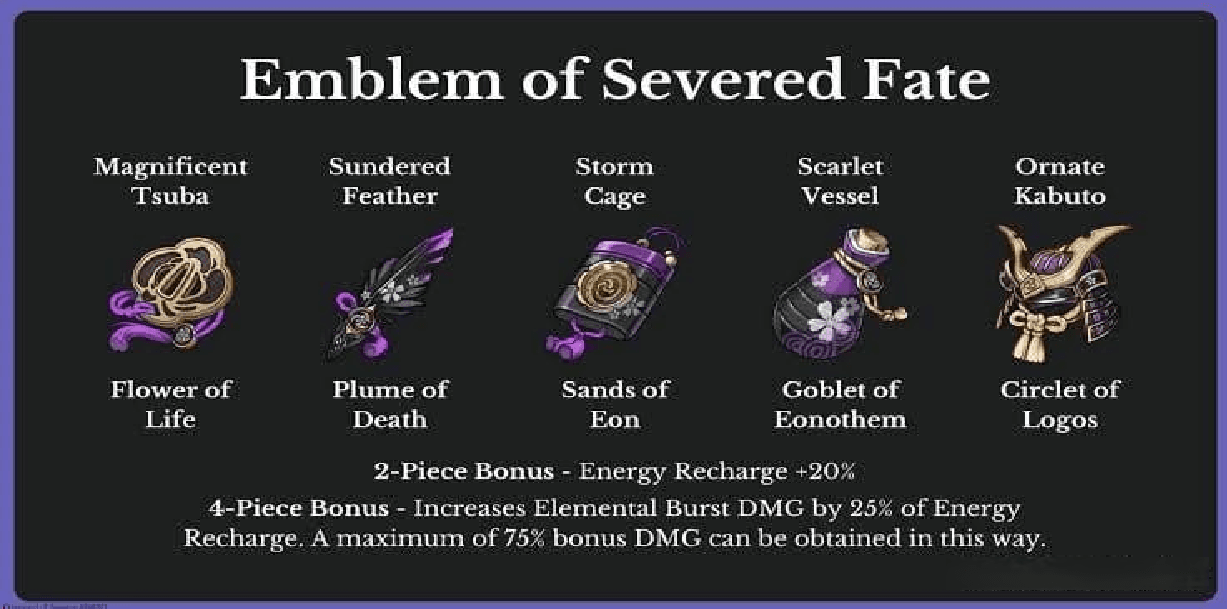
. ER/ATK% Sands, ATK%/Electro DMG% Goblet, CRIT Rate/DMG Circlet. You want 200-250% ER – yes, it sounds like a lot, but trust the process.
Xiangling: Another 4pc Emblem user. ER/ATK% Sands, Pyro DMG% Goblet, CRIT Rate/DMG Circlet. With Raiden on the team, you can get away with 140-180% ER instead of the usual 200%+ nightmare.
Bennett: 4pc Noblesse Oblige for that team-wide ATK buff. ER/ATK% Sands, HP% Goblet, Healing Bonus/HP% Circlet. 180-220% ER keeps his Burst available when you need it.
F2P Players, This One’s For You
Chevreuse reaches peak effectiveness at C0 using the humble 3-star Black Tassel. That 46.9% HP substat? It’s your ticket to the 40,000 HP threshold without breaking the bank. Bennett can rock Prototype Rancour, Festering Desire, or Favonius Sword – whatever you’ve got lying around works fine.
Here’s the beautiful part: minimal talent investment required for supports since the core buffs come from passives. Your resin can go elsewhere.
For strategic resource management during those limited banners that always seem to drop at the worst times, Genesis Crystal deal for banners through BitTopup provides cost-effective solutions with secure transactions and immediate delivery.
When Money’s No Object
C6 Chevreuse is where things get ridiculous. Team-wide heal (10% Max HP) plus stacking 20% Pyro/Electro DMG Bonus that caps at 60%? She starts competing with Kazuha in specialized compositions.
C2 Raiden ignores 60% enemy DEF during Burst. Combined with Chevreuse buffs, the damage ceiling becomes… well, let’s just say enemies start questioning their life choices.
Rotation Mastery (The Make-or-Break Moment)
Your Bread and Butter
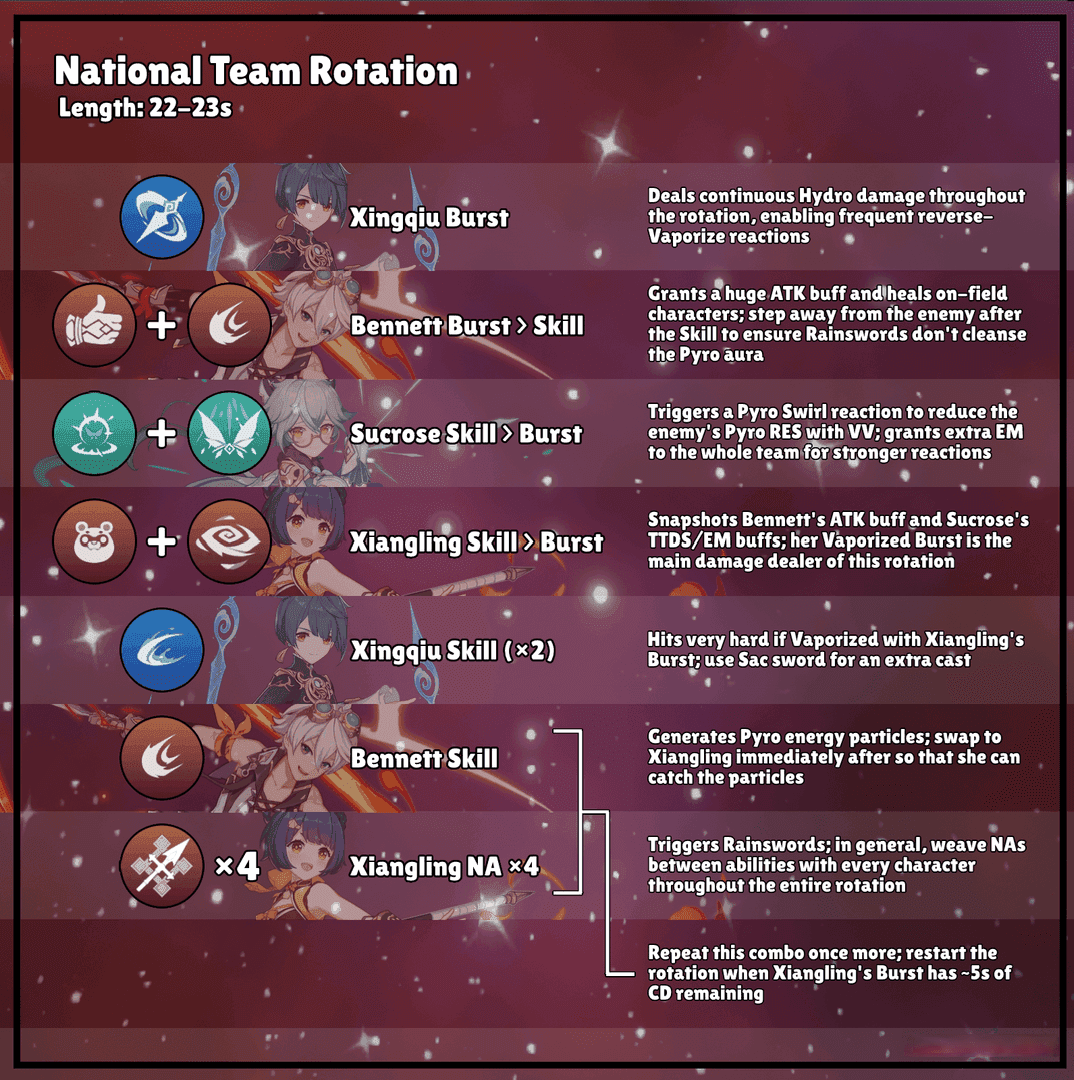
Standard rotation: (Raiden E) > Chevreuse Q hE > Xiangling N2 > Bennett Q E > Xiangling Q E > Raiden Q N4 E N4D N4D N4 > Bennett E > Xiangling N2
Let me break this down because timing matters:
Initial Raiden E applies Electro presence (first rotation only – don’t repeat this step)
Chevreuse Q hE triggers A4 passive through Overcharged Ball generation
Xiangling N2 triggers Overload before Bennett Q E provides ATK buff
Xiangling Q E snapshots Bennett buff while benefiting from Chevreuse RES shred
Advanced Techniques (For the Perfectionists)
Raiden Burst combo: N4 E N4D N4D N4 maximizes damage and energy generation. Those dash cancels (N4D) aren’t just for show – they maintain DPS while improving positioning.
Energy particle management gets technical here. Chevreuse Skill generates 4 Pyro particles on a 10s cooldown. Bennett Skill produces 2-3 Pyro particles. Each Favonius weapon proc can reduce team ER requirements by 10-20%. The math adds up quickly.
Energy Requirements (The Numbers Game)
Character-Specific Targets
Chevreuse: 175-205% without Raiden, 105-135% with Raiden. That energy restoration makes a massive difference.
Xiangling: 140-180% in Raiden teams (down from the usual 200%+ nightmare in traditional National).
Bennett: 180-220% for self-sufficiency and his Xiangling battery duties.
Raiden: 200-250% for optimal energy restoration feedback loop.
Making It Work
Same-element particles provide 3 energy vs 1 for off-element – basic stuff, but worth remembering. Favonius Lance on Chevreuse requires 25-30% CRIT Rate but turns her into a team battery. Strategic Burst timing aligns with energy generation windows and enemy vulnerability phases.
Chevreuse Deep Dive
Artifact Optimization
4pc Noblesse Oblige gives that sweet team 20% ATK buff, or 4pc Song of Days Past for healing-to-damage conversion shenanigans. Main stats? HP% Sands/Goblet/Circlet for that 40,000 HP target, or ER Sands if Burst consistency is giving you nightmares.
Substat priority: ER (to requirement) > HP% > Flat HP > CRIT Rate (for Favonius builds).
Weapon Reality Check
Black Tassel: The 3-star wonder. That 46.9% HP substat provides unmatched efficiency for hitting 40,000 HP. Don’t let the rarity fool you.
Favonius Lance: Best utility option. Generates team energy particles on CRIT hits, but you’ll need to invest in CRIT Rate. Worth it for the team support.
Higher-rarity weapons? Diminishing returns compared to Black Tassel’s specialized HP focus. Sometimes simple wins.
Performance in the Real World
Where It Stands
This team consistently ranks among top-performing compositions. You’re trading Hydro reactions for specialized Pyro/Electro amplification, and the trade-off works. Moderate investment (C0, 4-star weapons) performs competitively with established meta teams. High investment? You’ll exceed many premium compositions in sustained damage.

Spiral Abyss Reality
High clear rates across floor configurations. Particularly effective against Ruin enemies, large Hilichurls, and boss encounters – basically anything that won’t get knocked around like a pinball.
Floor 12 performance varies with enemy lineup and ley line disorders (as always). Challenges include energy-draining effects and high-mobility enemies that force rotation adjustments.
When Things Go Wrong
Common Rotation Mistakes
Using Chevreuse Hold Skill before Overload triggers? You just prevented A4 passive activation. Overcharged Ball generation requires nearby Overload reactions first – no shortcuts here.
Xiangling must cast Burst within Bennett’s field for ATK buff snapshot. Miss this timing, and your damage plummets. Proper particle funneling and Burst timing prevents energy issues before they start.
Positioning Nightmares
Overload knockback against light enemies requires wall positioning or terrain usage. Heavy enemies and bosses resist knockback, allowing aggressive optimization. Strategic single-target elimination prevents positioning disruption in multi-enemy scenarios.
FAQ (The Questions Everyone Asks)
What’s the optimal rotation sequence? (Raiden E) > Chevreuse Q hE > Xiangling N2 > Bennett Q E > Xiangling Q E > Raiden Q N4 E N4D N4D N4. This ensures proper buff snapshots and maximizes Raiden Burst damage.
How much ER does Chevreuse actually need? 175-205% without Raiden, 105-135% with Raiden. Favonius weapons can reduce these requirements by 10-20% per proc.
Best artifacts for Chevreuse? 4pc Noblesse Oblige or 4pc Song of Days Past. HP% Sands/Goblet/Circlet to reach that crucial 40,000 HP threshold for maximum ATK buff.
What weapon should I use on Chevreuse? Black Tassel for support builds (that 46.9% HP substat is gold), Favonius Lance for team battery role requiring 25-30% CRIT Rate investment.
Is this viable in Spiral Abyss? Excellent performance against heavy enemies and bosses, high clear rates on Electro/Pyro-favoring floors. Struggles with energy drain effects and high-mobility enemies.
Which constellations matter? C6 provides 60% DMG Bonus stacking, C4 enables Quickswap builds. But here’s the thing – it’s highly effective at C0 for F2P accessibility.


