

How We Actually Ranked These Operators (And Why It Matters)
The Real Metrics That Count
Look, I've been covering tactical shooters for years, and ranking operators isn't just about who looks coolest or has the flashiest abilities. We're talking hard data here—competitive performance stats, ability effectiveness across different scenarios, and actual meta impact in both Hazard Operations and Havoc Warfare modes.
Each operator gets rated from SS-tier (the absolute meta dominators) down to B-tier. But here's the thing: we're not just looking at individual fragging potential. The metrics that actually matter? Extraction success rates, K/D ratios sure, but also objective completion efficiency and pick rates in competitive play. Because let's be honest—if pros aren't picking an operator, there's usually a good reason.
The analysis pulls from Season 6: War Ablaze data (launched September 23, 2025), which completely shook things up with the Raptor operator introduction and some pretty significant weapon adjustments. Trust me, the competitive landscape looks nothing like it did six months ago.
What's Actually Driving the Meta Right Now
Here's where things get interesting. The current meta has shifted hard toward intel gathering, mobility, and objective control following those September updates. Recon operators? They're having a moment—and it's not just because they're fun to play.
The Season 6 weapon balances hit different too. That SKS damage buff from 44 to 48 base damage might seem small on paper, but it completely changed engagement ranges and which operators can actually capitalize on those mid-range fights.
For players looking to maximize their operator potential, Delta Force currency recharge for operators through BitTopup provides instant access to premium operators with competitive pricing and secure transactions, ensuring you can unlock meta picks immediately upon release.
What we're seeing now—and this is based on feedback from actual pro players, content creators, and tournament results—is that utility abilities providing team-wide benefits are crushing purely individual performance enhancements. The days of lone-wolf operators dominating matches are pretty much over.
S-Tier Operators: The Meta Dominators
The Operators Everyone's Actually Playing
Luna (Recon) - SS-Tier: Okay, let's just get this out of the way—Luna is broken. In the best possible way. Her Detection Arrow doesn't just ping enemies; it creates sensor trails that highlight enemy positions for what feels like forever. The Volt Arrow? It's delivering shock damage while marking targets for increased vulnerability.

If you're dealing with campers (and who isn't these days), Luna is your answer. The map awareness she provides for team coordination is honestly unmatched. I've watched entire tournament strategies revolve around Luna's intel.
Raptor (Recon) - S-Tier: Season 6's game-changer, and boy did this operator shake things up. Those EMP grenades aren't just disabling enemy lasers and optics—they're creating tactical advantages that completely flip firefights. The Ultimate Trace Scanner gives you 5x enemy pings, and here's something most guides won't tell you: the footprint tracking is absolutely clutch in fog conditions with those 30-40m visibility ranges.

Raptor's kit directly counters all those electronic-dependent strategies that were dominating the meta. It's beautiful, really.
Stinger (Support) - S-Tier: This is aggressive healing done right. The Stim Pistol provides heal-over-time effects while actually removing debuffs from allies—not just masking them. Those Smokescreen walls? They're enabling safe revives in contested areas where you'd normally be asking for a death sentence.
The Hive-Tech Smoke Grenades offer serious area denial. Stinger's entire kit enables sustained team pushes in ways that other support operators just can't match.
D-Wolf (Assault) - A-Tier: That Motorized Exoskeleton isn't just about speed—it's providing HP restoration on knockdowns, which gives you those clutch second-chance opportunities. The Triple Blaster fires sticky grenades for area damage, and honestly? D-Wolf's mobility makes him perfect for aggressive flanking maneuvers and rapid site takes.
What sets these S-tier operators apart isn't just their individual abilities—it's how they enable entire team strategies. Luna's intel capabilities can dictate how your whole squad moves. Raptor's EMP utility counters the prevalent meta tactics everyone else is running.
Assault Class: Who's Actually Worth Your Time
The Real Assault Tier List
D-Wolf (A-Tier): Leading the assault rankings, and it's not even close. Superior mobility options plus that versatile grenade arsenal make him the go-to entry fragger. The Motorized Exoskeleton provides speed boosts that are crucial for getting those opening picks, while the HP restoration on knockdowns offers those clutch second chances.
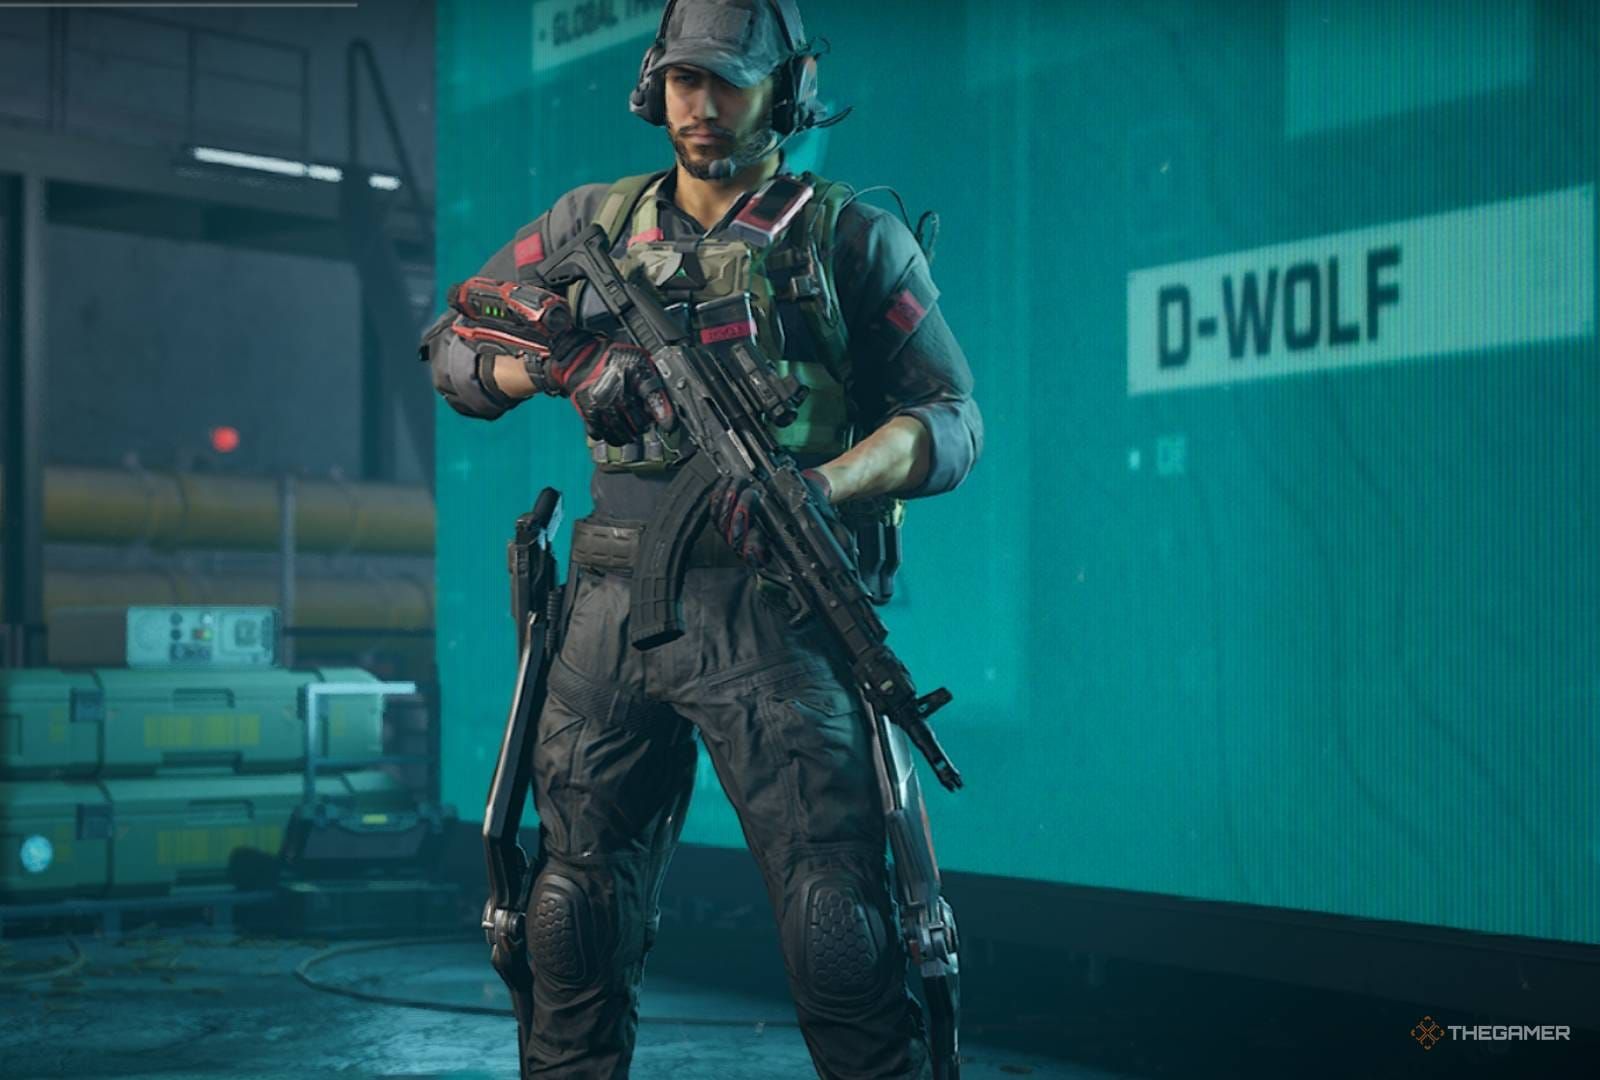
Those Triple Blaster sticky grenades? They excel at clearing defensive positions and denying areas. It's the complete package.
Nox (S-Tier): Here's where things get spicy. Nox achieves S-tier status through that Silent Assault ability providing completely undetectable movement in Warfare modes. The Whirlwind Disc tracks and detonates on targets, while the Tactical Flashbang doesn't just stun—it delays medical usage.
Nox excels in stealth-based approaches and ambush tactics. If you're the type who likes to get behind enemy lines and wreak havoc, this is your operator.
Vyron (A-Tier): Solid utility with that knockdown launcher for crowd control, dash ability for rapid repositioning, and magnetic bomb for area denial. Vyron's kit emphasizes tactical maneuvering over raw damage output, which isn't everyone's cup of tea but definitely has its place.
Tempest (B-Tier): Look, Tempest has an evasion device for damage mitigation and a drill ability for breaching. But honestly? Tempest lacks the game-changing impact of higher-tier assault operators and requires very specific scenarios for optimal effectiveness. Not terrible, just... situational.
Building for Aggressive Plays
Assault operators need high-mobility loadouts emphasizing close to mid-range engagement capabilities. The M4A1 remains the versatile choice (25 damage, 672 RPM, 10.1% pick rate), while the CI-19 with those 60-round drum magazines provides sustained fire when you need it.
For D-Wolf specifically, I'm running M4A1 with Sandstorm Vertical Compensator, AR Gabriel Long Barrel, and 45-round magazine for extended engagements. It's a setup that can handle most situations you'll find yourself in.
For secure and reliable access to premium assault operators and their optimal loadouts, secure Delta Force Hawk Ops top up service via BitTopup ensures immediate operator unlocks with industry-leading security protocols and 24/7 customer support, helping you dominate assault scenarios without delay.
Entry fragging requires precise timing and positioning to maximize these abilities. D-Wolf players should save that Motorized Exoskeleton for site approaches, keeping the Triple Blaster for clearing defensive utility. Nox excels on flanking routes where Silent Assault enables completely undetected positioning.
Engineer Class: The Unsung Heroes
Utility That Actually Matters
Shepherd (S-Tier in Warfare, A-Tier in Operations): Absolute area control monster. That Sonic Drone suppression affects enemies within a 30m radius, reducing their fire rate and destroying sonic devices. The Sonic Trap deployment triggers within 4m for damage and slow effects, and the passive explosion damage reduction? It enhances survivability in those vehicle-heavy scenarios.
Uluru (S-Tier in Warfare, B-Tier in Operations): The Loitering Munition guided missile deals 30 armor damage plus explosion effects. Those Quickset Cover barriers can completely block doorways for defensive positioning. The Composite Incendiary molotov denies areas effectively.
Gizmo (S-Tier, Season 7 Addition): This is where things get weird—and I mean that in the best way. Crawler nest deploys 3 exploding spiders that apply corrosion for increased bullet damage vulnerability. The smoke mine slows and reveals enemies, while that ultimate hunting spider creates webs that disable gadgets and mark opponents.
It's chaotic, it's effective, and it's absolutely terrifying to play against.
Sineva (B-Tier): Grapple gun for enemy displacement and shield deployment for defensive positioning. Sineva's abilities just lack the area control impact of higher-tier engineer operators. Not bad, just not meta-defining.
Defensive Specialist Builds
Engineer loadouts need to prioritize area denial and sustained fire capabilities. The M250 LMG is the premier choice—125-round magazine capacity, 550 RPM fire rate, and 55 damage per shot. I'm running M250 Sentinel Short Barrel, Sandstorm Vertical Compensator, and Secret Order Bevel Foregrip for recoil management.
The PKM offers an alternative with 75-round capacity and enhanced mobility if you need to reposition frequently.
Engineers excel in objective-focused gameplay through strategic utility placement. Shepherd players should position those Sonic Traps on common approach routes for early warning systems and flank prevention. Uluru's Loitering Munition demands precise timing and target selection for maximum impact.
Sniper Class: Long-Range Domination
The Elite Marksmen
Luna (SS-Tier): Still maintaining supreme sniper ranking, but not just because of the rifle work. Those Detection Arrow sensor trails and Volt Arrow marking capabilities transcend traditional sniping roles by providing team-wide strategic advantages.
Optimal positioning on elevated terrain maximizes detection range and escape route coverage. Luna isn't just about getting picks—she's about controlling information flow.
Raptor (S-Tier): Revolutionizing sniper gameplay through EMP grenade utility that counters enemy optics and electronic devices. The Trace Scanner's 5x enemy pings provide unmatched battlefield awareness, while footprint tracking excels in limited visibility conditions.
Hackclaw (A-Tier): Specializes in technological warfare through Signal Decoder scanning 60m ahead and Data Knife hacking capabilities. Silent Step enables quiet repositioning between shots, while Flash Drone provides close-range defensive options when things go sideways.
Positioning and Map Control
Sniper positioning requires elevation advantages and multiple escape routes for sustained effectiveness. Maps like Ascension favor long-range engagement distances where sniper rifles achieve optimal damage falloff ratios.
The AWM delivers 100 damage with 200m effective range, achieving one-shot eliminations to the chest within 30m. Quick-scope configurations prioritize ADS speed and mobility over maximum range optimization, while traditional sniper builds maximize damage output through heavy barrels and high-magnification optics.
Medic Class: Keeping Everyone Alive
Healing and Support Rankings
Stinger (S-Tier): Dominates medic rankings through rapid healing capabilities and aggressive support potential. That Stim Pistol provides heal-over-time effects while removing debuffs—not just healing damage, but actually cleansing negative effects.
Smokescreen walls create safe revive opportunities in contested areas where you'd normally be asking for trouble.
Toxik (A-Tier): Offers unique debuff capabilities through Dragonfly Swarm affecting enemy senses and movement. Swift Healing provides standard medical support, while Adreno-Boost enhances team performance.
Medic operator selection depends on team strategy preferences between aggressive healing support (Stinger) and utility-focused debuff application (Toxik). Positioning requires that delicate balance between safety and accessibility for team healing.
Ability Analysis: What Actually Works
Power Rankings That Matter
Ability effectiveness varies dramatically based on game mode and team composition. Luna's Detection Arrow provides the highest strategic value through extended intel gathering. Raptor's EMP grenades offer immediate tactical advantages against equipment-dependent enemies.
Healing abilities demonstrate consistent value across all scenarios, with Stinger's Stim Pistol providing the most reliable team sustainability.
Here's something most players get wrong: ability cooldown optimization requires strategic usage timing rather than immediate deployment upon availability. High-impact abilities like Raptor's Trace Scanner should coordinate with team pushes for maximum intelligence value.
Best Loadouts: The Builds That Actually Work
Weapon Recommendations
Luna Sniper Build: AWM with code 6HLOCT009MFFCME3G7LT2 featuring AWM Skyline Long Barrel, Resonant Suppressor, ACOG 6x optic, DBAL-X2 laser, and AWM M-Lok Kit. This configuration achieves one-shot chest eliminations to 30m with stealth capabilities.
D-Wolf Assault Build: M4A1 with code 6FINC4G0CQTV1IBVCBQVT including Resonant Ergonomic Grip, Invasion Rear Grip, AR Gabriel Long Barrel, Sandstorm Compensator, UR Spec Ops Stock, Recon 1.5/5 Scope, 45-Round Magazine, and DBAL-X2 Laser for mid-long range stability.
Shepherd Engineer Build: M250 LMG with code 6FIAPV406L5PA4U76HE30 featuring AR Heavy Tower Rear Grip, M250 75-Round Belt, M250 Sentinel Short Barrel, Micro Sight Riser with Panoramic Red Dot, Resonant MKII Foregrip, Sandstorm Vertical Compensator, Shadow Rail Stock, and Perst-7 Blue Laser.
Equipment Optimization
Here's a pro tip: avoid stacking similar benefits for optimal loadout efficiency. Primary attachment priorities should focus on recoil management through compensators and grips before adding optics and magazines. The Sandstorm Vertical Compensator provides universal recoil reduction across multiple weapon platforms—it's basically a must-have.
Team Composition: Building the Perfect Squad
Balanced Team Builds
Optimal 4-player composition features 1 Recon (Luna for spotting), 1 Support (Stinger for healing), 1 Engineer (Shepherd for barriers), and 1 Assault (D-Wolf for pushes). This configuration provides comprehensive capability coverage across intel, sustainability, area control, and aggressive potential.
Alternative compositions emphasize specific strategies through class distribution adjustments. Rush strategies benefit from multiple assault operators supported by healing and mobility enhancements. D-Wolf and Nox combinations provide varied approach angles through mobility and stealth capabilities.
Defensive compositions prioritize area control and information gathering through engineer and recon operator combinations.
Meta Shifts: What's Coming Next
Recent Balance Changes Impact
Season 6: War Ablaze (launched September 23, 2025) introduced significant meta shifts through Raptor operator addition and weapon balance adjustments. That SKS damage buff from 44 to 48 base damage enhanced semi-automatic rifle viability in mid-range engagements.
EMP mechanics introduction through Raptor's abilities created new counter-play opportunities against electronic devices and laser attachments—which honestly was needed given how dominant laser-heavy builds had become.
Season 7 additions including Gizmo (Engineer) emphasize utility-focused gameplay through deployable spider mechanics and area control capabilities. Recon operator dominance continues through Luna and Raptor effectiveness in competitive scenarios.
Future balance changes will likely target operator ability cooldowns and effectiveness based on competitive usage data. Keep an eye on those patch notes.
Frequently Asked Questions
Who are the best Delta Force operators in 2025? Luna (SS-tier Recon), Raptor (S-tier Recon), Stinger (S-tier Support), and D-Wolf (A-tier Assault) represent the current meta dominators. Luna provides unmatched intel gathering, while Raptor counters electronic devices with those EMP grenades.
What is the strongest class in Delta Force? Recon class currently dominates the meta through Luna and Raptor's intel gathering and utility capabilities. However, balanced team compositions require all four classes for optimal effectiveness.
How do you unlock all Delta Force operators? Operators unlock through battle pass tiers, sign-in events (like Vyron after 3 days), recruitment challenges (complete 2/3 missions such as 30 matches or 100 kills), or direct purchase for 500 Delta Coins.
Which Delta Force operators are best for beginners? Luna (Recon) for intel gathering, Stinger (Support) for healing, D-Wolf (Assault) for mobility, and Shepherd (Engineer) for area control provide the most beginner-friendly learning curves.
What are the best loadouts for each Delta Force class? Assault: M4A1 with stability attachments. Engineer: M250 LMG for suppression. Recon: AWM for one-shot potential. Support: SMG-45 for close-range healing support.
How do you build the perfect Delta Force team composition? Optimal 4-player teams include 1 Recon (Luna for spotting), 1 Support (Stinger for healing), 1 Engineer (Shepherd for barriers), and 1 Assault (D-Wolf for pushes).


