

Event Overview: What You Need to Know
New Year Arcade Rush runs December 17 - January 23, overlapping with Ahsarah Winter Training (December 19 - January 15). Unlike standard Warfare, Arcade Rush emphasizes streak-based scoring multipliers and objective-focused points. Optimized loadouts reduce farming time by up to 50% versus generic builds.
To access premium attachments and operator unlocks instantly, Delta Force top up through BitTopup for competitive pricing and secure transactions.
Core Mechanics Differences
Arcade Rush modifies standard Warfare scoring:
- Capture points generate 25% more base points during first 90 seconds
- Five consecutive kills trigger 2.5x point multiplier until death
- Versatile weapons outperform specialists due to varied combat ranges
- CI-19 and M4A1 dominate because they're effective from 15-60 meters
Reward Structure
Six progressive tiers require 5,000 to 75,000 cumulative points. Higher tiers unlock exclusive weapon skins, operator cosmetics, and premium currency. Final tier includes limited-edition emblem.
Daily challenges provide 1,500-3,000 bonus points. Aligning loadouts with daily requirements achieves 30-40% faster progression.
Point System Mechanics
Base values:
- Eliminations: 100 points
- Assists: 50 points
- Objective captures: 200 points
Multiplier triggers:
- Elimination streaks: 3/5/7 kills
- Objective control: 60/120/180 seconds
- Squad coordination: simultaneous captures with 2+ teammates
Consecutive objective defenses within 30 seconds trigger 1.5x defensive bonus. Elimination streaks compound with objective multipliers. Highest multiplier takes precedence.
Decay mechanics:
- Elimination streak multipliers reset on death
- Objective multipliers persist 15 seconds after losing control
Streak Maintenance Strategy
Position near high-traffic chokepoints with clear sightlines. Recommended operators: two Stinger supports plus one Uluru or Vyron. Stinger provides health regeneration, Uluru reveals flanks, Vyron enables rapid repositioning.
Top Assault Rifle Loadouts
CI-19, M4A1, and SG552 dominate long-range performance. Shared priorities: vertical recoil reduction, horizontal stability, magazine capacity.
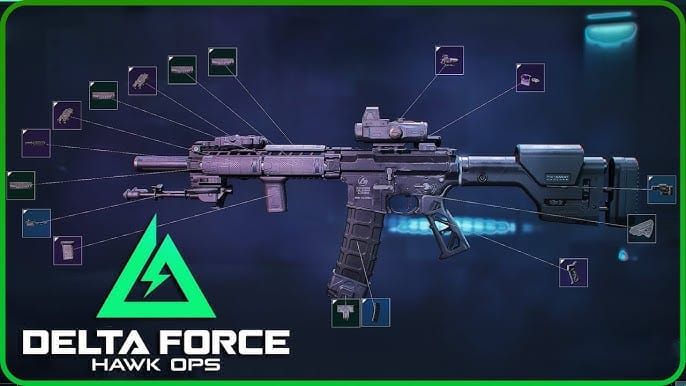
Loadout #1: CI-19 Warfare Build
Import code: 6HEQHRS08M3TET99CEP38

- Muzzle: Sandstorm Vertical Compensator (18% vertical recoil reduction)
- Barrel: New Leviathan Tactical Long Barrel
- Right Rail: DBAL-X2 Purple Laser-Light Combo
- Foregrip: Secret Order Bevel Foregrip (15% horizontal deviation reduction)
- Upper Patch: Ranger Handguard
- Rear Grip: New Type Vanguard Light Grip
- Magazine: 5.8 Newtype 60-Round Drum Mag (50% reload frequency reduction)
- Stock: 416 Light Stock
- Optic: Cobra Accuracy Sight
- Secondary: 93R burst pistol
- Gadget: Anti-Personnel Grenade
60-round magazine reduces reload frequency by 50%. Excels at 30-50 meter engagements.
Loadout #2: M4A1 Balanced Build
Import code: 6F3U0QS08EVAS5MG88P0S
Deals 25 damage per shot at 672 RPM.
- Muzzle: Sandstorm Vertical Compensator (18% vertical recoil reduction)
- Barrel: AR Gabriel Long Barrel Combo (22% damage falloff distance increase)
- Right Rail: DBAL-X2 Purple Laser-Light Combo
- Foregrip: Secret Order Bevel Foregrip (15% horizontal deviation reduction)
- Upper Patch: KC Hound Handguard
- Rear Grip: Phantom Rear Grip
- Magazine: M4 45-Round Extended Mag
- Mag Assist: Badger Small Mag Assist
- Stock: M16A4 Stable Stock
- Cheek Pad: Universal Cheek Pad
- Optic: Panoramic Red Dot Sight
- Secondary: 93R burst pistol
- Gadget: Anti-Personnel Launcher
AR Gabriel Long Barrel extends effective range to 65+ meters. Maintains sub-2-inch groupings at 50 meters during sustained fire.
Loadout #3: K416 High Fire Rate
Import code: 6FNPLSO06L5PA4U76HE30
880 RPM fire rate for superior close-quarters lethality.
- Muzzle: Poseidon Flash Hider (35% muzzle flash reduction)
- Barrel: K416 A8 Long Barrel Combo
- Upper Rail: Ranger Handguard
- Foregrip: Mini Hand Stop
- Rear Grip: Phantom Rear Grip
- Magazine: M4 45-Round Extended Mag
- Mag Pouch: Honey Badger Small Fast Mag Pouch
- Stock: 416 Light Stock
- Optic: Hydra Riser + Micro Sight Riser + Panoramic Red Dot
- Secondary: Desert Eagle
- Gadget: Med Crate
Med Crate enables self-sufficient objective holds during solo farming.
Best SMG Loadouts
SMG-45 leads with 5.3% pick rate, followed by SR-3M and MK4. Excel in urban maps and interior objectives under 20 meters.
SMG-45 Mobility Build
Optimal configuration:
- Lightweight barrel for movement speed
- Laser sight for hipfire accuracy
- Extended magazine (40+ rounds)
- Vertical foregrip for recoil control
- Reflex optic for fast acquisition
- Stun grenades for objective clearing
- Lightweight stock for ADS speed
Reduces sprint-to-fire time by 30%. Enhanced hipfire allows effective engagement at full movement speed.
Map-Specific Recommendations
Urban maps with interior capture points favor SMGs. Outdoor maps require hybrid approaches—SMG secondary with assault rifle primary for range flexibility.
Support Class Loadouts
Generate points through ammunition resupply, healing, and suppressive fire assists.
M250 Area Suppression Build
Import code: 6FIAPV406L5PA4U76HE30
150+ round capacity enables continuous fire. Excels during objective defense by denying enemy movement. Position near high-traffic chokepoints for maximum area denial.
Squad Composition
Optimal: two Stinger supports + one Uluru/Vyron reconnaissance. Ensures healing availability while maintaining tactical awareness. Stinger operators deploy healing near contested objectives. Reconnaissance focuses on enemy callouts for preemptive positioning.
Critical Gadgets and Operators
Gadget Priority Rankings
Tier 1 (Essential):
- Anti-Personnel Grenades for objective clearing
- Med Crates for sustained holds
- Anti-Personnel Launcher for area denial
Tier 2 (Situational):
- Smoke Grenades for approach concealment
- Flashbangs for room clearing
- Claymores for flank protection
Top Operator Abilities
Stinger: Reduces downtime 40-50%, enables aggressive playstyles through self-healing.

Uluru: Prevents flanking deaths that reset streak multipliers through enemy position reveals.
Vyron: Enables rapid objective rotation, capturing undefended points before enemy response.
For premium operator unlocks, buy Delta Force currency online through BitTopup's secure platform.
Advanced Farming Strategies
Solo Farming Requirements
Self-sufficient loadouts balance offense and defense. CI-19 and M4A1 excel through versatile ranges and forgiving recoil. Prioritize objectives with multiple escape routes.
Essential elements:
- Medium-range primary + close-quarters secondary (93R burst pistol)
- Med Crate gadget for healing without teammate dependency
- Objectives with multiple approach vectors
Squad Coordination
Role distribution:
- Assault: Objective capture and elimination streaks (CI-19/M4A1)
- Support: Covering fire and healing (M250)
- Reconnaissance: Enemy position tracking (Uluru)
Assault focuses on captures and streaks. Support provides covering fire and healing. Reconnaissance calls enemy positions to prevent flanks.
Event Phase Meta Shifts
Early phase (Dec 17-23): Lower skill levels favor aggressive loadouts. CI-19's forgiving recoil proves effective.
Mid-event (Dec 24-Jan 7): Skill normalization requires competitive optimization. M4A1 provides necessary consistency.
Final days (Jan 8-23): High-intensity competition demands maximum efficiency. Use tested configurations over experimental builds.
Common Loadout Mistakes
Over-Specialization
Loadouts optimized exclusively for one range create disadvantages during map rotations. CI-19 and M4A1 dominate through versatility, not specialized excellence.
Attachment Conflicts
Heavy barrels + lightweight stocks create handling inconsistencies. Optimized loadouts balance attachment categories. Example: M4A1's AR Gabriel Long Barrel pairs with M16A4 Stable Stock to maintain handling while extending range.
High-magnification scopes on close-quarters weapons sacrifice peripheral awareness. Panoramic Red Dot Sight proves optimal for most scenarios.
Ignoring Team Composition
Three assault players lack healing sustainability. Three support players can't generate sufficient eliminations. Recommended two Stinger + one Uluru/Vyron balances requirements, preventing 30-40% efficiency loss.
Performance Metrics
CI-19 and M4A1 users average 15-20% higher points per match versus off-meta weapons.
Points Per Hour
Assault Rifles (CI-19/M4A1):
- Solo: 8,000-12,000
- Squad: 12,000-18,000
SMGs (SMG-45/SR-3M):
- Solo: 6,000-9,000
- Squad: 9,000-14,000
Support (M250):
- Solo: 5,000-7,000
- Squad: 10,000-15,000
Tier Achievement Timelines
Using optimized assault rifle loadouts:
- Tier 1 (5,000): 30-45 minutes
- Tier 2 (15,000): 2-3 hours cumulative
- Tier 3 (30,000): 4-6 hours cumulative
- Tier 4 (45,000): 6-9 hours cumulative
- Tier 5 (60,000): 8-12 hours cumulative
- Tier 6 (75,000): 10-15 hours cumulative
Maximum efficiency through squad coordination reduces total completion to 8-10 hours.
Importing Loadouts
Step 1: Open Gun Customization Station from main menu.
Step 2: Select weapon, click Preset → Import Preset.
Step 3: Paste import code:
- CI-19: 6HEQHRS08M3TET99CEP38
- M4A1: 6F3U0QS08EVAS5MG88P0S
- K416: 6FNPLSO06L5PA4U76HE30
- M250: 6FIAPV406L5PA4U76HE30
Step 4: Verify attachments match specifications. Manually equip any missing locked components.
Reduces setup from 10-15 minutes to under 60 seconds.
FAQ
What is Delta Force New Year Arcade Rush?
Limited-time Warfare event (Dec 17-Jan 23) with modified scoring and exclusive rewards. Features streak-based multipliers and objective-focused gameplay.
Best weapons for farming rewards?
CI-19 (9.5% pick rate) and M4A1 (9.3% pick rate) dominate through versatile 15-65 meter effectiveness. SMG-45 (5.3% pick rate) for close-quarters urban sections.
How does the point system work?
Base: 100 per elimination, 50 per assist, 200 per capture. Multipliers activate through streaks (3/5/7 kills), objective control (60/120/180 seconds), and squad coordination. Highest multiplier applies.
Which loadout farms fastest?
M4A1 (code 6F3U0QS08EVAS5MG88P0S) generates 12,000-18,000 points/hour in squad play through balanced damage, extended range, and attachment synergy.
What operator abilities synergize best?
Stinger reduces downtime 40-50%. Uluru prevents flanking deaths. Vyron enables rapid rotation. Use two Stinger + one Uluru/Vyron.
Solo or squad completion?
Solo viable with CI-19/M4A1 + Med Crate (8,000-12,000 points/hour). Squads achieve 50% higher efficiency (12,000-18,000 points/hour) through role specialization.
Unlock your full potential in Delta Force New Year Arcade Rush! Visit BitTopup for instant, secure currency top-ups to upgrade loadouts and dominate the event. Competitive pricing, fast delivery, excellent service. Don't let resource limitations hold you back—get the attachments and operators you need today!


