

Delta Force Ahsarah Warfare: Everything We Know From Leaks
Season 7 drops November 18, 2025, and runs through December 4—though collaboration events stretch to December 19 if you're hunting those limited cosmetics. Monument's the star here, and it's not just another desert map. We're talking fully explorable pyramid interiors with actual verticality, shifting sand dunes that change your cover options, and underground tunnel networks that completely flip how you approach flanking routes.
The narrative setup? It's 2035, energy crisis has everyone scrambling, and you've got three-way conflicts between Haavk Corporation, Ahsarah Guard, and GTI teams all converging on Brakkesh headquarters. Map rotation pairs Monument with Fault, supporting TDM, Air Supremacy, and Hill of Iron modes.
Buy Delta Force currency cheap through BitTopup to unlock Battle Pass tiers instantly and access Gizmo at Level 15 without grinding.
Official vs Leaked Information: What's Confirmed
November 18 is locked in—that's official. Battle Pass runs through December 18, offering 100 tiers packed with Luna legendary skins, Gizmo at Level 15, AS Val blueprints, and Adage knuckle knives. The free track isn't terrible either—Luna skins and SG552/LAV-AA cosmetics are available without spending.
Gizmo's kit is where things get interesting. Sentinel Nests spawn three tracking spiders that deal 50 damage with a Corrosion debuff lasting 6 seconds. That debuff increases bullet damage by 25% and marks enemies through smoke—basically turning your team's focus fire into a death sentence. The Defensive Vanguard passive reduces recoil by 30% and boosts stability 16% when you're within 10 meters of your devices. Smart positioning near your own gadgets turns you into a laser.
PC Open Beta wrapped December 5, 2025. Black Hawk Down campaign arrives January 2025. Full launch across PC and mobile hits January 20, 2025, with console versions following Q1 2025. And yes, beta progress carries forward—so December participants already have a leg up.
Map Size and Geographical Layout
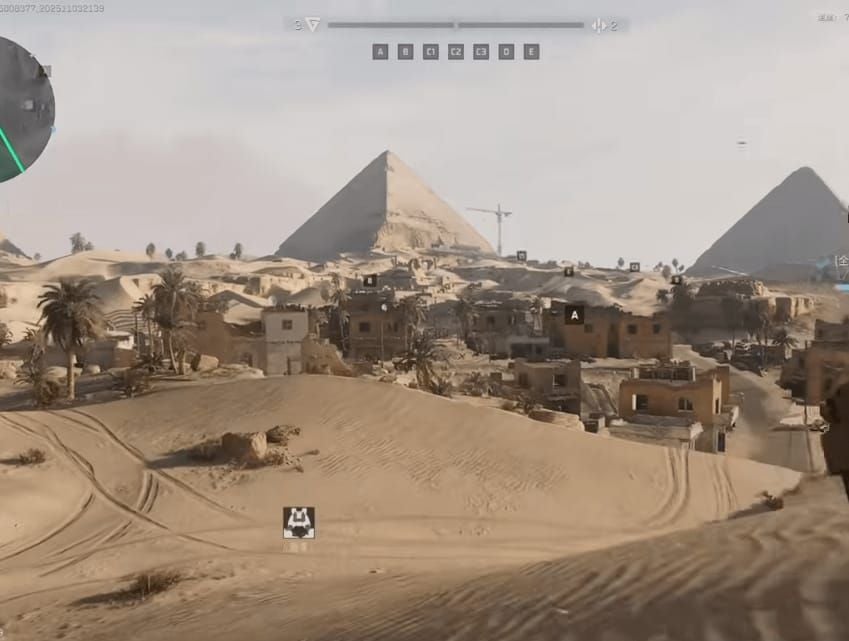
Monument spans multiple zones optimized for 50+ meter engagements. The northern pyramid complex features multi-level interiors with staircases, chambers, and rooftop vantage points providing 200-meter sightlines. If you control the high ground here, you control the match—simple as that.
Central desert plateaus create open kill zones where mobility determines survival. Shifting dunes offer temporary cover but expose your rotations. One second you're behind a dune, next second the wind's shifted and you're standing in the open like a target dummy. Underground tunnels connect zones, letting you bypass surface chokepoints for flanking—experienced players know these routes are the difference between a successful push and a squad wipe.
Southern settlements introduce CQB with multi-story buildings, narrow alleyways, and destructible elements favoring SMGs and shotguns. The exotic town architecture includes vertical access through windows and balconies, so don't assume ground-level is your only concern.
Warfare Mode Mechanics Breakdown
32v32 ticket-based PvP with vehicle spawns at 5,000 points—they reduced the threshold to increase mechanized combat, which honestly makes matches more dynamic. M1A4 tank enables crew swaps via F-key for 30-second survival extensions when your driver gets sniped. LAV-G1 deals 100 limb damage at 200 meters now (buffed from 94), which makes it genuinely terrifying in open desert.
Objective capture prioritizes sustained presence over kills. You get 200 points for captures, 150 for defenses, 50-100 for kills. What works best is coordinating your squad to hold objectives rather than chasing K/D ratios—the scoring system rewards smart play.
Battle of Monument event through December 4 offers 10 Armament Vouchers, 4 Premium Weapon EXP Tokens, 2 Double EXP Cards. Hot Zone wins grant 5 additional vouchers. Vehicle counters include Javelin/Stinger AT weapons, LAV-AA platforms, and M250 suppression. AH-1035D helicopter provides overwatch but it's vulnerable to AA fire—skilled pilots make the difference.
Beta Timeline and Access Windows
January 2025 beta coincides with Black Hawk Down campaign and full PC/mobile launch January 20. December 2025 Open Beta participants retain progression advantages—attachments, operators, weapon levels all carry over. Mobile Summer 2025 delays create a PC-first competitive environment, so console and mobile players are waiting a bit longer.
Minimum specs: Windows 10 64-bit, i3-4150/FX-6300, 8GB RAM, GTX 660/HD7870/Arc A380 with 2GB VRAM. Recommended: i5-6500/Ryzen 5 1500X, 16GB RAM, GTX 1060 5G/RX 5500XT/Arc A580 with 5GB VRAM. Storage runs 50-88GB depending on installation—SSD is highly recommended.
120+ FPS is critical for recoil control. FOV 100 provides optimal awareness without distortion. Kernel-level anti-cheat requires clean configurations, so make sure your drivers are updated and you're not running sketchy background software.
Ahsarah Map Analysis: Strategic Zones and Control Points
Northern industrial complex near pyramids offers elevated 360-degree visibility controlling vehicle spawns and suppressing rotations. Central plateaus function as contested no-man's-land requiring constant movement—CI-19 with 55-meter range and 60-round drums dominates here, especially when you're prone for stability. Southern oasis settlements concentrate CQB where SMG-45 with 40-round mags and 40-meter lethality excels, particularly when paired with Gizmo's smoke mines revealing corroded enemies.
Northern Industrial Complex: High-Value Territory
Pyramid interiors feature three-level vertical combat with staircases connecting chambers to rooftops. Defenders holding upper levels force predictable entry points—perfect for M4A1 burst fire at 25-30 meters (9.3% pick rate across all skill brackets). Exterior approaches expose teams to AWM sniper fire from peaks, dealing 100 chest damage at 30 meters. That 3.4% pick rate increases dramatically in open sightlines where snipers thrive.
Loadout code 6F50VEC0CH8TK2MI8PG7U optimizes AWM with Skyline Long Barrel, Resonant Suppressor, ACOG 6x, DBAL-X2 laser—import that and you're set for long-range dominance.
Underground tunnels favor Gizmo's Sentinel Nests at exits, creating chokepoints. The 20% faster deployment near synergized gadgets enables rapid area denial, forcing enemies into routes where Corrosion amplifies team damage. In practice, one well-placed nest can completely shut down a tunnel approach.
Central Desert Plateau: Open Combat Dynamics
CI-19 achieves 9.5% pick rates through 55-meter effectiveness with Leviathan Barrel and Sandstorm Vertical Compensator (+9 recoil control). Import code 6HLOANO09MFFCME3G7LT2 delivers optimized configs with Secret Order Bevel Foregrip and 60-round drums.

Going prone reduces recoil by 80% with FOV 100 and 120+ FPS. Execute 3-5 round bursts beyond 30 meters, pulling down vertical kick during the first 5-10 rounds. It's muscle memory—drill this in Hot Zone before taking it to Warfare.
Vehicle spawns at 5,000 points introduce mechanized threats. M250 LMG with 550 RPM and 125-round mags suppresses crews effectively—55 damage at 40 meters. Code 6FIAPV406L5PA4U76HE30 optimizes M250 for area denial, especially effective with Gizmo's Corrosion multiplying damage by 25%.
Southern Oasis Settlements: CQB Hotspots
SMG-45 achieves 5.3% pick rates through 40-meter lethality and 58 hip-fire accuracy. Echo Suppressor and UR Spec Ops Stock enhance stealth and stability. Import code 6HLOBLC09MFFCME3G7LT2 provides competitive configs. The 40-round capacity sustains multi-target engagements—critical when you're clearing buildings.
MK4 SMG introduces 34 base damage at 793 RPM with convertible 3-round burst to full-auto. 58 hip-fire accuracy and 60 handling excel in smoke-filled corridors. Pairing with 4.6x30mm Ultra SX ammo bypasses armor below Level 5—0.4-second kills against Tier-6 protection. Gizmo's smoke mines trigger within 5 meters, slowing movement while revealing corroded targets via automatic pings. The synergy is brutal.
Vehicle Depot Locations and Spawn Timers
Vehicle spawns near northern industrial and southern settlement outskirts require 5,000 points. M1A4 crew swap via F-key enables 30-second survival extensions when your driver gets dropped. Engineers provide field repairs extending operational windows—protect your engineer, they're keeping your tank alive.
LAV-G1 delivers 100 limb damage at 200 meters, shredding exposed infantry. Counters include Javelin/Stinger AT or LAV-AA fire. AH-1035D helicopter offers overwatch but demands skilled pilots avoiding Stinger lock-ons—one mistake and you're a fireball.
Teams reaching 5,000 points first gain mechanized advantages that snowball map control. Denying enemy vehicle spawns through aggressive point contesting becomes the primary objective. Don't let them get that first tank.
Pre-Beta Gear Optimization: Loadout Recommendations
M4A1 remains beginner-friendly with a 9.3% pick rate—25 damage at 672 RPM, 50+ meter range. Import codes 6FINC4G0CQTV1IBVCBQVT and 6HLOBES09MFFCME3G7LT2 provide AR Gabriel Long Combo Barrel configs for 3-5 round bursts beyond 30 meters. CI-19 dominates extended engagements (9.5% pick rate) with 60-round drums and 55-meter effectiveness.
Attachments prioritize recoil control—Sandstorm Vertical Compensator (+9), Secret Order Bevel Foregrip, avoiding stacking penalties that actually hurt performance. DBAL-X2 laser adds +16% stability, which you'll feel immediately.
Delta Force credits quick top up through BitTopup enables instant Battle Pass progression to Level 15 for Gizmo, plus premium attachments bypassing the grind.
Primary Weapon Meta for Desert Warfare
S-tier primaries exceeding 6% pick rates: SG552, CAR-15, M4A1 (9.3%), CI-19 (9.5%), SMG-45 (5.3%), M250. SG552 achieves 3% through balanced mid-range versatility. CAR-15 reaches 4.8% through handling advantages—it just feels snappier. M7 maintains 9.5-7% across skill brackets, reliable without specialized attachments, ideal if you're transitioning from other FPS games.
SCAR-H, AUG, SR-3M occupy S-tier below 6%, serving niche roles. They're not bad, just more situational.
QJB-201 LMG delivers 785 RPM with 125-round mags, excelling in suppression near Gizmo deployables where Defensive Vanguard reduces recoil by 30%. Import code 6FIAMCA005E7GMC01NIUGE optimizes QJB-201 with Newtype Sledgehammer Barrel for area denial. M250 provides similar suppression at 550 RPM with enhanced stability—pick based on your playstyle.
Optimal Attachment Combinations for Long-Range
Sandstorm Vertical Compensator provides +9 recoil reduction without stacking penalties—this is key, some attachments actually conflict. Resonant Ergonomic Grip adds +16% moving accuracy. Secret Order Bevel Foregrip enhances vertical control during initial bursts when recoil is hardest to manage.
AR Gabriel Long Combo and Leviathan barrels extend range 10-15 meters maintaining velocity. Skyline Long Barrel for AWM maximizes 200-meter thermal detection. Suppressors gain +9% range bonuses, 15-20% stealth improvements in Operations—not just for sound reduction.
ACOG 6x suits 50+ meter engagements without excessive zoom penalties. VMX Frameless Sight optimizes CQB with minimal obstruction. Thermal scopes counter fog and sandstorm visibility. MEO Micro Sight Riser provides co-witness for rapid acquisition when you need to transition targets fast.
Secondary Weapons and Sidearm Selection
Vector SMG excels in emergency CQB when primaries run dry—high fire rate compensates for lower damage. .45 ACP Super ammo delivers 85% base damage killing Tier-6 armor in 0.4 seconds. MP5 and Bizon maintain S-tier through reliability. MP7 benefits from 4.6x30mm Ultra SX ammo providing 25% armor damage bypassing Level 5 protection.
Pistols gain viability through .50 AE AP Tier-5 ammo one-shotting DICH Level-4 helmets with 100% penetration. 5-round capacity demands precision but rewards headshots. Deagle/Revolver platforms leverage this for last-resort defense—experienced players know a well-placed pistol headshot can save your life.
Tactical Equipment Tier List for Ahsarah
Leverage Relink Neo I (50,000 Tekniq) provides 600-second scans increasing container yields and high-tier loot chances—essential for Operations. Aviation crate targeting maximizes returns. Neo II variants locate Red Crates via signal detection, which is huge for efficiency.
Tactical Equipment Supply enables instant ability recharges with 5-second activation—critical for Gizmo cycling Sentinel Nests during pushes. IFF Disruptor jams NPC detection for 180 seconds, supporting stealth in Sinkpoint Operations with armored aquatic NPCs.
Smoke grenades synergize with Gizmo's Corrosion, creating obstruction while revealing debuffed enemies. Frags clear pyramid interiors. Flashbangs disable defenders during breaches. Stuns prove less effective in open desert but excel in settlement CQB where movement is already restricted.
Operator Selection Guide for Ahsarah Warfare
Luna achieves SS-tier Recon through intel revealing enemy positions across 50+ meter sightlines—game-changing in open desert. Stinger maintains S-tier Support via healing smokes and mobility enhancements sustaining objective contests. Gizmo's Engineer specialization introduces area denial through Sentinel Nests and smoke mines, with Defensive Vanguard reducing recoil 30% near devices. This synergizes beautifully with QJB-201/M250 LMGs creating defensive strongpoints. Shepherd provides alternative Engineering with barriers and repairs.
Optimal 4-player compositions: 1 Recon (Luna intel), 1 Support (Stinger heals), 1 Engineer (Gizmo barriers), 1 Assault (aggressive pushes). Three-player squads prioritize Stinger for sustainability—you can't push objectives if you're constantly respawning. Warm up with 3 Hot Zone rounds calibrating aim and communication before jumping into Warfare.
Assault Operators: Best Picks for Aggressive Pushes
D-Wolf achieves A-tier through movement speed bonuses enabling rapid rotations—suits Monument's open desert crossings minimizing exposure. Nox provides stealth with reduced detection and silent movement, excelling in settlement CQB where sound reveals positions. Pairing with suppressed CI-19 (Echo Suppressor +9% range) creates infiltration specialists disrupting spawn flows.
Toxik occupies SS-tier through debuff application and self-healing sustaining aggressive plays. Synergizes with Gizmo's Corrosion, stacking damage amplification accelerating time-to-kill. Devastating in coordinated pushes where multiple debuffs overwhelm healing—enemies just melt.
Support Operators: Team Utility Maximization
Stinger's S-tier status derives from healing smokes restoring health during objective contests—blocks sightlines while regenerating, enabling defensive holds against numerical disadvantages. Mobility enhancements facilitate emergency repositioning when flanked or vehicle-suppressed.
Shepherd offers ammo resupply and barrier placements—suits static pyramid defenses where consumption spikes. Barriers create temporary cover in open desert for safe revives. Raptor introduces EMP disabling electronics beyond 8-10 meters, countering thermal and NVG reliance. Footprint tracking reveals movement patterns in settlements with multiple entry points. Synergizes with Luna for comprehensive awareness—you'll know where they are and where they've been.
Recon Operators: Information Gathering Strategies
Luna's SS-tier capabilities center on position revelation across 50+ meter sightlines—provides real-time intel enabling pre-aimed angles and crossfires, especially effective in open desert where visual detection exceeds engagement distances. Teams gain first-strike advantages snowballing objective control.
Raptor's A-tier status complements Luna through EMP disruption and footprint tracking—counters enemy intel while revealing movement predicting rotations. Combining Luna's position data with Raptor's movement tracking creates predictive models for proactive positioning.
Synergies with AWM sniper platforms maximize information advantages—thermal scopes through fog combine with operator intel for comprehensive awareness. You're not just reacting, you're anticipating.
Specialist Operators: Niche Roles and Counters
Gizmo's Engineer specialization counters aggressive pushes through area denial. Defensive Vanguard enables defensive LMG setups with 30% recoil reduction—you become a turret. Hunter Spider ultimate webs detected enemies for 4 seconds, blocking gadgets, ADS, and weapon usage. Forces vulnerability during team pushes—they literally can't fight back.
Counter-strategies require understanding cooldowns and deployment limits. Gizmo's maximum 2 Sentinel Nests and 3 smoke mines create coverage gaps exploitable through multi-angle attacks. Destroying devices eliminates Defensive Vanguard bonuses, reducing effectiveness by 30% recoil control and 16% stability.
Pick rates shift based on zones—open desert favors Recon and long-range Assault, settlement CQB increases Support and close-range Specialist value. Adapt your composition to the terrain you're fighting in.
Beta Preparation Checklist: What to Do Before January
Phase 1 (weeks 1-2): Complete tutorials, 15-minute daily M4A1 aim drills establishing baseline accuracy. Don't skip this—muscle memory matters. Phase 2: Learn slide mechanics, pre-aiming, recoil patterns through offline practice targeting Monument's distances. Phase 3: Establish communication protocols with callouts for pyramid landmarks, dune formations, settlement structures. Coordinate utility timing—smoke deployments, grenade throws, ability activations.
Phase 4: Analyze killcams tracking positioning mistakes and aim deficiencies. Monitor stats for K/D benchmarks and win rates. Be honest about weaknesses.
Progression pathways: Hot Zone 3v3v3 for low-stakes aim practice → Raid PvE for tactical coordination → Operations extraction introducing gear loss mechanics incentivizing careful play. Master one class and weapon over 2-3 weeks before expanding diversity—jack of all trades, master of none doesn't work here.
Account Setup and Beta Registration Process
Beta registration requires active accounts with verified emails and updated systems meeting minimum specs. Windows 10 64-bit, i3-4150/FX-6300, 8GB RAM provide baseline access, though 16GB RAM and i5-6500/Ryzen 5 1500X deliver smoother 32v32 performance—you'll feel the difference in intense firefights.
GPU requirements: GTX 660/HD7870/Arc A380 with 2GB VRAM minimum, GTX 1060 5G/RX 5500XT/Arc A580 with 5GB VRAM recommended for stable 120+ FPS. Storage runs 50-88GB depending on installation, SSD reduces load times 40-60% versus HDD—worth the investment.
Kernel-level anti-cheat requires clean drivers and security patches. Account linking enables progression carryover from PC Open Beta to January launch. December 2025 beta participants gain attachment unlocks and operator familiarity over fresh accounts. Verify account status before January preventing data loss—don't lose your progress over a technicality.
System Requirements and Performance Optimization
Target 120+ FPS for recoil mastery with FOV 100 balancing awareness and clarity. Graphics prioritize frame rate—low textures, disabled shadows, reduced particles maintain performance during intense firefights. Competitive audio emphasizes footsteps and reload cues through headphones with positional accuracy.
Disable music, reduce ambient volumes isolating critical audio revealing positions before visual contact. You'll hear them before you see them.
Network optimization: wired Ethernet over Wi-Fi reduces latency and packet loss. Port forwarding and router QoS prioritize game traffic minimizing lag spikes. Monitor ping and packet loss through overlays identifying connection issues requiring ISP troubleshooting or server region adjustments. Lag kills—literally.
Resource Stockpiling Strategies
Stockpile currency for Battle Pass purchases and premium attachments. 100-tier Pass through December 18 offers Gizmo at Level 15, Luna legendaries, AS Val blueprints—critical competitive unlocks. Early tier progression through double EXP cards and missions accelerates meta content access.
Tekniq Alloy farming through Sinkpoint Operations yields 40,000 per seismic defusal, funding Leverage Relink Neo I (50,000 cost) enhancing loot quality. 22 underwater spots and 3 safes (1 major, 2 minor) provide high-tier attachments and ammo. Five Armament Vouchers per Hot Zone win accelerate weapon progression.
Weapon EXP token stockpiling through Warfare missions (4 Premium, 6 Intermediate) enables rapid attachment unlocks on MK4 SMG. Prioritize meta weapons with 6%+ pick rates—CI-19, M4A1, SMG-45—ensuring investments align with competitive viability. Don't waste resources on off-meta guns.
Practice Routines for Desert Combat Scenarios
Desert combat practice emphasizes long-range accuracy across 50+ meter engagements. Offline maps simulating Monument's sightlines enable repetition of 3-5 round M4A1/CI-19 burst patterns. Daily 15-minute drills pulling down vertical kick during initial 5-10 rounds build muscle memory—boring but effective.
Movement training includes slide-canceling, jump-shotting, prone transitions reducing hitbox exposure during crossings. Practice in Hot Zone 3v3v3 provides low-stakes experimentation without Warfare ticket penalties. Master movement fluidity for aggressive flanks exploiting dune cover and tunnels.
Team coordination drills involve callout practice for landmarks—North Pyramid,Central Dunes,South Settlement—ensuring communication clarity. Role-specific sessions with dedicated Recon/Support/Engineer/Assault players refine synergies before competitive matches. Chemistry wins games.
Ahsarah Warfare Mechanics: New Systems Explained
Dynamic weather affects visibility and combat effectiveness. Sandstorms reduce sightlines to 30-40 meters favoring SMGs and shotguns over rifles. Thermal scopes maintain detection through obscuration creating equipment advantages—suddenly that attachment slot matters. Fog compresses ranges similarly, shifting meta toward close-range loadouts.
Corrosion debuff revolutionizes damage through 25% bullet amplification lasting 6 seconds. Gizmo's Sentinel Spiders apply on contact, marking targets through smoke. Corroded enemies become priority for Hunter Spider ultimates webbing for 4 seconds, disabling gadgets, ADS, and weapons for coordinated eliminations.
Vehicle damage models incorporate component-based destruction—engine damage reduces mobility 30-50%, turret damage disables rotation and firing, track damage immobilizes. Engineer repairs restore 25-40% functionality over 10-15 seconds requiring protection during vulnerability. Protect your engineers.
Dynamic Weather Effects on Visibility and Combat
Weather cycles between clear, fog, sandstorms on 10-15 minute intervals. Clear enables full-range combat across 200+ meter sightlines favoring AWM snipers and long-range ARs. Teams controlling pyramid high-ground during clear phases gain overwhelming advantages—it's almost unfair.
Fog transitions compress ranges to 50-70 meters, reducing sniper effectiveness while maintaining AR viability. M4A1/CI-19 retain effectiveness, AWM pick rates decline as thermal advantages diminish. SMGs gain relative value as distances contract toward 20-40 meter optima.
Sandstorms create 30-40 meter visibility favoring CQB specialists. SMG-45/MK4 dominate through hip-fire accuracy and handling. Thermal scopes provide detection advantages but sacrifice attachment slots—trade-offs matter. Teams adapting loadouts to weather gain tactical flexibility. Don't get caught with a sniper in a sandstorm.
Sandstorm Mechanics and Tactical Implications
Sandstorms introduce movement penalties—reduced sprint speeds, increased stamina consumption. Players caught in open desert face exposure from thermal detection. 5.8x42mm DBR30 Tier-4 flesh ammo reduces stamina by 150% body damage, compounding penalties—you're basically crawling.
Tactical implications favor defensive positioning during storms—teams holding pyramids and settlements avoid exposure penalties. Offensive pushes require smoke coverage and coordinated timing minimizing detection windows. Gizmo's smoke mines synergize with natural sandstorm obscuration creating layered visibility denial. Stack your advantages.
Audio cues gain importance as visual ranges collapse. Footstep detection reveals positions before visual contact enabling pre-aimed angles. Suppressor attachments with +9% range and 15-20% stealth maximize survival during low-visibility. Sound discipline becomes critical.
Vehicle Damage Model and Repair Systems
Component categories: engine, turret, tracks, armor plating. Engine damage reduces max speed 30-50% limiting mobility during retreats and pushes—you're a sitting duck. Turret damage disables rotation and firing converting vehicles to mobile cover. Track damage immobilizes creating stationary targets vulnerable to concentrated fire.
M250 LMG with 125-round mags excels at track destruction through sustained suppression. Javelin AT delivers instant mobility kills. Engineers provide field repairs restoring 25-40% functionality over 10-15 seconds requiring protection—guard your engineer or lose your tank.
Armor degradation through accumulated damage reduces protection against subsequent hits. 4.6x30mm Ultra SX bypassing Level 5 armor proves effective against degraded plating, enabling SMG anti-vehicle contributions. Even SMGs can contribute to vehicle destruction if the armor's already compromised.
Objective Capture Mechanics and Point Scoring
Sustained presence within control zones required, capture rates scaling with player count advantages. 4v2 advantage captures 2x faster than even numbers, incentivizing aggressive pushes establishing numerical superiority. Contested objectives pause progress creating stalemates requiring tactical resets—sometimes you need to pull back and try a different angle.
Point scoring prioritizes objectives over kills—captures award 200 points, defenses 150, kills 50-100 based on threat levels. Structure rewards coordinated team play over individual fragging. Ticket depletion through deaths and objective losses triggers defeat at zero. Efficient play minimizes unnecessary deaths while maximizing objective control time. Play smart, not just aggressive.
Common Misconceptions About Ahsarah Beta Access
January 2025 beta coincides with full PC/mobile launch January 20—no separate beta keys. Active accounts gain immediate access upon launch, contrary to speculation about limited invitations or pre-registration lotteries. Progression from December 2025 Open Beta carries forward preserving attachments, operators, weapon levels. Continuity rewards early participation but doesn't lock out new players—accelerated progression through double EXP events enables catch-up.
Regional access limitations affect console releases (Q1 2025), while PC/mobile launch globally January 20. Mobile Summer 2025 delays create temporary PC exclusivity, though cross-progression enables account continuity. NDA and content sharing policies expired with Open Beta conclusion, permitting unrestricted footage and strategy discussion—share away.
Beta Key Distribution: Facts vs Fiction
Beta key myths stem from confusion between December 2025 Open Beta and January 2025 full launch. Open Beta required registration and potential key allocation based on capacity, while January provides universal access meeting system requirements. No separate beta keys exist—account creation and installation suffice.
Speculation about limited slots contradicts official announcements confirming open launch across PC/mobile. Console versions face Q1 2025 delays due to certification, not access restrictions. Pre-registration benefits include email notifications and potential cosmetic rewards, but don't affect access priority. All players enter simultaneously January 20 with server capacity scaled for launch demand. Everyone gets in.
Progression Carryover: What Transfers to Full Release
December 2025 Open Beta progression includes weapon levels, attachments, operators, statistics. Beta participants gain immediate advantages through meta attachment access—Sandstorm Vertical Compensators, Secret Order Bevel Foregrips, premium optics unlocked via weapon EXP.
Operator unlocks transfer completely—Gizmo access at Battle Pass Level 15 carries forward. New players starting January 20 face progression requirements, creating temporary roster disparities. But starter operators provide competitive viability preventing pay-to-win scenarios.
Currency balances and premium purchases transfer with progression, preserving Battle Pass investments and cosmetics. December 18 Battle Pass conclusion creates urgency for tier completion before January—unclaimed rewards may become unavailable. Don't leave rewards on the table.
Regional Access Limitations Clarified
Regional limitations primarily affect console platforms (Q1 2025 delays) due to certification across PlayStation and Xbox. PC/mobile launch globally January 20 without regional restrictions, though server locations affect latency and matchmaking.
Server region selection enables low-ping prioritization or higher latency for specific pools. North American, European, Asian clusters provide coverage with cross-region play permitted but discouraged due to latency—nobody wants to fight a teleporting opponent. Competitive modes may implement region locks preventing excessive ping disparities.
Mobile Summer 2025 delays affect iOS and Android equally creating temporary PC exclusivity. Cross-progression enables account continuity allowing mobile players to maintain progress on PC during delays. Your account travels with you.
NDA and Content Sharing Policies
NDA and content policies expired with December 2025 Open Beta conclusion, permitting unrestricted footage, guides, meta analysis. Content creators freely publish Ahsarah leaks and impressions without legal restrictions. January 2025 launch maintains open policies encouraging community engagement—they want you talking about this.
Official partnerships provide early access and exclusive cosmetics but don't restrict independent coverage. Competitive integrity policies prohibit cheating, exploiting, toxic behavior but don't limit strategy discussion or recording. Kernel-level anti-cheat enforces fair play without restricting OBS or streaming software. Stream and share freely.
Advanced Tactical Strategies for Ahsarah Warfare
32v32 format creates sub-squad dynamics where 4-player teams coordinate within larger structures requiring micro-tactics and macro-awareness. Optimal compositions balance Recon intel (Luna SS-tier), Support sustainability (Stinger S-tier), Engineer area denial (Gizmo), Assault fragging.
Luna provides position data enabling pre-aimed angles. Stinger heals sustain objective contests. Gizmo deployables create strongpoints with 30% recoil reduction. Assault operators execute aggressive flanks disrupting formations.
Counter-strategies require understanding weapon ranges and attachment limits. CI-19's 55-meter effectiveness creates vulnerability beyond that range—AWM sniper fire at 200 meters eliminates CI-19 users before return fire. SMG-45's 40-meter lethality proves ineffective in open desert requiring positioning near settlements. Know your weapon's limits.
Team Composition Frameworks for Objective Modes
Minimum viable composition: 1 Recon (intel), 1 Support (sustainability), 1 Engineer (area control), 1 Assault (aggression). Three-player squads sacrifice Assault maintaining Recon/Support/Engineer core emphasizing defense—you can't do everything with three players.
Luna provides real-time positions enabling crossfires and flank counters. Stinger sustains health during prolonged contests preventing ticket losses. Gizmo denies advances through Sentinel Nests and smoke mines creating chokepoints funneling attackers into kill zones—they come to you.
Assault operators execute high-risk flanks disrupting formations and creating numerical advantages. D-Wolf's A-tier mobility enables rapid rotations. Nox's stealth facilitates infiltration behind lines. Coordinating Assault timing with Recon intel and Support heals maximizes survival during aggressive plays. Timing is everything.
Communication Protocols and Callout Systems
Standardized callouts for Monument landmarks: North Pyramid, Central Dunes, South Settlement, East Tunnels, West Vehicle Depot. Directional references use compass bearings—Enemy 270 degrees, 50 meters. Elevation callouts—High ground,Ground level,Underground—clarify vertical positioning in pyramids. Be specific.
Enemy count reporting: Three enemies North Pyramid, ground level. Threat assessments include operator types and equipment: Gizmo nest East Tunnel entrance, smoke deployed. Damage callouts—Enemy cracked,One-shot—coordinate focus fire. Avoid clutter during firefights requiring discipline and brevity. Don't talk over critical info.
Utility coordination involves pre-planned sequences: Smoke deploying in 3, 2, 1 enables synchronized pushes. Ability cooldown tracking—Luna scan ready,Gizmo ultimate 30 seconds—informs tactical timing. Post-engagement debriefs identify mistakes driving continuous improvement. Learn from every fight.
Counter-Strategy Against Meta Loadouts
CI-19's 55-meter effectiveness creates vulnerability beyond range—AWM at 200 meters eliminates users before return fire. Force long-range engagements through positioning denying optimal performance. SMG-45's 40-meter lethality proves ineffective in open desert—deny settlement access through pyramid high-ground control forcing disadvantageous long-range duels. Vehicle-mounted weapons suppress settlement approaches preventing SMG specialists from reaching effective ranges.
Gizmo's area denial faces counters through multi-angle attacks overwhelming device coverage. Maximum 2 Sentinel Nests and 3 smoke mines create gaps exploitable through flanking. Destroying devices eliminates Defensive Vanguard bonuses reducing effectiveness by 30% recoil control—prioritize device destruction over direct engagement. Kill the gadgets, then kill Gizmo.
Resource Management During Extended Matches
60-round CI-19 drums enable sustained fire but encourage wasteful spray—disciplined 3-5 round bursts preserve ammunition. Looting eliminated enemies replenishes supplies but exposes to counterattacks during animations—check your corners first.
Tactical equipment timing maximizes impact—smoke grenades during captures provide concealment. Frags clear entrenched positions before pushes. Flashbangs disable defenders during breaches. Avoid premature utility expenditure preserving options for final objectives. Save something for the end.
Vehicle resource management involves point accumulation enabling timely spawns during critical phases. Hoarding 5,000 points for emergency spawns provides flexibility but delays earlier mechanized advantages. Balance immediate vehicle impact against future spawn potential requiring strategic foresight. Sometimes you need that tank now.
Maximizing Your Beta Experience: Pro Tips
Efficient XP farming prioritizes Warfare double EXP events and mission completions offering Premium Weapon EXP Tokens. Hot Zone 3v3v3 provides low-stakes aim practice with 5 Armament Voucher rewards per win, accelerating attachments without gear loss—perfect for warming up.
Data collection tracks personal K/D, win rates, weapon pick rates against 6%+ meta benchmarks. Analyze killcams identifying positioning mistakes and aim deficiencies. Monitor enemy loadout trends revealing emerging meta shifts before widespread adoption—stay ahead of the curve.
Community engagement through forums and content channels provides diverse tactical perspectives. Share loadout codes—6HLOANO09MFFCME3G7LT2 for CI-19, 6FINC4G0CQTV1IBVCBQVT for M4A1—accelerating community optimization. Participate in feedback channels influencing development priorities. Your voice matters.
Efficient XP Farming Methods
Warfare participation during double EXP events—objective captures and defenses yield 200-150 points versus 50-100 for kills. Focus strategic play over fragging maximizing points per match. Battle of Monument event through December 4 offers 10 Armament Vouchers and 4 Premium Weapon EXP Tokens.
Hot Zone 3v3v3 provides 5 Armament Vouchers per win without gear loss—90-second decrypt objectives encourage aggressive play and rapid cycling generating more XP per hour than Operations extractions. Fast matches, fast progression.
Sinkpoint Operations yields 40,000 Tekniq Alloys per seismic defusal funding Leverage Relink Neo I enhancing loot quality. 22 underwater spots and 3 safes provide high-tier attachments accelerating weapon progression. Diversify your farming.
Data Collection for Competitive Advantage
Track personal metrics—K/D, win rates, accuracy—against skill benchmarks. Maintain spreadsheets documenting weapon performance across zones identifying optimization opportunities. Compare stats against 6%+ meta pick rates revealing alignment with competitive standards—are you using what works?
Killcam analysis identifies recurring positioning mistakes. Review deaths from pyramid high-ground revealing rotation timing or smoke coverage needs. Track enemy loadout trends—attachments, operators, equipment—predicting meta evolution. Knowledge is power.
Community data aggregation through leaderboards and stat-tracking provides macro-level insights. Monitor top-tier player loadout codes and operator preferences revealing cutting-edge strategies. Integrate community data with personal metrics creating comprehensive competitive intelligence. Learn from the best.
Community Engagement and Feedback Channels
Official forums and social media provide direct developer communication. Participate in balance discussions influencing patch priorities. Report bugs and exploits contributing to stability improving competitive integrity—help make the game better.
Content creator channels offer diverse tactical perspectives and advanced strategies. Follow multiple creators preventing echo chambers, exposing varied playstyles. Engage through comments building network connections for squad recruitment. Find your people.
Feedback submission through in-game reporting and surveys shapes development roadmaps. Constructive criticism highlighting specific balance issues with supporting data proves more impactful than generic complaints. Contribute to knowledge bases through strategy guides and loadout sharing elevating collective skill. Give back to the community.
Preparing for Full Release: Long-Term Strategy
Establish sustainable practice routines beyond beta—daily 15-minute aim drills build muscle memory without burnout. Weekly meta reviews track evolving strategies. Balance skill development with enjoyment preventing competitive fatigue—it's still a game.
Squad recruitment creates consistent practice partners with complementary playstyles. Establish role specializations—dedicated Recon/Support/Engineer/Assault players—enabling refined synergies. Regular scrimmages against organized squads provide competitive experience exceeding public matchmaking. Organized play hits different.
Resource planning involves currency stockpiling and Battle Pass completion. December 18 conclusion creates urgency for Gizmo unlocks and Luna legendaries. Anticipate January 2025 Black Hawk Down campaign enabling proactive preparation for new modes. Stay ready.
Power Up Your Delta Force Experience with BitTopup
BitTopup provides instant Delta Force currency top-ups enabling immediate Battle Pass progression and premium content access. Competitive pricing delivers maximum value per transaction with frequent promotional discounts below official rates—why pay more?
Secure payment processing through encrypted channels protects financial information. Fast delivery completes transfers within minutes eliminating waiting periods delaying competitive preparation. Wide game coverage creates unified account management simplifying multi-game tracking.
Excellent 24/7 customer service resolves transaction issues. High user ratings reflect consistent service quality—thousands of verified reviews document successful purchases building trust. It works.
Instant Currency Top-Ups for Beta Preparation
Instant top-ups enable immediate Battle Pass tier purchases unlocking Gizmo at Level 15 without grinding. Premium currency funds attachment purchases and cosmetics providing competitive advantages and personalization. Transaction processing completes within 2-5 minutes with automated delivery to game accounts. Email confirmations and transaction histories provide documentation—everything's tracked.
Bulk purchase discounts reduce per-unit costs for large acquisitions maximizing value for extensive Battle Pass progression. Promotional events offer limited-time bonuses—additional currency percentages or discounted rates—rewarding strategic timing. Monitor BitTopup's promotional calendar optimizing spending efficiency. Smart spending saves money.
Exclusive Battle Pass Deals
Exclusive deals provide bundled currency packages optimized for tier completion. Packages calculate exact requirements for full 100-tier progression eliminating guesswork and over-purchasing. Bundled discounts reduce total costs versus incremental purchases—buy smart, save more.
Seasonal promotions align with content updates offering enhanced value during major launches like Ahsarah Season 7. Early-bird discounts reward proactive purchases before launch enabling day-one completion. Get ahead early.
Loyalty programs reward repeat customers with accumulated points redeemable for future discounts or bonus currency. Tiered membership provides escalating benefits based on purchase volume incentivizing platform loyalty creating long-term value. Stick around, get rewarded.
Secure Transaction Process
Encrypted payment gateways protect financial information. SSL certification and PCI compliance ensure industry-standard security. Multiple payment methods—credit cards, PayPal, cryptocurrency—provide flexibility maintaining security. Pick what works for you.
Account verification prevents unauthorized access and fraud. Two-factor authentication adds security layers protecting BitTopup and game accounts. Transaction monitoring detects suspicious activity triggering automatic holds and customer outreach—they're watching for you.
Dispute resolution provides recourse for errors or delivery failures. Customer service investigates within 24 hours with refund policies covering legitimate grievances. Transparent terms of service and privacy policies establish clear expectations and protections. No surprises.
24/7 Customer Support for Seamless Gaming
24/7 support through live chat, email, tickets ensures availability regardless of time zone. Multilingual staff accommodate global users providing native language service. Average response times under 5 minutes for live chat enable rapid resolution—help when you need it.
Comprehensive FAQ databases and knowledge bases provide self-service for common questions. Video tutorials demonstrate purchase processes and account management reducing ticket volume. Community forums enable peer-to-peer assistance. Multiple support channels.
Proactive communication during disruptions or maintenance manages expectations. Status pages provide real-time updates on availability and processing. Transparent communication builds trust reducing frustration during temporary limitations. They keep you informed.
FAQ
What is Delta Force Ahsarah Warfare and when does it launch? Launches November 18, 2025 as Season 7 introducing Monument map in Egypt's desert with pyramids, underground tunnels, and Gizmo Engineer operator. Season runs through December 4, 2025. Full game launches PC/mobile January 20, 2025.
How do I unlock the Gizmo operator in Season 7? Gizmo unlocks at Battle Pass Level 15 during Season 7 (November 18-December 18, 2025). Progress through gameplay or purchase tier skips using premium currency available through BitTopup for instant access—no grinding required.
What are the best weapons for Monument map's desert terrain? CI-19 assault rifle (9.5% pick rate) with 55-meter range and M4A1 (9.3% pick rate) excel in open desert. SMG-45 (5.3% pick rate) with 40-meter lethality dominates settlement CQB. AWM snipers (3.4% pick rate) control pyramid high-ground at 200+ meters. Match your weapon to the terrain.
What system requirements do I need for Delta Force beta? Minimum: Windows 10 64-bit, i3-4150/FX-6300, 8GB RAM, GTX 660/HD7870/Arc A380 with 2GB VRAM. Recommended: i5-6500/Ryzen 5 1500X, 16GB RAM, GTX 1060 5G/RX 5500XT/Arc A580 with 5GB VRAM for 120+ FPS. SSD highly recommended for load times.
How does Gizmo's Corrosion debuff work in combat? Sentinel Spiders apply Corrosion on contact increasing bullet damage taken by 25% for 6 seconds while marking enemies through smoke. Synergizes with team focus fire and Hunter Spider ultimate webbing enemies for 4 seconds—they can't fight back.
Will my beta progress carry over to full release? Yes, December 2025 Open Beta progression carries to January 20, 2025 full launch including weapon levels, attachments, operators, statistics. Battle Pass progress through December 18 also transfers preserving rewards. Don't lose your progress.


