

Why Furina's 6.1 Return Changes Everything
Let's be honest—when Furina first dropped, plenty of players slept on her. Another support, they said. I already have Kokomi. Well, those players are probably kicking themselves now.
Genshin Impact Version 6.1 launches October 22, 2025, and Furina's sharing Phase 1 with Nefer's debut. The banner runs through November 11, following the usual maintenance window (October 21, 6:00-11:00 PM UTC-5). But here's the kicker: Nefer's kit practically screams for Furina's Hydro application.
Furina operates as a 5-star Hydro Sword user who's honestly more like three characters rolled into one. Sub-DPS? Check. Universal buffer? Absolutely. Emergency healer? When you need it. Her Fanfare mechanics scale with HP fluctuations across your team, providing damage buffs that make other supports look quaint by comparison.
Need Genesis Crystals for those crucial pulls? BitTopup offers competitive pricing and instant delivery when you purchase Genshin Impact Genesis Crystal packs—no premium costs, no waiting around.
The Numbers That Matter

At Level 90, Furina sits at 15,307 HP, 244 ATK, 696 DEF, with 24.2% CRIT Rate from ascension. Not exactly DPS territory for base stats, but that's missing the point entirely.
Her real power? Fanfare stacks. Each point grants 0.07% damage increase and 0.01% healing bonus to your entire team. At maximum stacks (300 points), you're looking at a flat 100% damage bonus. That's not a typo.
The ascension grind requires the usual Hydro suspects: Varunada Lazurite gems, Whopperflower Nectar variants, 168 Lakelight Lilies, 46 Water That Failed to Transcend, and 420,000 Mora. Standard stuff, really.
But here's where it gets interesting—Furina toggles between Ousia mode (HP-draining familiars that deal serious damage) and Pneuma mode (single-target healing). Most players stick to Ousia for the DPS potential, switching to Pneuma only when things get dicey.
Weapon Tier List: From Signature to F2P Heroes
The S-Tier Champion
Splendor of Tranquil Waters remains uncontested at the top.

This signature weapon brings 542 base ATK and 88.2% CRIT DMG—already solid stats. The passive? That's where things get spicy.
Each HP change grants 8% Elemental Skill damage (stacks up to 3 times for 6 seconds). Plus, you get 14% Max HP per party member experiencing HP changes, capping at 2 stacks. The 0.2-second trigger window means consistent uptime in any team worth running.
A-Tier Alternatives That Actually Work
Primordial Jade Cutter brings 44.1% CRIT Rate—always appreciated—plus 20% HP increase and 1.2% ATK scaling from Max HP. Perfect for CRIT-focused builds where you need survivability.
Key of Khaj-Nisut offers 66.2% HP and 20% base HP increase, with Elemental Mastery stacks based on HP values. Honestly? It's niche, but in reaction-heavy comps, it performs.
F2P Options That Don't Suck
Festering Desire at R5 is your best friend here. 45.9% Energy Recharge, 32% Skill damage increase, and 12% Skill CRIT Rate. Addresses Furina's energy hunger while boosting her off-field damage—what more do you want?
Fleuve Cendre Ferryman deserves mention as a craftable option. Same Energy Recharge stat, 16% Skill CRIT Rate, and 32% Energy Recharge after using Elemental Skill. Not flashy, but it gets the job done.
For weapon banner pulls, BitTopup provides secure recharge Genshin Impact Genesis Crystals instantly with 24/7 support and competitive rates.
Artifact Builds: The Math Behind the Magic
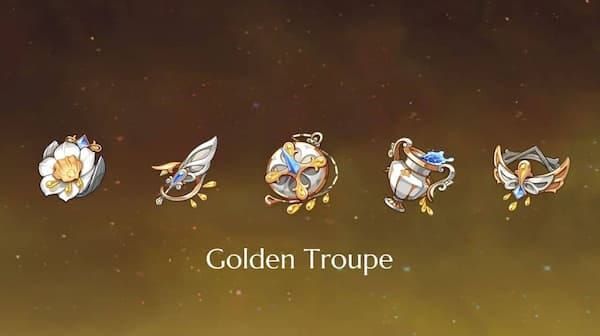
Golden Troupe: The Clear Winner
4-piece Golden Troupe isn't just optimal—it's practically mandatory for serious Furina builds. The 2-piece gives 20% Elemental Skill damage, while the 4-piece adds another 25% when you're off-field. That's 70% total Skill damage amplification when you factor in the base scaling.
Main stats are straightforward: Energy Recharge or HP% Sands, HP% Goblet, CRIT Rate or CRIT DMG Circlet. But the substats? That's where optimization gets tricky.
Target ranges: 35,000-40,000 HP, 60-80% CRIT Rate, 160-200% CRIT DMG, and 180%+ Energy Recharge. Sounds like a lot? It is. But Furina's scaling rewards the investment.
Alternative Sets Worth Considering
4-piece Tenacity of the Millelith works for pure support builds. 20% HP from 2-piece, 20% party ATK when Skill hits opponents. Less personal damage, more team buffing—depends on your priorities.
4-piece Marechaussee Hunter enables on-field DPS builds (yes, they exist). Up to 36% CRIT Rate from HP fluctuations. Pairs beautifully with HP-draining DPS characters who can trigger the passive consistently.
Energy Requirements: The Reality Check
Solo Hydro teams demand 220% ER for C0-C3, dropping to 170% for C4+. Double Hydro comps are more forgiving—180% for C0-C3, 140% for C4+. These aren't suggestions; they're requirements for consistent Burst uptime.
HP scaling hits its sweet spot at 35,000-40,000. The Unheard Confession passive provides 0.7% summon damage per 1,000 HP, maxing at 28% damage increase. Every point of HP matters.
Nefer Synergy: The New Meta Defining Duo
Here's where Furina's 6.1 rerun gets really interesting. Nefer's Lunar-Bloom mechanics create a feedback loop with Furina's Hydro application that's honestly kind of broken.
Nefer's Shadow Dance mode transforms Charged Attacks into Phantasm Performance with enhanced damage scaling. When Furina's Ousia summons apply Hydro, they create Dendro Cores that Nefer absorbs as Seeds of Deceit. Each seed generates Veil stacks—100 Elemental Mastery and boosted Burst damage per stack.
The optimal team? Nefer (Main DPS), Furina (Sub-DPS/Hydro), Lauma (Sub-DPS for Lunar-Bloom synergy), Baizhu (Healing/Dendro support). This maximizes Nefer's Phantasm Performance while maintaining Furina's Fanfare through HP fluctuations.
Rotation Mastery
The rotation's actually pretty clean: Furina Elemental Skill in Ousia mode, then Elemental Burst. Nefer activates Elemental Skill for Shadow Dance, then spams Charged Attacks to absorb cores and stack Veil buffs. 10-second cycles, rinse and repeat.
C2 Furina changes everything here—instant Fanfare stacks cut rotation time and boost team DPS by roughly 50% over C0. It's expensive, but the performance gap is real.
In optimized builds, this combo hits 40,000+ DPS consistently. Furina provides 75-100% team damage increase through Fanfare, while Nefer's reactions scale with EM and CRIT stats.
Team Compositions: Meta and Budget Options
The Meta Monsters
Neuvillette Hypercarry remains king: Neuvillette (DPS), Furina (Sub-DPS/Buffer), Kazuha (VV Shred/Grouping), Xilonen (Heal/Buffer). Neuvillette's HP drain feeds Fanfare stacks while Furina buffs his Charged Attacks. 40,000+ DPS territory with Energy Recharge dropping to 140% thanks to double Hydro resonance.
Bloom Optimization leverages reactions: Furina, Alhaitham, Nahida, Kuki Shinobu. Furina provides Hydro, Nahida enables cores, Alhaitham carries DPS, and Shinobu triggers Hyperbloom. Consistent 35,000+ DPS through reaction synergy.
Freeze Control for crowd management: Furina, Wriothesley, Shenhe, Xilonen. Furina's Hydro enables Freeze while buffing Wriothesley's Cryo damage through Fanfare.
Budget-Friendly Builds
F2P Nefer Synergy: Furina, Nefer, Dendro Traveler, Barbara. Maintains core Lunar-Bloom functionality with Barbara handling heals. Furina runs Festering Desire for energy management—still hits 25,000+ DPS.
National Variant: Furina, Bennett, Xiangling, Sucrose. Furina replaces traditional Hydro applicators while providing superior buffing through Fanfare. Maintains Vaporize reactions, reaches 30,000+ DPS with C0 and 4-star weapons.
Constellation Analysis: Where to Stop (Or Not)
C0: The Complete Package
C0 Furina functions as a complete support character. 75% maximum damage bonus through Fanfare, universal team buffing, decent healing when needed. Honestly? Most players can stop here and be perfectly happy.
C1: Skip It
C1 adds 150 starting Fanfare points (capping at 400). Reduces ramp-up time but provides minimal damage increase. Save your primos.
C2: The Game Changer
C2: A Woman Adapts Like a Duckweed in Water is where Furina transforms from great to broken.
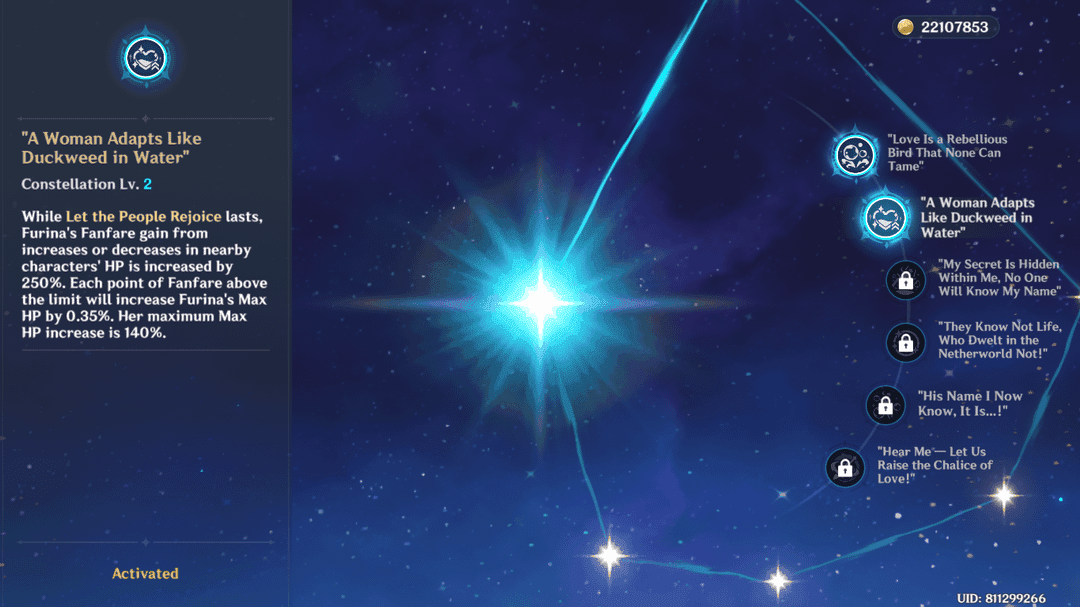
250% increased Fanfare gain from HP changes, plus excess points beyond 400 boost Max HP by 0.35% per point (maximum 140% increase).
Translation? Instant maximum stacks and massive HP scaling. 50-100% team DPS uplift over C0. Costs around 25,000 Primogems on average, but unlocks healerless comps and improves Abyss clear rates by 20-30%.
C4 and Beyond
C4 reduces Burst energy cost, cutting Energy Recharge requirements by roughly 25%. Nice quality of life, but not essential.
C6 enables on-field DPS builds through Hydro infusion on Normal Attacks, adding 18% Max HP damage per hit. Whale territory—150+ pulls beyond C2 limits its appeal.
Talent Priorities: Where to Spend Your Books
Elemental Skill First, Always
Salon Solitaire scales your off-field damage and Hydro application. Level 10 provides optimal scaling: Gentilhomme deals 5.96% Max HP damage, Chevalmarin contributes 3.23%, Crabaletta delivers 8.29%. HP drain rates hit 2.4%, 1.6%, and 3.6% respectively.
This is your bread and butter. Max it first.
Elemental Burst Second
Let the People Rejoice enhances that 60-energy AoE Hydro damage (11.4% Max HP at level 10) and Fanfare buff scaling. Maximum level provides 0.07% damage increase and 0.01% healing bonus per Fanfare point.
Essential for support builds, but Skill takes priority.
Normal Attack Last
Soloist's Solicitation only matters for C6 on-field builds. Most players can leave this at level 1.
Resource Planning
Complete ascension runs 420,000 Mora. Talent development to 9/9/9 minimum demands over 1,000,000 Mora, Justice talent books (114 Teachings, 63 Guides, 9 Philosophies), 18 Lightless Mass, and 3 Crowns for level 10 talents.
Stock 25,000+ Primogems for C2 investment through daily commissions (60 Primogems daily), Spiral Abyss (100 per star), and events (typically 1,000+ per major event).
Furina vs The Competition
Kokomi: The Healing Specialist
Kokomi excels as a dedicated healer with 100% uptime on healing and Hydro aura. But Furina surpasses her in team damage contribution—that 100% damage bonus through Fanfare buffs is no joke. Plus, Furina's Pneuma mode provides comparable healing (4.8% Max HP + 462 per tick) when you actually need it.
The real advantage? Furina enables healerless compositions with self-sustaining DPS characters. Kokomi can't do that.
Yelan: The Sub-DPS Queen
Yelan functions as pure Sub-DPS with exceptional single-target Hydro application. Here's the thing—Furina doesn't compete with Yelan; she complements her. Double Hydro resonance reduces Energy Recharge requirements for both characters, and Furina's universal buffing enhances Yelan's damage output.
Furina's Fanfare system provides unmatched universal buffing across all damage types. Geo teams, Physical builds, Anemo comps—she enhances everything. Other Hydro characters can't make that claim.
Common Mistakes (And How to Avoid Them)
Energy Recharge: The Silent Killer
Most common mistake? Underestimating Furina's 60-energy Burst requirements. Solo Hydro teams need 180%+ Energy Recharge for consistent uptime. Solutions include Favonius Sword (61.3% ER substat), double Hydro resonance, or dedicated energy batteries.
Don't be that player with a beautifully built Furina who can't use her Burst.
Mode Management
Using Pneuma during combat reduces DPS by switching away from Ousia's damage-dealing summons. Maintain Ousia mode for off-field damage, reserve Pneuma for healing emergencies only.
Team Building Oversights
Pairing Furina with teams that lack HP fluctuation sources limits Fanfare generation. She needs either self-draining DPS characters (Neuvillette, Arlecchino) or dedicated healers for optimal buff stacking.
Also—avoid Chevreuse teams where Furina's Hydro disrupts Overloaded reactions, and be careful with Nilou Bloom teams where elemental restrictions can limit core generation.
FAQ: Your Burning Questions Answered
Is Furina worth pulling in 6.1? Absolutely. Universal team buffing up to 100% damage bonus enhances virtually every DPS character. Her Nefer synergy and ability to enable healerless compositions makes her a top-tier investment.
Best weapons for Furina in 6.1? Splendor of Tranquil Waters (signature) ranks highest for optimal HP/CRIT scaling. F2P players should grab Festering Desire at R5 for Energy Recharge and Skill damage.
How exactly does Nefer synergy work? Furina's Hydro creates Dendro Cores that Nefer absorbs as Seeds of Deceit, generating Veil stacks for enhanced Burst damage. Furina's universal buffs amplify Nefer's Lunar-Bloom reactions by 75-100%.
Artifact splits for Furina? 4-piece Golden Troupe provides maximum off-field damage (70% total Skill DMG boost). Target 35,000-40,000 HP, 180%+ Energy Recharge, and 60-80% CRIT Rate.
Should I pull Furina or save? Furina offers exceptional long-term value through universal buffing that improves with future character releases. Her C0 functionality and meta relevance make her a safer investment than most limited characters.
How many constellations does Furina need? C0 provides full functionality for most teams. C2 offers the best value upgrade (50-100% DPS increase) for maximum performance. C1 and C3+ provide minimal improvements relative to cost.
The bottom line? Furina's 6.1 rerun isn't just another banner—it's your chance to future-proof your account with the most versatile support in the game.


