

What Makes Nod-Krai Different (Spoiler: Everything)
Forget everything you know about regional politics. Nod-Krai doesn"t answer to an Archon—it"s run by the Voynich Guild, which creates some fascinating power dynamics we haven"t seen before. The archipelago breaks down into three main areas, each with its own personality:

Paha Isle houses the Fatui stronghold and Kuuvahki Experimental Design Bureau. Think high-tech meets military industrial complex. Lempo Isle centers around Nasha Town—your typical trading hub, but with that distinctly Snezhnayan edge. Then there"s Hiisi Island, where the Frostmoon Scions worship a Moon Goddess who"s… well, conspicuously absent.
The “Song of the Welkin Moon” storyline spans the entire Version 6.x cycle through October 2026. That"s ambitious, even for miHoYo. You"ve got five major factions pulling strings: Frostmoon Scions, Lightkeepers (anti-Abyssal defenders), Fatui under Il Dottore"s command, the Wild Hunt (Abyssal entities), and the Hexenzirkel—Alice and Nicole"s coven finally getting proper screen time.
Quick note: You"ll need previous Archon Quests completed for access. No shortcuts here.
Your Two-Week Nod-Krai Exploration Plan
Days 1-3: Start with Lempo Isle. Nasha Town"s your entry point for NPC questlines and faction introductions. Blue Amber Lake has environmental puzzles that need Electro application—keep that in mind when building your exploration team. Moonlit Flora grows here (that"s Lauma"s ascension material), and you"ll want to establish Voynich Guild reputation early.
Days 4-7: Paha Isle gets serious. The Kuuvahki Bureau infiltration missions throw high-level enemies at you, but the rewards—Ancient Runes and Crystallized Moonbeams—make it worthwhile. Here"s something interesting: Moonsign Chests require Nod-Krai characters in your party. The industrial facilities drop technological blueprints tied to Voynich Guild reputation.
Days 8-14: Hiisi Island for the long haul. Frostmoon Scions ruins contain ancient artifacts and Moon Goddess worship sites that feel genuinely mysterious. The faction-specific questlines here unlock exclusive Lunar Reaction enhancement materials. Hidden treasures work through the new Moonsign system—more on that later.
Ineffa: The Electro Shield Queen
Let"s talk mechanics. Ineffa converts standard Electro-Charged into Lunar-Charged reactions that can actually crit. Her shields scale at 250% ATK (with 250% effectiveness against Electro), and she summons this entity called Birgitta for coordinated attacks. The CRIT Rate progression bonus hits +19.2%—respectable for a sub-DPS.
Build-wise, you"ve got options. 2pc Thundering Fury + 2pc Tenacity gives you Electro DMG +15% and HP +20%. Alternatively, 4pc Emblem of Severed Fate provides ER +20% with Burst DMG scaling. Main stats should be ATK%/ER% Sands, Electro DMG Goblet, CRIT Rate Circlet. Substat priority: CRIT Rate > CRIT DMG > ATK% > ER% > EM.
For weapons, her signature Fractured Halo is obviously optimal. Engulfing Lightning works for ER scaling, Staff of Homa for CRIT DMG/HP scaling. F2P players should grab The Catch (free CRIT Rate + Burst DMG) or Favonius Lance for ER support.
Constellation-wise? C1 gives 50% Lunar-Charged DMG boost based on ATK. C2 adds AoE Electro DMG at 300% ATK plus party shields. Total investment: 420,000 Mora, 168 regional specialty materials, 46 weekly boss drops.
Lauma: Bloom Reactions Just Got Scary
Here"s where things get wild. Lauma converts ALL Bloom reactions to Lunar-Bloom with 15% base CRIT Rate and 100% CRIT DMG. Her Elemental Mastery progression hits +115.2, and she"s got this white deer transformation for alternate sprint. The passive talent enables Bloom/Hyperbloom/Burgeon critical hits across the board.
As someone who"s been running Bloom teams since Sumeru dropped, this feels like Christmas morning.
Artifact recommendations: 4pc Silken Moon"s Serenade (ER +20%, party EM +60/120) or 4pc Deepwood Memories for Dendro DMG +15% with RES shred. Main stats get flexible—EM/ER% Sands, EM/Dendro DMG Goblet, EM/CRIT Rate Circlet depending on team needs.
Team synergies are extensive. Lunar-Bloom core runs Lauma/Hydro/Electro/Anemo. Hyperbloom variant uses Lauma/Xingqiu/Kuki/Nahida. Burgeon focus goes Lauma/Kokomi/Thoma/Kazuha. Ascension costs 1,652,500 Mora per talent with Nagadus Emerald gems and new domain talent books.
Who Should You Pull? (The Real Talk)
Ineffa"s strengths: Sub-DPS with 250% ATK shield scaling, consistent Electro application, CRIT Rate bonus, defensive utility. She excels in survivability-focused content where staying alive matters as much as damage output.
Lauma"s advantages: Dendro reaction enabler with EM scaling, that 15% base CRIT Rate for Bloom reactions, broader team applications, higher damage ceiling through Lunar-Bloom mechanics.
Meta positioning breaks down like this: Ineffa revolutionizes Electro-Charged teams that need defensive support. Lauma completely changes Bloom compositions with critical-capable reactions.
For investment priority? F2P players should favor Lauma for versatility. Spenders benefit from both C1 constellations—Lauma gets healing, Ineffa provides team damage.
Don"t Make These Mistakes (Trust Me)
Ineffa errors I"m already seeing in beta footage: Neglecting shield scaling by building ATK% over HP%, ignoring Energy Recharge requirements (you need minimum 140% for consistent burst), building pure DPS without support utility, overlooking Lunar-Charged team synergy requirements.
Lauma pitfalls: Undervaluing Elemental Mastery (aim for 800 EM minimum), focusing on personal damage over team reaction support, insufficient Energy Recharge (160% minimum), misunderstanding Lunar-Bloom trigger mechanics.
Universal mistakes that"ll cost you: Farming artifacts before character acquisition, ignoring regional specialty pre-farming, inadequate Mora reserves (keep 2+ million), neglecting weapon banner planning.
What Players Are Actually Saying
Community reception sits at 41.35% positive—10.58% “freakin HYPE,” 30.77% “interested.” Another 24.04% are taking a wait-and-see approach, while 34.62% express concerns about Snezhnaya delays and power creep complexity.
Early adopter feedback suggests Lunar Reactions provide meaningful mechanical evolution that addresses long-standing community requests. The Moonsign system encourages diverse team building, though some worry about overwhelming newer players with substantial resource investment requirements.
Content creators are noting significant power increases for Bloom-based teams, new viability for Electro-Charged compositions, and further marginalization of Physical damage builds in meta relevance.
Team Compositions That Actually Work
Optimal Ineffa teams: Ineffa/Yelan/Kazuha/Bennett for Lunar-Charged focus.

Ineffa/Kokomi/Nahida/Lauma for dual Lunar reactions. Ineffa/Xingqiu/Fischl/Jean for Electro-Charged core.
Lauma synergy teams: Lauma/Aino/Kuki/Kazuha (Hyperbloom), Lauma/Kokomi/Thoma/Sucrose (Burgeon), Lauma/Yelan/Ineffa/Nahida (dual Lunar optimization).
Here"s something cool: Nod-Krai Resonance activates when non-Nod-Krai characters use abilities, increasing Lunar Reaction damage up to 36% for 20 seconds. Scaling varies by element—Pyro/Electro/Cryo get +0.9% per 100 ATK, Hydro gets +0.6% per 1000 HP, Geo gets +1% per 100 DEF, Anemo/Dendro get +2.25% per 100 EM.
Performance Benchmarks (The Numbers That Matter)
Ineffa targets: Shield absorption 15,000+ when well-built, Lunar-Charged damage 25,000+ per reaction, Energy Recharge 140-160% for consistent burst uptime, CRIT Rate 70%+ for optimal DPS contribution.
Lauma expectations: Elemental Mastery 800-1000 minimum, Lunar-Bloom damage 30,000+ per seed, Energy Recharge 160-180%, party EM buff +120 at maximum stacks.
Team DPS ceilings: Ineffa teams hit 40,000+ DPS, Lauma teams reach 50,000+ through optimized Lunar-Bloom scaling, dual Lunar teams can push 60,000+ DPS with proper investment.
These numbers assume well-invested characters with appropriate artifacts and weapons.
Resource Planning (Start Now)
Nod-Krai exclusives include: Moonlit Flora (character ascension), Crystallized Moonbeams (weapon enhancement), Ancient Runes (artifact enhancement), Nod-Krai Crystals (regional currency exchange).
Farming locations: Paha Isle industrial facilities for technological materials, Hiisi Island ruins for ancient artifacts, Lempo Isle Blue Amber Lake for environmental puzzle rewards, Moonsign Chest locations for enhanced materials.
Resource management strategy: Pre-farm universal materials (420,000 Mora per character, Hero"s Wit EXP books), maintain 2+ million Mora reserves, collect Elemental crystals, stock weekly boss materials for potential overlap.
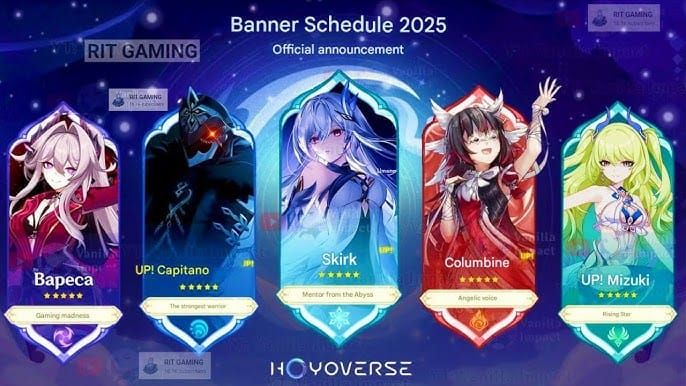
Banner Timeline and Pull Planning
Phase 1 (September 10): Lauma + Yelan rerun. Phase 2 (October 1): Flins + Nahida rerun.
Guaranteed character requires 180 pulls (28,800 Primogems), weapon guarantee needs 240 pulls (38,400 Primogems).
The Version 6.x roadmap looks stacked: 6.1 brings Durin (Pyro Sword), 6.2 introduces Nefer (Dendro Bow), 6.3 features Columbina (Hydro Polearm), 6.5 gives us Varka (Anemo Claymore), 6.6 delivers Nicole Reeyn (Cryo), 6.7 finally brings Alice (Pyro).
Anniversary benefits include first-time top-up bonus reset, roughly 20 free Intertwined Fates, potential free standard 5-star selection, enhanced rewards compared to previous years. Budget 400+ pulls for optimal Version 6.0 acquisition.
Quick FAQ
What makes Lunar Reactions special? They feature 15% base CRIT Rate and 100% CRIT DMG, scaling with both Elemental Mastery and CRIT stats for significantly higher damage than standard reactions.
Ineffa or Lauma first? Lauma offers broader applications for reaction teams, while Ineffa provides unique Electro-Charged enhancement with defensive utility. Choose based on roster gaps.
How does Nod-Krai Resonance work? Activates when non-Nod-Krai characters use abilities, providing up to 36% Lunar Reaction damage increase for 20 seconds with element-specific scaling bonuses.
Pre-farming priorities? Universal materials (Mora, EXP books, elemental crystals), Elemental Mastery artifacts for Lauma, CRIT artifacts for Ineffa, weekly boss materials for potential overlap.
✅ Official direct recharge, 100% secure
✅ No waiting – top-up arrives in 7 seconds
✅ Big discounts, low prices to save more
✅ 7×24-hour customer service, ready to assist anytime


