

What's Actually Changed in 6.1 Luna II
Let's be honest – Version 6.1 Luna II (dropped October 22, 2025) didn't just tweak the meta, it completely flipped the script. The new Lunar-Bloom reactions and enhanced Dendro synergies have forced us to rethink everything we thought we knew about character rankings.
Here's how we're evaluating characters now: sustained damage over 20-second rotations (because that's what actually matters in Spiral Abyss), elemental reaction potential with these new Luna II mechanics, and team flexibility across different floor types. No more theoretical DPS that only works in perfect conditions.
How We Actually Rank These Characters
Our methodology isn't some abstract formula – it's practical testing that reflects real gameplay. We start with role identification: Main DPS units need to hold the field for 70% of rotation time, Sub-DPS characters must deliver meaningful off-field damage, and Supports need to provide tangible buffs or healing that actually impact clear times.
Then comes the real work. We cross-reference patch notes with community testing data, optimize stats following the tried-and-true 1:2 CRIT ratio (50% Rate/200% DMG), and ensure Sub-DPS units hit that crucial 180% Energy Recharge threshold. Every character gets put through 20-second rotation testing – because that's what separates theory from practice.
The rating system spans from SS-tier (meta-defining versatility that works everywhere) down to D-tier (characters you'd only use if you literally have no other options). Each tier considers both whale optimization and F2P constraints, with clear annotations for constellation-dependent performance.
Luna II's Impact – What You Need to Know
Here's where things get interesting. Luna II's Lunar-Bloom mechanics convert standard Bloom cores into these enhanced Seeds of Deceit – but there's a catch. You need Moonsign level 2 activation through Nod-Krai region characters, which completely changes Dendro team priorities.
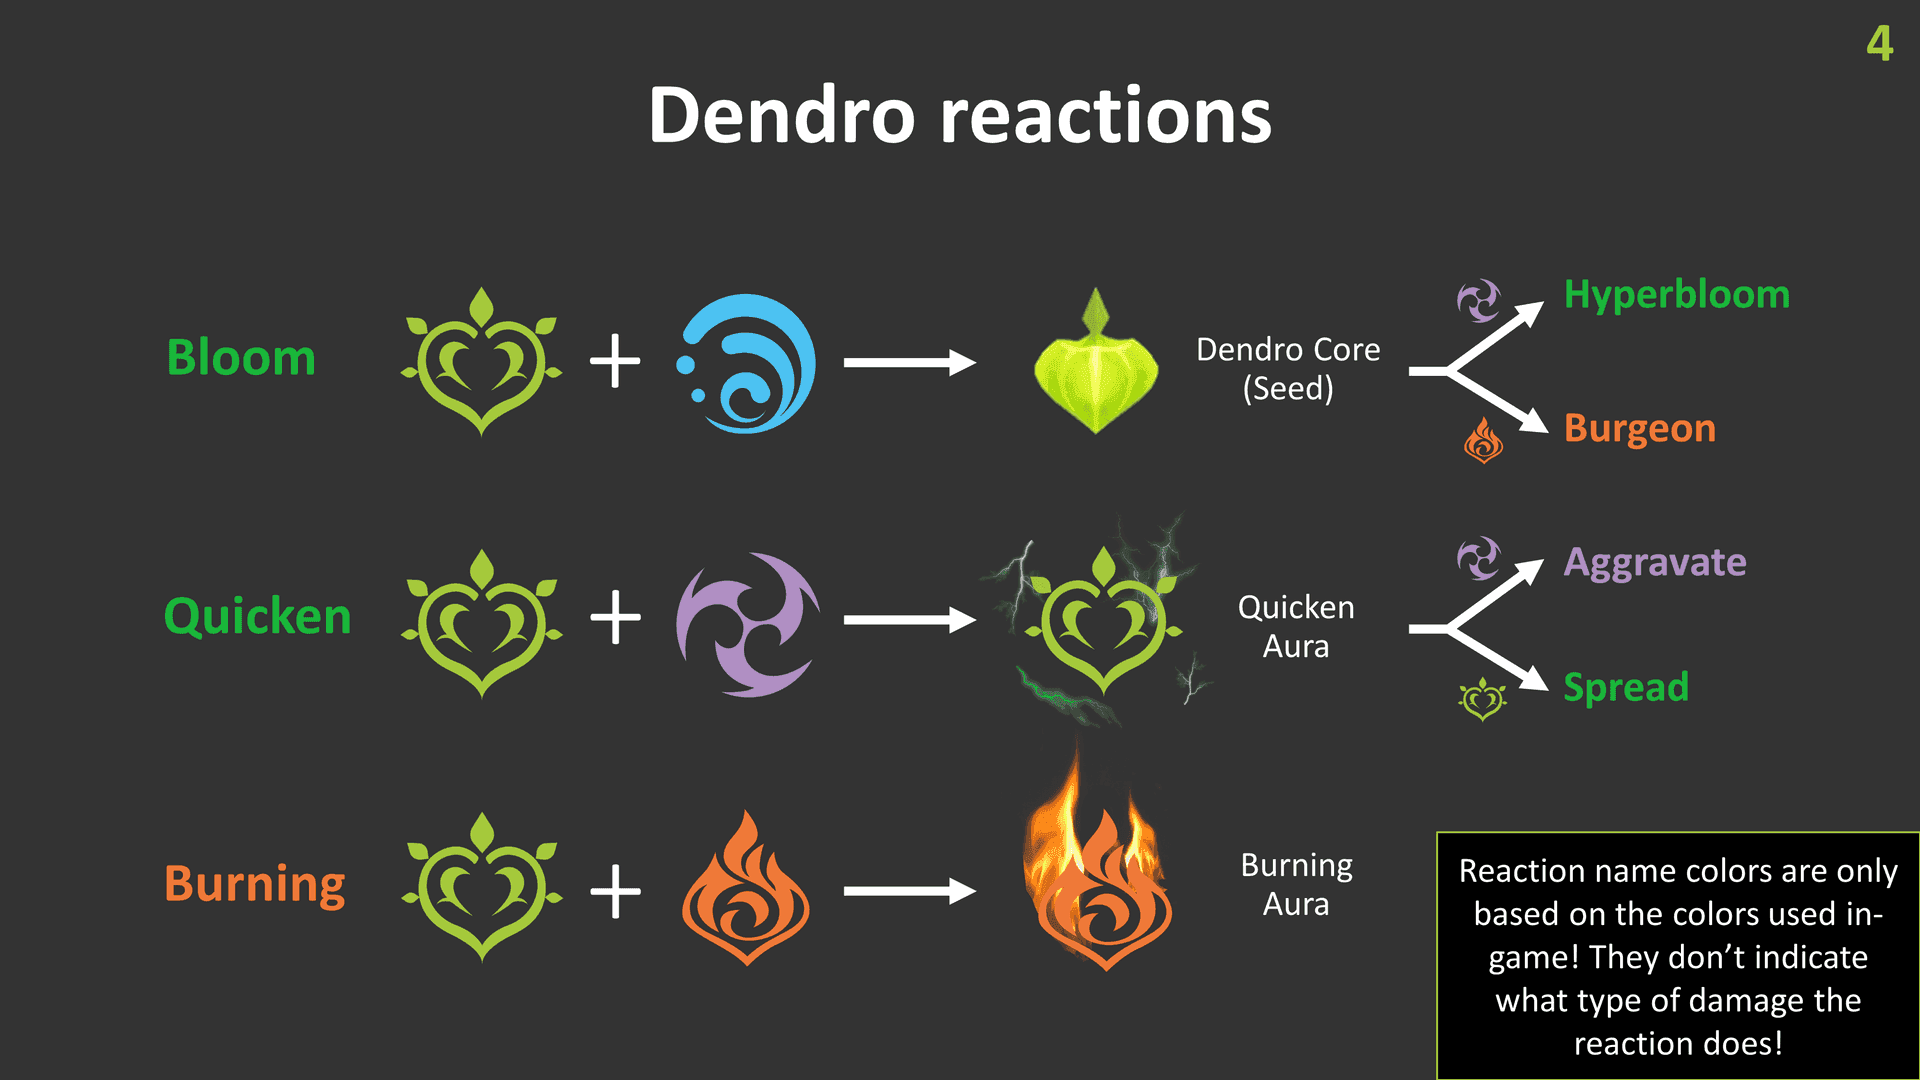
Nefer can leverage these mechanics for 20-30% damage increases over traditional Hyperbloom setups. Meanwhile, Nahida's getting a second wind through Lauma synergies that basically mimic her C2 Dendro application effects. It's like getting a free constellation upgrade.
For players looking to optimize their rosters with these new characters, Genshin Impact Genesis Crystals top up through BitTopup offers competitive pricing and instant delivery for those limited-time banners. BitTopup's secure transactions and 24/7 customer support make it the go-to choice for building meta teams without breaking the bank.
What Actually Matters in Rankings
Performance evaluation weighs DPS calculations against utility contributions – because raw damage means nothing if you can't survive to deal it. Main DPS characters need consistent on-field presence with proper CRIT scaling and ideally their signature weapons. Sub-DPS units are all about off-field consistency and elemental application frequency, with Energy Recharge thresholds that ensure you can actually use their bursts when needed.
Support characters? They're judged on team-wide damage amplification, survivability improvements, and reaction facilitation. A support that looks good on paper but doesn't translate to faster clear times isn't worth your investment.
SS-Tier Characters: The Meta Definers
SS-tier isn't just about being good – it's about being irreplaceable. We've got 14 five-star and 2 four-star units here that offer exceptional performance across multiple team compositions while staying relevant as the meta evolves.
The DPS Kings and Queens
Mavuika (5★ Pyro Claymore) isn't just dominating – she's rewriting what we expect from Pyro DPS. Her Lunar-Charged reaction synergies outperform traditional Vaporize setups by 20-30%, which is honestly ridiculous. Her kit scales beautifully with ATK% and CRIT substats while providing team-wide Pyro application that enables other characters.
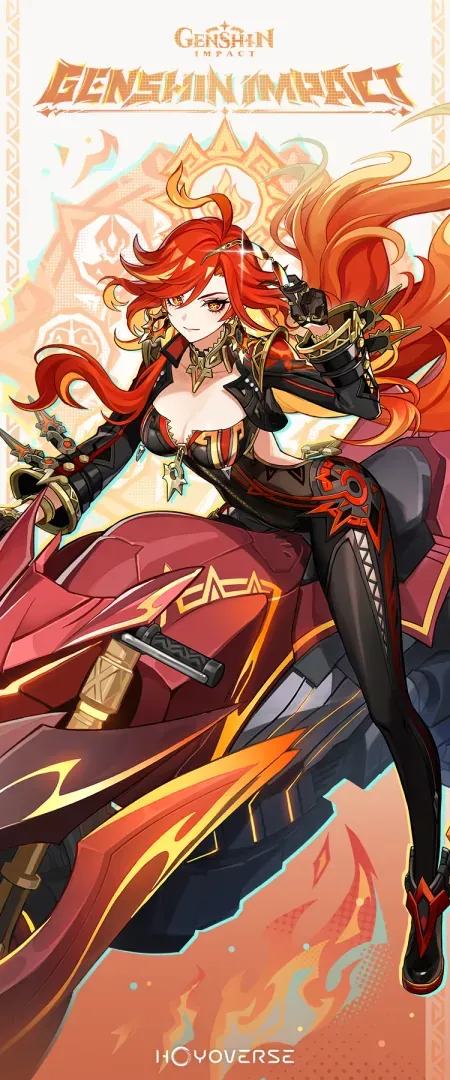
Build her with Crimson Witch 4-piece, focusing on ATK%/Pyro DMG/CRIT main stats. You're aiming for that 50% CRIT Rate and 200% CRIT DMG sweet spot – anything less and you're leaving damage on the table.
Neuvillette (5★ Hydro Catalyst) maintains his SS-tier status through sheer versatility. His Charged Attack scaling benefits from both solo performance and team buffs, making him incredibly flexible. The Hydro application enables Vaporize, Bloom, and Electro-Charged reactions with minimal field time requirements.
Go with Heart of Depth 4-piece using HP%/Hydro DMG/CRIT main stats. His HP-scaling damage conversion means you're not sacrificing survivability for damage output.
Flins (5★ Electro Polearm) has emerged as the definitive Electro Main DPS for Luna II content. She absolutely excels in Electro-Charged compositions with Hydro supports, and her signature weapon Bloodsoaked Ruins provides optimal ATK scaling. Thundering Fury 4-piece maximizes her Electro DMG bonus effects during those crucial 70% field time rotations.
Sub-DPS Powerhouses
Yelan (5★ Hydro Bow) continues her SS-tier dominance through unmatched off-field Hydro application and HP-scaling damage that just keeps getting better. Golden Troupe 4-piece with HP%/Hydro DMG/CRIT optimizes her Sub-DPS potential, but make sure you hit that 180% Energy Recharge threshold for reliable rotations.
Ineffa (5★ Electro Polearm) specializes in off-field Electro application with enhanced damage during Lunar-Charged states. She synergizes beautifully with Hydro Main DPS while providing consistent elemental reaction triggers. Emblem of Severed Fate 4-piece with ER%/Electro DMG/CRIT maximizes her Burst damage contribution.
Furina (5★ Hydro Sword) offers unparalleled versatility as both Sub-DPS and Support, providing team-wide damage buffs alongside consistent Hydro application. Her dual HP and CRIT scaling enables flexible optimization – Golden Troupe 4-piece for Sub-DPS emphasis or Noblesse Oblige 4-piece for Support focus.
The Support Essentials
Kazuha (5★ Anemo Sword) remains the premier Anemo Support through Elemental Mastery sharing and resistance shredding that never gets old. Viridescent Venerer 4-piece with EM/EM/EM provides that crucial -40% elemental resistance reduction while buffing team damage through swirl reactions.
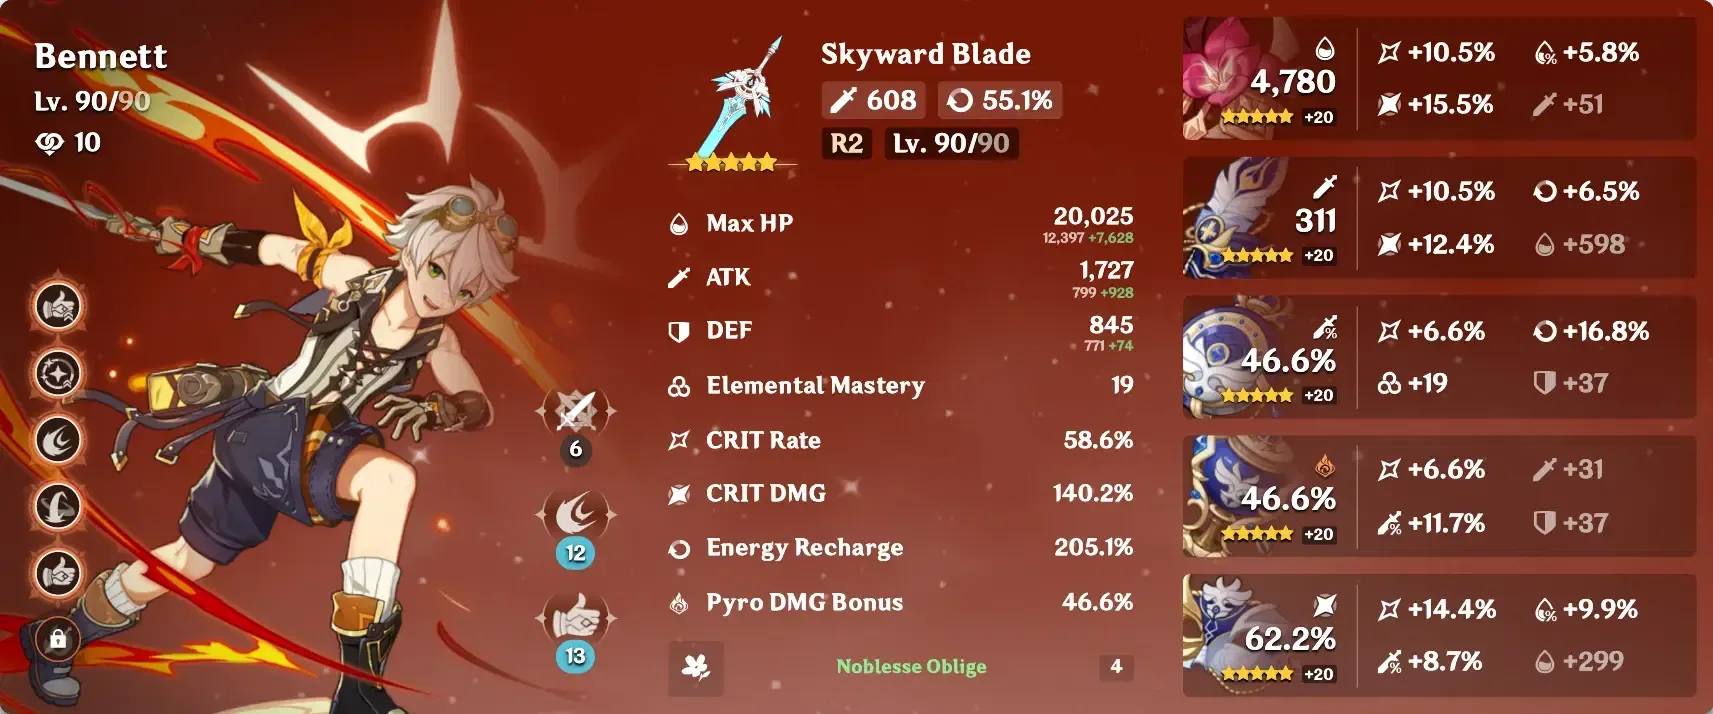
Bennett (4★ Pyro Sword) achieves S-tier despite his four-star rarity through unmatched ATK buffing and healing. Noblesse Oblige 4-piece with ER%/HP%/Healing Bonus optimizes his support potential – just make sure you hit 200% Energy Recharge for consistent Burst uptime.
Xilonen (5★ Geo Support) provides crucial resistance shredding and defensive utility that's perfectly suited for Luna II content. She offers superior damage mitigation compared to Zhongli while maintaining offensive support through Geo resonance. Archaic Petra 4-piece enhances her elemental damage buffing potential.
For mid-game players looking to expand their character rosters efficiently, cheap Genshin Impact recharge crystals online from BitTopup ensures cost-effective banner access. Their competitive rates and reliable service make it the smart choice for budget-conscious players building competitive teams.
S-Tier Characters: Exceptional Performers
S-tier encompasses 27 characters offering excellent performance in specialized roles while maintaining broad applicability across endgame content. These aren't quite meta-defining, but they're damn close.
Strong DPS Alternatives
Nefer (5★ Dendro Catalyst) introduces those game-changing Lunar-Bloom mechanics as our featured S-tier Main DPS. She converts Dendro Cores into enhanced Seeds of Deceit for empowered Charged Attacks that hit like trucks. Optimal team composition includes Lauma for Dendro resonance, Aino for Hydro application, and Nahida for additional Dendro support.

Night of the Sky's Unveiling 4-piece with EM/EM/CRIT maximizes her Lunar-Bloom damage potential. It's a completely different playstyle from traditional DPS units, but the payoff is substantial.
Arlecchino (5★ Pyro Polearm) delivers exceptional burst damage through Bond of Life mechanics, excelling in quick-clear scenarios where you need things dead fast. She requires careful HP management, but rewards skilled play with the highest single-target damage outputs in the game. Crimson Witch 4-piece with ATK%/Pyro DMG/CRIT makes her particularly effective against single-target bosses.
Chasca (5★ Anemo Bow) provides unique Anemo Main DPS capabilities with enhanced mobility and crowd control that feels refreshing to play. She synergizes with elemental infusion mechanics while maintaining consistent damage output. Viridescent Venerer 4-piece with ATK%/Anemo DMG/CRIT supports her hybrid damage and utility role.
Versatile Sub-DPS Picks
Nahida (5★ Dendro Catalyst) maintains S-tier relevance through enhanced Dendro application synergies with Luna II mechanics. Her Elemental Mastery scaling provides substantial team damage amplification while enabling consistent Dendro reactions. Deepwood Memories 4-piece with EM/EM/CRIT works best – you're aiming for 1000+ Elemental Mastery for maximum effectiveness.
Yae Miko (5★ Electro Catalyst) offers consistent off-field Electro damage through her turret-style Elemental Skill. She provides reliable elemental application for reaction teams while contributing meaningful personal damage. Golden Troupe 4-piece with ATK%/Electro DMG/CRIT enhances her Sub-DPS potential significantly.
Emilie (5★ Dendro Polearm) specializes in off-field Dendro application with enhanced damage during Burning reactions. She synergizes particularly well with Pyro Main DPS units while providing consistent elemental reaction triggers. Emblem of Severed Fate 4-piece maximizes her Burst contribution.
Reliable Support Options
Zhongli (5★ Geo Polearm) still provides unmatched defensive utility through his shield mechanics, though his offensive support capabilities lag behind Xilonen in Luna II content. Tenacity of the Millelith 4-piece with HP%/HP%/HP% maximizes shield strength while providing team ATK buffs.
Baizhu (5★ Dendro Catalyst) offers comprehensive healing and shielding with Dendro application for reaction teams. His HP-scaling kit provides substantial survivability improvements while enabling Dendro resonance activation. Ocean-Hued Clam 4-piece optimizes his healing output.
Kokomi (5★ Hydro Catalyst) delivers consistent healing with reliable Hydro application for reaction teams. She eliminates CRIT scaling in favor of HP-based damage and healing, which simplifies building her significantly. Ocean-Hued Clam 4-piece with HP%/HP%/Healing Bonus main stats.
A-Tier Characters: Excellent Choices
A-tier includes 23 characters offering solid performance in specific scenarios. They require more investment or team support to achieve optimal results, but they're far from dead weight.
Situational DPS Units
Hu Tao (5★ Pyro Polearm) maintains relevance through Vaporize team compositions, though her performance trails behind Mavuika in Lunar-Charged scenarios. Her low HP mechanics require careful management but reward skilled play with high burst damage potential. Crimson Witch 4-piece with HP%/Pyro DMG/CRIT works best – just make sure you pair her with Xingqiu or Yelan for consistent Vaporize reactions.
Ayaka (5★ Cryo Sword) excels in Freeze team compositions with exceptional Burst damage against grouped enemies. She requires specific team support through Hydro application and Anemo grouping, but delivers outstanding performance in optimal conditions. Blizzard Strayer 4-piece with ATK%/Cryo DMG/CRIT DMG leverages those innate CRIT Rate bonuses beautifully.
Ganyu (5★ Cryo Bow) provides consistent Charged Attack damage with Cryo application for Freeze or Melt reactions. She offers both Main DPS and Sub-DPS flexibility while requiring protection from interruption during Charged Attack sequences. Wanderer's Troupe 4-piece for Melt or Blizzard Strayer 4-piece for Freeze compositions.
Niche Sub-DPS Characters
Albedo (5★ Geo Sword) offers consistent off-field Geo damage through his Elemental Skill turret mechanics. He provides reliable damage contribution while enabling Geo resonance activation, though his utility remains limited outside specific team compositions. Husk of Opulent Dreams 4-piece with DEF%/Geo DMG/CRIT optimizes his scaling.
Fischl (4★ Electro Bow) delivers reliable off-field Electro application through Oz's consistent damage output. She synergizes well with reaction teams while providing meaningful personal damage contribution. Golden Troupe 4-piece with ATK%/Electro DMG/CRIT enhances her Sub-DPS potential.
Xiangling (4★ Pyro Polearm) maintains viability through her powerful Pyronado Burst, though she requires significant Energy Recharge investment for consistent rotations. Emblem of Severed Fate 4-piece with ER%/Pyro DMG/CRIT optimizes Burst damage while ensuring reliable uptime.
B-Tier Characters: Solid but Situational
B-tier encompasses 23 characters with limited applications in Version 6.1 content. They typically require significant investment or very specific scenarios to achieve meaningful performance.
Outdated DPS Options
Diluc (5★ Pyro Claymore) represents the original Pyro Main DPS design philosophy, but honestly? He lacks the scaling and utility of modern alternatives. He provides straightforward Pyro damage but simply can't compete with Mavuika or Arlecchino in current meta conditions. Standard DPS artifacts with ATK%/Pyro DMG/CRIT maintain basic functionality.
Keqing (5★ Electro Sword) offers mobility and consistent Electro damage but suffers from limited scaling potential and reaction limitations. She provides decent performance in Electro-Charged teams but trails significantly behind Flins or other modern Electro options.
Razor (4★ Electro Claymore) functions as a basic Physical DPS with limited elemental synergy potential. He requires significant field time investment while providing minimal team utility, making him unsuitable for reaction-based meta compositions.
Replaced Sub-DPS Units
Beidou (4★ Electro Claymore) provides counter-based Electro damage with defensive utility, but requires specific team compositions for meaningful performance. Her Energy Recharge requirements and conditional damage mechanics limit practical applications.
Rosaria (4★ Cryo Polearm) offers CRIT Rate sharing and off-field Cryo application but lacks the damage output or utility of premium Cryo options. She provides basic support functionality without exceptional benefits.
Thoma (4★ Pyro Polearm) specializes in shield stacking with Pyro application but offers limited offensive contribution. He requires significant investment for minimal defensive improvement over superior alternatives.
Nefer Deep Dive: The Lunar-Bloom Queen
Nefer introduces Lunar-Bloom mechanics as Version 6.1's featured Dendro Main DPS, and honestly? She's completely changed how we think about Dendro teams. Her kit converts standard Dendro Cores into enhanced Seeds of Deceit through Ascendant Gleam activation, providing substantial damage amplification for Charged Attack sequences.
Understanding Her Kit
Her Elemental Skill creates Dendro application zones while generating initial Dendro Cores through Hydro interaction. The real magic happens with her Charged Attack sequence, which consumes Seeds of Deceit for enhanced damage multipliers. It requires careful timing and positioning, but the payoff is substantial.
Her Elemental Burst provides team-wide Elemental Mastery buffs while extending Lunar-Bloom duration for sustained damage windows. Passive talents enhance Elemental Mastery scaling while reducing Charged Attack stamina consumption during Lunar-Bloom states.
Constellation upgrades improve Energy Recharge efficiency and extend buff durations, though C0 performance remains competitive with proper team support. Optimal stat distribution prioritizes 1000+ Elemental Mastery with CRIT substats for consistent damage output.
Best Team Compositions
The Premium Lunar-Bloom Team features Nefer with her Reliquary of Truth signature weapon, Lauma providing Dendro resonance and resistance shredding, Nahida for additional Dendro application, and Aino for consistent Hydro triggers. This achieves maximum Lunar-Bloom uptime while optimizing elemental reaction frequency.
Rotation sequence goes like this: Nahida Normal Attack into Burst activation, Aino Skill and Burst for Hydro application, Nahida's Elemental Skill for ongoing Dendro application, Lauma's Skill and Burst for resistance reduction, then Nefer's Elemental Skill activation followed by two Charged Attacks with dash canceling, finishing with her Elemental Burst for sustained damage output.
The F2P Alternative substitutes Dendro Traveler for Lauma and Barbara for premium Hydro options, while maintaining Aino for Moonsign activation. You can still achieve 3-star rating performance, though it requires more careful resource management and rotation timing.
Constellation Investment
C1 provides Energy Recharge improvements and enhanced Elemental Skill damage – quality-of-life improvements that make rotations much smoother. C2 extends Lunar-Bloom duration while adding team-wide damage buffs, representing the primary damage constellation worth considering.
C4 and C6 provide additional utility and damage scaling, but require significant investment for marginal improvements over C2 performance levels. F2P players can achieve competitive performance at C0 with proper team composition and artifact optimization.
What's Actually Changed in the Meta
Version 6.1 introduces fundamental changes to character viability through Lunar-Bloom mechanics and updated artifact sets, creating new optimization pathways while maintaining existing team composition viability.
Character Buffs and Nerfs
Nahida receives indirect buffs through Lauma synergies that replicate her C2 Dendro application effects, elevating her to S-tier status in Lunar-Bloom compositions. Her Elemental Mastery scaling gains additional value through enhanced reaction multipliers and team buffing capabilities.
Zhongli experiences relative performance decline compared to Xilonen's superior offensive support capabilities, though his defensive utility remains unmatched for players prioritizing survivability over damage optimization.
Sucrose gains relevance through Elemental Mastery sharing in Lunar-Bloom teams, providing a budget-friendly alternative to Kazuha while maintaining competitive team buffing capabilities through Viridescent Venerer artifact synergies.
New Synergies Worth Knowing
Lunar-Charged reactions create enhanced damage multipliers for Pyro and Electro Main DPS units, favoring Mavuika and Flins over traditional Vaporize or Electro-Charged compositions. These mechanics provide 20-30% damage improvements in optimal team configurations – which is honestly game-changing.
The new Silken Moon's Serenade artifact set enables new optimization pathways for Elemental Mastery scaling characters, providing +60 Elemental Mastery and enhanced Elemental DMG bonuses for Lunar reaction participants. This set particularly benefits Dendro and Hydro characters in reaction-focused teams.
Moonsign mechanics require Nod-Krai region character participation for optimal activation, creating team building constraints while providing substantial damage amplification for compatible compositions.
Smart Investment Priorities
Resource allocation in Version 6.1 requires careful consideration of character roles, constellation dependencies, and long-term meta stability to maximize account progression efficiency.
F2P Must-Haves
Bennett represents the highest priority four-star investment, providing universal team compatibility and scaling benefits that remain relevant across all content types. C1 removes HP restrictions while C6 provides Pyro infusion for compatible Main DPS units.
Xingqiu offers essential Hydro application for reaction teams while contributing meaningful Sub-DPS damage through Burst mechanics. Constellation upgrades improve damage reduction and Hydro application frequency, making him valuable for long-term investment.
Fischl provides consistent off-field Electro application with scaling damage contribution, particularly effective in Electro-Charged and Hyperbloom team compositions. C6 represents a significant damage upgrade while maintaining accessibility through standard banner availability.
Aino emerges as the premier four-star addition in Version 6.1, offering Hydro Sub-DPS capabilities with Moonsign activation for Lunar-Bloom teams. Her kit provides F2P access to Luna II mechanics while maintaining competitive damage output.
Whale vs F2P Differences
Premium investment enables access to signature weapons and constellation upgrades providing substantial performance improvements over F2P alternatives. Signature weapons typically offer 15-20% damage increases while providing specialized passive effects that enhance character kit synergies.
C2 constellations for five-star characters often represent optimal investment breakpoints, providing significant damage or utility improvements without requiring excessive resource commitment. Examples include Raiden's C2 defense ignore and Nahida's C2 Dendro application enhancement.
Artifact optimization through resin refresh enables perfect substat distributions maximizing character potential, though these improvements provide diminishing returns compared to basic optimization standards achievable through regular gameplay.
Resource Allocation That Actually Works
Talent priority focuses on damage-dealing abilities first. Normal Attack talents for Main DPS characters and Elemental Burst talents for Sub-DPS units should receive priority investment to level 8-9. Support character talents require minimal investment beyond level 6 for most applications.
Artifact farming should prioritize set completion over perfect substats – 4-piece set bonuses provide more significant benefits than marginal substat improvements. The 1:2 CRIT ratio standard provides achievable optimization targets without excessive farming requirements.
Weapon investment follows character priority, with Main DPS weapons receiving maximum enhancement while support weapons require only functional enhancement levels. Four-star weapons often provide competitive alternatives to five-star options with proper refinement investment.
Team Building That Actually Works
Effective team composition in Version 6.1 balances elemental synergies, role distribution, and rotation efficiency to maximize damage output while maintaining survivability across diverse content types.
Core Compositions
Lunar-Bloom Core utilizes Nefer as Main DPS with Lauma for Dendro resonance, Aino for Hydro application, and a flexible fourth slot for additional support or Sub-DPS contribution. Excels in sustained damage scenarios while providing consistent elemental reaction triggers.
Electro-Charged Optimization features Flins as Main DPS with Ineffa for off-field Electro application, Yelan for Hydro Sub-DPS, and Sucrose for Elemental Mastery sharing and crowd control. Achieves high single-target and AoE damage through reaction amplification.
Pyro Vaporize Standard employs Mavuika as Main DPS with Xingqiu for Hydro application, Bennett for ATK buffing and healing, and Kazuha for resistance shredding and damage amplification. Provides reliable performance across all content types.
Flexible Options That Work
National Team Variants adapt the classic Xiangling/Xingqiu/Bennett core with flexible fourth slots including Sucrose for crowd control, Chongyun for Melt reactions, or Fischl for Overloaded damage. These provide accessible high-performance options for F2P players.
Freeze Compositions utilize Ayaka or Ganyu as Main DPS with Kokomi or Mona for Hydro application, Diona for Cryo resonance and healing, and Kazuha for crowd control and resistance shredding. They excel against groups of freezable enemies.
Hyperbloom Variations feature Dendro application through Nahida or Dendro Traveler, Hydro triggers from Kokomi or Barbara, Electro activation through Kuki Shinobu or Fischl, and a flexible fourth slot for additional utility or damage contribution.
FAQ
Who are the best DPS characters in Genshin Impact 6.1? Mavuika leads as premier Pyro Main DPS through Lunar-Charged synergies, followed by Neuvillette for Hydro versatility and Flins for Electro-Charged compositions. These characters provide exceptional damage scaling with proper team support and artifact optimization.
How does Luna II affect the meta in Genshin Impact? Luna II introduces Lunar-Bloom mechanics converting Dendro Cores into enhanced Seeds of Deceit, providing 20-30% damage increases for compatible teams. Requires Moonsign activation through Nod-Krai characters while creating new optimization pathways for Dendro and Hydro units.
What makes a character S-tier in Genshin Impact 6.1? S-tier characters demonstrate exceptional performance across multiple team compositions, maintain relevance in evolving meta conditions, and provide either outstanding damage output or essential team utility. They require minimal investment for competitive performance while offering scaling potential through constellation and weapon upgrades.
Which support characters work best with Luna II? Lauma provides optimal Dendro support through resistance shredding and reaction enhancement, while Aino offers accessible Hydro application with Moonsign activation. Bennett and Kazuha maintain universal compatibility across Luna II teams through ATK buffing and resistance reduction respectively.
How has the tier list changed from 6.0 to 6.1? Version 6.1 elevates Nahida to S-tier through Lauma synergies while introducing Nefer as competitive A-tier Dendro Main DPS. Zhongli experiences relative decline compared to Xilonen's offensive support capabilities, while Sucrose gains relevance in Elemental Mastery sharing roles.
What are the best team compositions for Genshin Impact 6.1? Lunar-Bloom teams featuring Nefer, Lauma, Aino, and Nahida provide cutting-edge performance, while traditional compositions like Mavuika Vaporize and Flins Electro-Charged maintain competitive viability. F2P alternatives using National Team variants offer accessible high-performance options across all content types.


