

Why Traditional Strategies Fail in 6.3 Abyss
Floor 12 features enemies with complete CC immunity. Battle-Scarred Rock Crab (4,409,072 HP) and Fireblade Shock Trooper (4,765,990 HP) can't be grouped, frozen, or staggered. Anemo grouping strategies provide zero value.
Moonsign Ascendant Gleam reduces enemy HP by 90%, but strict DPS checks remain. Primordial Bathysmal Vishap's Hydro Armor activates after 30s with +80% RES and drains 10 Energy every 0.5s. Teams need frontloaded damage within vulnerability windows.
Genshin top up Genesis Crystals through BitTopup for secure, instant delivery to build specialized teams.
CC Immunity Problem
Interrupt resistance negates Anemo value. Kazuha's grouping and Venti's Burst don't work on Floor 12 bosses. Freeze, Stun, and Petrification don't stop attack patterns, eliminating safety windows.
Assault Specialist Mek loses Pyro element after two Ousia hits for 25s but stays fully mobile. Can't rely on control for safe damage windows—need shields, healing, or precise dodges.
Boss Mechanics: Shields and Invulnerability
Fireblade Shock Trooper has three shield layers (285,959 HP each) granting +200% RES. Breaking shields within 30s triggers -50% All RES and -60% Electro RES. Electro-Charged deals 600% shield damage, making reactions far more efficient than raw damage.
Wilderness Hunters (2,008,523 HP each) enter Grief-Stricken State at 0 HP, requiring coordinated burst timing. Punishes teams lacking synchronized damage output.
DPS Checks vs Previous Cycles
Chamber 1 First Half requires converting 6 Hermit Seeds with Dendro Cores to break Rock Crab's shield—minimum reaction count threshold. Must generate cores while maintaining damage for 90s timer. Eliminates pure hypercarry strategies ignoring elemental synergies.
Tainted Water-Splitting Phantasm (851,787 HP) and Assault Specialist Mek (817,716 HP) test energy economy. Need 180%+ ER on supports to sustain rotations without grouped enemy kills.
Successful Team Archetype Principles
6.3 teams prioritize elemental reaction damage over character scaling. First Half: 200% Bloom DMG, 75% Lunar-Bloom DMG. Second Half: 200% Electro-Charged DMG, 75% Lunar-Charged DMG. Creates 3-4x multipliers for reaction teams.
Sustained Damage Over Burst Grouping
Reactions bypass grouping by applying consistent auras to single targets. Bloom generates Dendro Cores through Hydro-Dendro regardless of positioning. Electro-Charged maintains dual auras triggering on every attack. Scales with application frequency, not enemy count.
Kaveh Bloom team converts 6 Hermit Seeds at 500% Bloom DMG per seed, 1.5M damage cap per rotation = 9M total damage from reactions alone.
Energy Economy Without CC
Hyperbloom needs 180%+ ER and 200+ EM on trigger characters. Nahida Hyperbloom uses Nahida's 250 EM Burst buff to amplify Kuki Shinobu's triggers while Yelan and Kazuha provide off-field Hydro and EM sharing. Allows continuous Skill cycling without grouped kills.
Hydro Resonance: +25% Max HP. Dendro Resonance: +50 EM. Reduces artifact stat requirements.
Role Distribution
Driver-enabler-support framework replaces traditional DPS-subdps-support. Neuvillette drives with Charged Attacks while Furina and Xilonen enable reactions off-field. Kazuha provides EM sharing and elemental DMG% without grouping value.
Varesa team (Varesa, Iansan, Furina, Xianyun) shows multi-layered enablers where each contributes application, buffs, or healing without specific field time.
Archetype 1: Bloom/Hyperbloom
Bloom teams exploit First Half's 200% Bloom DMG and 75% Lunar-Bloom DMG bonuses. Nilou Bloom (Nilou, Lauma, Aino, Baizhu) creates Bountiful Cores. Nahida Hyperbloom adds Electro triggers through Kuki Shinobu for single-target damage.
How It Works
Bloom generates Dendro Cores when Hydro meets Dendro, dealing AoE after 6s or when triggered by Electro (Hyperbloom) or Pyro (Burgeon). Against Rock Crab's 4.4M HP, six Hermit Seeds break shield while dealing health damage. Scales with character level and EM, not ATK/CRIT.
Hyperbloom converts Cores into homing projectiles for single-target damage. Kuki Shinobu with 200+ EM and 180%+ ER triggers Hyperblooms while healing.
Best Characters
Nahida: Most consistent Dendro via Tri-Karma Purification, marking 8 enemies. 250 EM Burst buff amplifies team reactions. Premier Dendro enabler.
4-star options: Collei, Yaoyao for Dendro. Xingqiu for single-target Hydro, Yelan for higher damage, Barbara for budget healing.
Hyperbloom team: Collei, Yaoyao, Kuki Shinobu, Barbara—full 4-star viability with proper ER/EM.
Support Framework
Baizhu: Shields and healing while applying Dendro. Shield scales with Max HP, synergizes with Hydro Resonance +25% HP.
Kuki Shinobu: Skill applies Electro every 1.5s, triggering Hyperbloom automatically. Healing scales with Max HP, doesn't sacrifice EM investment.
Sample Rotation: Nahida Hyperbloom
- 0-2s: Nahida Skill (mark enemies)
- 2-4s: Kuki Skill (Electro field)
- 4-6s: Yelan Burst (off-field Hydro)
- 6-8s: Kazuha Skill/Burst (EM share, DMG%)
- 8-20s: Nahida on-field Charged Attacks (generate Cores, Shinobu converts to Hyperbloom)
- 20-22s: Yelan Skill (particles)
- 22-24s: Nahida Burst (refresh, EM buff)
24s rotation maintains continuous reactions while cycling Bursts.
Artifact Stats
Nahida: 140-160% ER, EM main stats (Sands/Goblet/Circlet). Deepwood Memories 4pc for -30% Dendro RES shred.
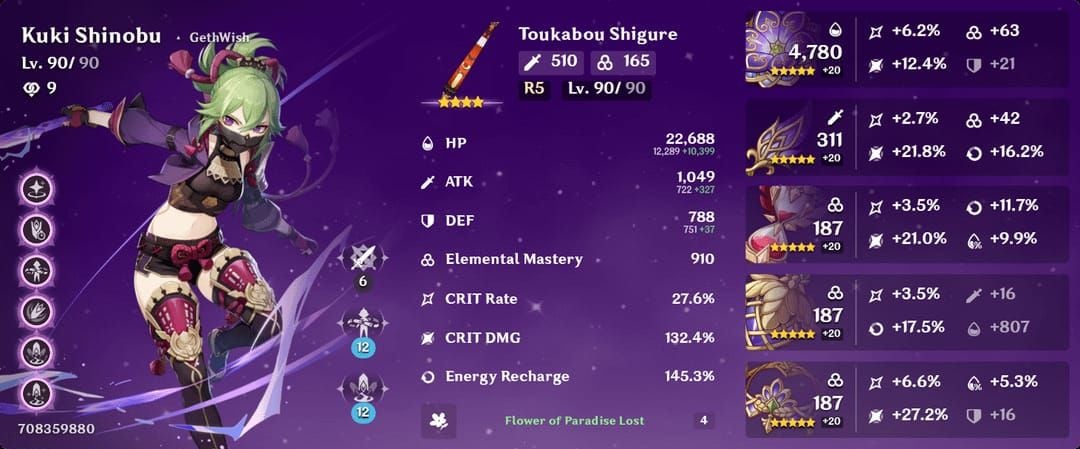
Kuki Shinobu: 180%+ ER, 200+ EM minimum. Gilded Dreams or Flower of Paradise Lost 4pc. Healing Bonus circlet for survival.
Yelan/Xingqiu: 180-200% ER. Emblem of Severed Fate 4pc. HP% Sands over ATK%.
Archetype 2: Electro-Charged
Second Half's 200% Electro-Charged DMG and 75% Lunar-Charged DMG bonuses optimize Electro-Hydro teams. Ororon team (Ororon, Xingqiu, Fischl, Sucrose) maintains continuous Electro-Charged while dealing 600% shield damage to Fireblade Shock Trooper's shields, breaking all three within 30s.
Why It Works
Electro-Charged maintains both Electro and Hydro auras simultaneously—every attack triggers reactions without consuming application. Against single targets with high HP, sustained reaction damage outperforms burst-window strategies.
600% shield damage multiplier makes this essential for Second Half. Breaking Fireblade shields within 30s triggers -50% All RES and -60% Electro RES.
Building Teams
Fischl: Oz provides consistent Electro with 100% uptime. A4 passive triggers additional Electro damage on reactions, creating feedback loop.
Xingqiu: Rain Swords apply Hydro on Normal Attacks, ensuring continuous triggers.
Sucrose: EM sharing via A4 passive and VV 4pc -40% RES shred. 200 EM share from triple-EM builds increases Electro-Charged damage ~35%.
Sample Rotation: Ororon Team
- 0-2s: Fischl Skill (summon Oz)
- 2-4s: Xingqiu Burst + Skill (Hydro, damage reduction)
- 4-6s: Sucrose Skill (EM share, VV shred)
- 6-18s: Ororon on-field (trigger Electro-Charged with Xingqiu/Fischl)
- 18-20s: Fischl Burst (refresh Oz)
- 20-22s: Xingqiu Skill (particles)
- 22-24s: Sucrose Burst if available
100% Electro-Charged uptime through overlapping application.
Buy Genshin Genesis Crystals online at BitTopup for fast, secure transactions with 24/7 support.
Energy Management
Xingqiu: 18s Burst duration, 20s cooldown = 2s gap. Use Skill immediately after Burst for particles during Burst window. 200% ER + Sacrificial Sword achieves near-perfect uptime.
Fischl: 25s Skill cooldown, 12s Oz duration. Use Burst to maintain 100% uptime. Alternate Skill and Burst for continuous Electro.
Archetype 3: Pyro Melt
Pyro Melt leverages Pyro Resonance +25% ATK and reverse Melt's 2x multiplier. Arlecchino, Klee, Mavuika compositions focus on Pyro with Cryo enablers, bypassing complex mechanics for straightforward damage amplification.
Why It Works
Melt provides flat 2x multiplier when Pyro triggers on Cryo, doubling all Pyro damage without positioning/grouping. Applies to every Pyro hit—fast attackers like Arlecchino excel.
Second Half has Cryo-vulnerable targets. Combined with Melt's 2x, Pyro carries achieve 4x+ effective damage vs neutral matchups.
Resonance Benefits
Pyro Resonance +25% ATK amplifies character-scaling damage. Synergizes with Bennett's Burst (ATK scaling from Base ATK), creating multiplicative stacking reaching 2500+ ATK.
Bennett provides healing and Pyro application. 15s Burst duration, 12s field duration = 100% uptime with proper timing.
Best Characters
Arlecchino: Highest single-target Pyro DPS via Bond of Life. Charged Attacks apply strong Pyro for Melt, scaling to 60,000+ per hit. Self-sufficient, allows flexible teams.
Klee: Fast Pyro via Charged Attacks and Skill. Animation cancels (jump/dash) increase DPS 25-30%.
Mavuika: Off-field Pyro and Burst damage. Functions as carry or enabler.
Sample Rotation: Arlecchino Melt
- 0-2s: Cryo enabler (Rosaria/Kaeya) Skill + Burst
- 2-4s: Bennett Burst (ATK buff, Pyro Resonance)
- 4-6s: Kazuha Skill/Burst (Pyro DMG%, VV shred)
- 6-18s: Arlecchino Skill + Normal → Charged Attacks (trigger Melt)
- 18-20s: Arlecchino Burst (frontload damage)
- 20-22s: Bennett Skill (particles)
- 22-24s: Cryo Skill (aura refresh)
Maintains Cryo aura while Arlecchino triggers Melt. Bennett's ATK + Kazuha's Pyro DMG% = 100,000+ per Charged Attack Melt.
When to Choose
Excels with high mechanical skill and predictable enemy patterns. Requires precise positioning to avoid interruption during Charged Attacks. Less forgiving than Bloom/Electro-Charged but higher damage ceiling—clears chambers 10-15s faster.
Investment favors players with existing hypercarry artifacts (60-80% CRIT Rate, 160-200% CRIT DMG). Reaction teams need specialized EM builds with less flexibility.
Comparative Analysis
Bloom/Hyperbloom: Lowest execution difficulty, passive triggers. 4-star accessible (Collei, Yaoyao, Kuki, Barbara). <50,000 Resin investment. Clear times: 60-75s per chamber. Most F2P-friendly.
Electro-Charged: Moderate skill for rotation timing. Relies on Xingqiu/Yelan (roster conflicts). 600% shield damage essential for Second Half. Clear times: 50-65s.
Pyro Melt: Highest skill and investment. Needs 5-star carries (Arlecchino, Hu Tao, Lyney) and premium supports (Kazuha, Zhongli). 80,000+ Resin, multiple limited 5-stars. Clear times: 40-55s. For veterans with deep rosters.
Investment Costs
Bloom/Hyperbloom: ~35,000 Resin. Deepwood/Gilded Dreams same domain. Talents 6/6/6 sufficient. 10,000-15,000 Primogems for weapon refinements.
Electro-Charged: ~45,000 Resin. Emblem (Xingqiu, Fischl) + VV (Sucrose). Talents: Xingqiu 1/9/9, Fischl 9/1/9. 15 weekly boss materials, 3M Mora. +28,800 Primogems if using Yelan.
Pyro Melt: 60,000+ Resin. Crimson Witch/Gladiator (Arlecchino), Noblesse (Bennett), triple-EM VV (Kazuha). Talents 9/9/9 for carries. 18 weekly boss materials, 5M Mora. 57,600+ Primogems for guaranteed 5-stars.
Execution Difficulty
Bloom/Hyperbloom: Tolerates errors via passive triggers. Missing Skill delays 2-3s but doesn't fail rotation. Ideal for mobile/high ping (100ms+).
Electro-Charged: Moderate timing for energy funneling. Mistiming Xingqiu Skill creates energy deficits. 2-3s error margin allows recovery. Needs <60ms ping.
Pyro Melt: Frame-perfect execution for animation cancels. Arlecchino's jump-cancel Charged Attacks need 15-20 hours practice. Errors waste Melt triggers, reducing DPS 30-40%.
Boss-Specific Performance
Rock Crab (4.4M HP, shield): Bloom excels via 6 Hermit Seed conversion. Kaveh Bloom's 1.5M cap per rotation clears shield + HP in 55-65s. Electro-Charged/Pyro Melt struggle with shields: 75-85s.
Fireblade Shock Trooper (3x 285,959 HP shields): Electro-Charged dominates via 600% shield damage. Breaks all shields in 30s, triggers -60% Electro RES, clears in 50-55s total. Bloom lacks shield efficiency. Pyro Melt brute-forces but sacrifices time.
Primordial Bathysmal Vishap (2.08M HP, 30s Hydro Armor): Pyro Melt's frontloaded damage wins. Arlecchino Burst + Charged Attack deals 400,000-500,000 in 15s, clears before armor. Bloom/Electro-Charged risk armor trigger, extending 20-30s due to energy drain.
F2P Recommendations
Prioritize Bloom/Hyperbloom: Collei, Yaoyao, Kuki, Barbara. Zero limited 5-stars, achieves 36 stars with 180% ER, 200+ EM on Shinobu. Zero Primogems beyond standard banner. Weapons: craftable Sapwood Blade, Prototype Amber.
Low-spenders (Welkin + BP): Target one limited 5-star carry per archetype. Neuvillette for Bloom, Arlecchino for Pyro Melt. Avoid 5-star supports until carries filled—4-star alternatives (Sucrose, Diona) provide 70-80% value.
Battle Pass weapons (Serpent Spine, Solar Pearl) give 15-20% DPS increase over craftables. Most Resin-efficient for low-spenders. Prioritize weapons over constellations—C0 5-star with R1 BP weapon > C1-C2 with 4-star weapon.
Advanced Combat Strategies
Burst Window Timing
Align team damage with vulnerability phases. Fireblade's -60% Electro RES lasts 15-20s after shield break—pre-stack Bursts for immediate deployment. Queue Fischl/Xingqiu Bursts during final shield layer break animation for frame-one damage.
Positioning and Stamina
Ranged carries: Neuvillette's Charged Attack range allows 15-20m safety. Reserve stamina for emergency dodges, not repositioning. Commit to damage windows, dodge only confirmed hits.
Melee carries: Arlecchino requires 3-5m positioning. Learn attack timings to execute Charged Attacks during boss recovery frames. Rock Crab slam: 2.5s recovery. Fireblade sweep: 1.8s.
Shield Breaking Priority
Prioritize shields over HP when shields grant +200% RES. Fireblade takes 66% reduced damage during shields. Focus Electro-Charged on shield depletion: 8-10s with reactions vs 25-30s direct damage.
Maintain application uptime through overlapping durations. Xingqiu 18s Burst + Fischl 12s Oz = 12s guaranteed Electro-Charged. Time Fischl Burst at 10s mark, extending to 22s, minimizing 2s downtime.
Invulnerability Phases
Assault Specialist Mek: Two Ousia hits remove Pyro for 25s. Use Neuvillette Charged Attack (Ousia) twice at start, then full damage rotation. Mistiming wastes damage on Pyro-resistant phases (-40% DPS).
Primordial Bathysmal Vishap: 30s Hydro Armor timer demands frontloaded damage. Deploy all Bursts in first 15s, aim for 60-70% HP depletion before armor. If armor triggers, switch to Cryo to remove Hydro aura, preventing +80% RES and energy drain.
Building with Current Roster
National Team core (Bennett, Xiangling, Xingqiu, flex) adapts to all archetypes via flex slot. Sucrose = Electro-Charged. Collei = Bloom. Chongyun = Melt. 4-star core requires minimal investment.
4-Star Core Teams
Bloom: Collei + Yaoyao + Barbara + Kuki. Barbara heals and applies Hydro via Normal Attacks. Collei/Yaoyao alternate Dendro for 100% uptime. Zero limited characters, craftable weapons.
Electro-Charged: Fischl + Beidou + Xingqiu + Sucrose. Layered Electro via Oz and Beidou Burst. Beidou snapshots ATK buffs, provides damage reduction.
Pyro: Bennett + Xiangling + Kaeya + Rosaria. Reverse Melt via Pyronado on Cryo aura. Cryo Resonance +15% CRIT Rate. 50-60% of premium Melt performance, zero limited characters.
Flexible Characters
Kazuha: Works in all three via EM sharing and elemental DMG%. VV shred applies to Dendro, Electro, Pyro. Triple-EM (800-900) provides 32-36% elemental DMG%, equivalent to Goblet main stat for entire team.
Xingqiu: Enables Bloom and Electro-Charged. Most contested support. Prioritize for team facing higher DPS checks or shields. Use Barbara/Candace as budget replacement.
Fischl: Electro for Hyperbloom and Electro-Charged. A4 scales with reaction frequency. Fills gaps based on matchups and blessings.
Common Mistakes
Over-investing in CC: Venti, Sucrose C6 waste field time on zero-value abilities. Sucrose retains value via EM sharing—use only Skill for VV/EM, save Burst energy.
Ignoring ER thresholds: Creates rotation failures. Calculate based on particles and rotation length. Xingqiu needs 200% without Hydro battery. Fischl needs 120% due to Skill particles.
Mixing reactions: Overload + Freeze, Bloom + Vaporize dilutes damage by consuming auras on low-value triggers. Commit to one reaction, build all four characters to support it.
Account Optimization
Talent Priority
Reaction teams: Skill > Burst for consistent application. Fischl Skill 9 increases Oz damage 35% vs level 6. Invest 6 weekly boss materials into Skills before Bursts for enablers.
Artifact Farming Routes
Emblem domain: Farm 4-6 weeks for Xingqiu, Yelan, Xiangling, Beidou. Highest Resin efficiency. Aim 180% ER with CRIT/ATK substats before specialized domains.
Deepwood/Gilded Dreams: Share domain. Farm after Emblem for Nahida, Collei, Yaoyao, Kuki. Prioritize EM main stats over substats—187 EM Sands with poor substats > CRIT piece for reactions.
VV: Only EM main stats matter for Kazuha/Sucrose—substats irrelevant. Accept any 5-star EM Sands/Goblet/Circlet. 187 EM per piece = 95% value. Reduces farming from 3-4 weeks to 1-2 weeks.
Constellation Value
Kuki C0: Full Hyperbloom functionality. C6 adds 150 EM during Burst for 12s = 15% reaction damage increase. Avoid pulling until C6.
Xingqiu C6: Reduces Burst cost 80→64, adds energy regen. Lowers ER 200%→160%. Saves 2-3 substat rolls = 15-20% DPS via reallocated CRIT. Prioritize over most limited 5-stars.
Bennett C1: Removes HP restriction on ATK buff, 60%→100% uptime = 25-30% DPS for ATK-scaling carries. Highest-value 4-star constellation. Avoid C6—converts melee to Pyro, disrupts physical/Cryo teams.
FAQ
Best archetypes for 6.3 Abyss? Bloom/Hyperbloom (First Half, 200% Bloom DMG), Electro-Charged (Second Half, 200% Electro-Charged DMG, 600% shield damage), Pyro Melt (brute force). Bloom: Nahida, Yelan, Kuki, Kazuha. Electro-Charged: Ororon, Xingqiu, Fischl, Sucrose. Pyro Melt: Arlecchino, Bennett, Kazuha, Cryo enablers.
Why doesn't CC work in 6.3? Floor 12 enemies have complete interrupt resistance and CC immunity. Rock Crab (4.4M HP) and Fireblade Trooper (4.7M HP) can't be grouped, frozen, or staggered. Anemo grouping provides zero value. Need sustained single-target damage and reactions.
ER requirements for boss fights? Hyperbloom: 180%+ Kuki, 140-160% Nahida. Electro-Charged: 200% Xingqiu (no Hydro battery), 180% Fischl, 160% Sucrose. Pyro Melt: 180% Bennett, 160% Cryo enablers. Ensures Burst every rotation without grouped kills.
Best F2P archetype? Bloom/Hyperbloom using Collei, Yaoyao, Kuki, Barbara—all non-limited. 35,000 Resin for EM/ER artifacts, achieves 36 stars. Lowest execution difficulty via passive triggers. Ideal for limited skill or high ping.
Need 5-stars for 36 stars? No—full 4-star teams clear all chambers. Hyperbloom (Collei, Yaoyao, Kuki, Barbara) and National variants (Bennett, Xiangling, Xingqiu, Sucrose) achieve 36 stars with 180% ER and proper builds. 5-stars like Neuvillette/Arlecchino reduce clear times 15-20s and lower difficulty.
Optimize burst rotations for bosses? Align Bursts with vulnerability windows, not fixed timings. Pre-stack during shield phases, deploy frame-one when shields break for -60% RES windows. Neuvillette rotation: Furina Skill → Xilonen Skill + 2 Normal → Kazuha Skill/Burst → Furina Burst → Neuvillette Skill + Charged Attack. 24s total, all damage in 12s buff window.


