

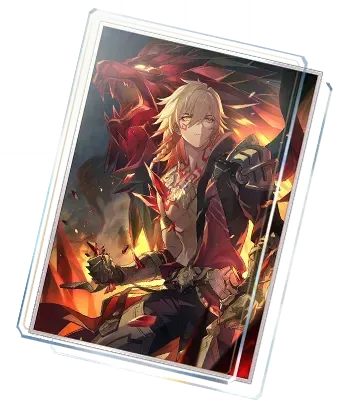
Mydei Character Overview & Hypercarry Potential
Character Kit Analysis
Here's what makes Mydei tick: he's a 5-star Imaginary Destruction character who literally burns his own health for massive damage output. At level 80, you're looking at 1552 HP, 426 ATK, 194 DEF, and 95 SPD – nothing groundbreaking on paper, but his kit? That's where things get wild.
The core mechanic revolves around consuming HP to build Charge stacks. His skill Deaths are Legion eats 50% of his current HP and slams enemies for 90% Max HP damage to the main target, plus 50% to adjacent enemies. Every point of HP lost becomes a Charge stack through a 1:1 ratio. The A6 trace Bloodied Chiton sweetens the deal – when his HP exceeds 4000, he gains +2.5% Charge per enemy damage taken.

But here's where it gets interesting. At 100 Charge, Mydei enters Vendetta state – think of it as controlled berserker mode. He gets +50% Max HP, complete crowd control immunity, and three revival opportunities. You lose manual control, but he starts throwing enhanced auto-attacks: Kingslayer (110% main + 66% adjacent damage) and the devastating Godslayer at 150 Charge (280% main + 168% adjacent damage).
Role in Team Compositions
Mydei's designed as a solo DPS hypercarry, and honestly? He's pretty good at it. His Ultimate Throne of Bones restores 20% HP while dealing 160% damage, creating these sustainable HP consumption/recovery cycles that feel almost rhythmic once you get the hang of it.
What's fascinating is how self-sufficient he can be. In lower-pressure content, you can actually run him without dedicated sustain – something most hypercarries can't pull off.
For Nameless Honor battle pass recharge, BitTopup offers competitive pricing and instant delivery, ensuring quick access to premium resources for optimizing Mydei's build. The platform's secure payment system and 24/7 customer support make it ideal for HSR players seeking reliable top-up services.
His hypercarry potential really shines in Memory of Chaos with a T0.5 ranking for Blast scenarios. The numbers don't lie: 0.31% adoption rate with 6.28 average clear cycles at E0. That's solid performance, especially considering he doesn't need specific elemental synergies – just raw HP scaling and Imaginary damage.
Strengths and Limitations
Let's be real about what Mydei brings to the table. His HP-scaling damage is exceptional, and those death immunity mechanics through revivals? Game-changing in the right scenarios. Bloodied Chiton can provide +48% CRIT Rate at 8000+ HP, which is basically a free CRIT Rate body piece.
But there are trade-offs. That forced auto-combat during Vendetta can be frustrating when you need precise targeting. His DEF drops to 0 during Vendetta, so HP management becomes critical. And the power gap between F2P options and his signature light cone? It's significant.
Still, his SS tier rating with 2413 community votes speaks volumes. The unique mechanics provide solid future-proofing for Amphoreus content, particularly with upcoming Chrysos Heirs synergies emphasizing undying gameplay.
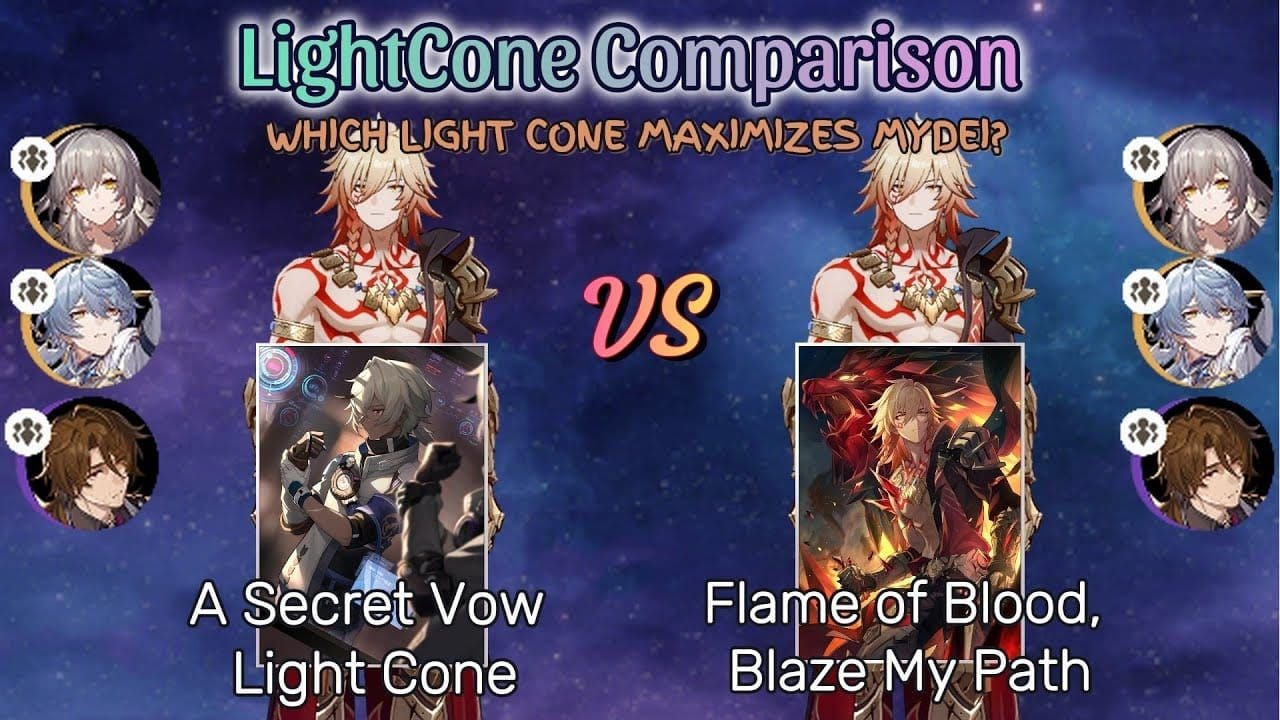
Best Light Cones for Mydei Hypercarry
5-Star Light Cone Tier List
Flame of Blood, Blaze My Path – his signature – absolutely dominates at 138% DPS efficiency with a 78% usage rate.
It provides 18-30% Max HP and 20-40% Incoming Healing, but the passive is where it gets spicy: when Skill or Ultimate consume 6-8% Max HP, you gain +30-50% damage (with an additional +30-50% if you consume over 500 HP). It's perfectly tailored to his kit and amplifies healing from abundance supports.
The Unreachable Side hits 117% DPS efficiency. You get +18-30% CRIT Rate and HP%, plus +24-40% damage when hit or consuming HP. More consistent CRIT scaling, though it lacks the signature's healing synergy.
Something Irreplaceable reaches 110% DPS with +20-40% damage against higher HP enemies. Boss specialist territory – valuable for Apocalyptic Shadow content where you're facing chunky single targets.
4-Star Alternatives
Ninja Record: Sound Hunt represents your best F2P option at 100% DPS baseline (9% usage rate). Provides +12-24% HP and +18-36% CRIT DMG when HP changes. You'll need to actively manipulate HP for buff uptime, but that aligns perfectly with Mydei's consumption mechanics anyway.
A Secret Vow offers +20-40% damage with additional scaling against higher HP enemies. Solid in hypercarry rotations against multiple high-HP targets.
Flames Afar provides 97% DPS with self-healing when losing >25% HP. Trades pure damage for survivability – useful if you're struggling with Vendetta management.
Light Cone Comparison Chart
The numbers tell the story:
- Signature LC: 138% DPS, perfect synergy, 78% usage
- The Unreachable Side: 117% DPS, CRIT focus
- Something Irreplaceable: 110% DPS, boss specialist
- Ninja Record: 100% DPS, F2P viable, 9% usage
- Flames Afar: 97% DPS, sustain focus
That 38% DPS gap between signature and alternatives makes it a high-priority pull for serious hypercarry optimization. Worth considering before chasing eidolons.
Mydei Trace Priority Guide
Skill Upgrade Order
Priority 1: Skill (Deaths are Legion) – Max this immediately. It's your primary damage source and Charge generation. At Level 10, you're looking at 90% Max HP damage to main targets, 50% to adjacent, plus 30 Energy generation.
Priority 2: Ultimate (Throne of Bones) – Level 10 for maximum damage and utility. 160% damage to main targets, 100% to adjacent, restores 20% HP, grants 20 Charge, and applies a 2-turn taunt effect.
Priority 3: Talent – Moderate priority for HP restoration and Charge mechanics that govern Vendetta transitions.
Priority 4: Basic Attack – Lowest priority since Vendetta auto-attacks replace manual basics anyway.
Major Traces Priority
Bloodied Chiton (A6) – This is essential for hypercarry builds. When Max HP exceeds 4000, every 100 excess HP (up to 4000 additional) provides +1.2% CRIT Rate, +2.5% Charge from enemy damage, and +0.75% Incoming Healing. At maximum (8000 HP), you're getting +48% CRIT Rate, +100% Charge generation, and +30% healing effectiveness. Absolutely crucial.
Thirty Tyrants (A4) – Crowd control immunity during Vendetta prevents interruption of auto-attack sequences. Quality of life improvement that becomes essential in higher-level content.
Earth and Water (A2) – Survival of 3 killing blows in Vendetta without state termination. This enables aggressive HP consumption strategies without fear.
Resource Investment Timeline
Here's a realistic progression path:
Week 1-2: Get Skill and Ultimate to Level 8. You'll need Borisin Teeth (15 total) and Fear-Stomped Flesh (41 total).
Week 3-4: Complete Skill/Ultimate to Level 10, begin major traces. Stock up on Lupitoxin Sawteeth (72 total) and Courage-Torn Chest (56 total).
Week 5-6: Maximize major traces. Gather Glory-Aspersed Torso (58 total) and Moon Rage Fang (139 total).
Total investment: 3,000,000 Credits, 8 Tracks of Destiny, 12 Auspice Sliver. Plan accordingly.
Optimal Mydei Rotation Guide
Basic Rotation Sequence
Pre-Combat: His Technique Cage of Broken Lance deals 80% Max HP AoE damage, grants +50 Charge, and applies taunt. Always use this when possible.
Turn 1: Skill consumes 50% HP, builds roughly 100 Charge through the 1:1 ratio plus Bloodied Chiton enhancement.
Turn 2: Vendetta activates at 100 Charge. Mydei restores 25% HP, gains +100% action forward, and triggers auto-attacks. Kingslayer consumes 35% HP while dealing 110% main/66% adjacent damage.
Turn 3-4: Continue auto-attacks. At 150 Charge, Godslayer triggers for 280% main/168% adjacent damage, consuming all 150 Charge.
Turn 5: Ultimate at 160 Energy restores 20% HP, grants 20 Charge, marks priority targets, and applies 2-turn taunt.
Advanced Rotation Techniques
SP Management: Skill costs 1 SP, but Vendetta auto-attacks are SP-neutral. Pair with SP-positive supports like Sunday (100% Advance, no SP cost) or Sparkle (SP regeneration, 50% Advance).
Energy Optimization: Skill grants 30 Energy, Kingslayer 30, Godslayer 10. Target Ultimate every 2-3 cycles, balancing Skill spam with auto-attack phases.
Speed Tuning: Target 134+ SPD for Memory of Chaos. With Sunday support, aim for 135 SPD Mydei and 134 SPD Sunday for -1 speed tuning, enabling immediate follow-ups.
For mid-game progression, buy Nameless Honor through BitTopup's streamlined platform to access premium materials and accelerate Mydei's development. The service's competitive rates and instant processing ensure uninterrupted character progression.
Situational Adaptations
Multi-Wave Content: Reserve Technique for wave 2-3 when Charge is depleted. Use Ultimate taunt strategically for enemy positioning.
Boss Scenarios: Manual Ultimate timing to mark high-priority targets for Godslayer. Taunt becomes crucial for aggro management.
Emergency Situations: Those 3 revival mechanics allow aggressive HP consumption. Don't be afraid to drop to critical HP levels to accelerate Charge building and Vendetta uptime.
Skill Point Management Strategies
SP Generation Basics
Mydei operates SP-neutral to SP-positive, which is honestly refreshing. Skill consumes 1 SP during setup, but Vendetta auto-attacks cost 0 SP. In a typical 5-turn cycle, you'll consume 2-3 SP during Skill spam, then generate 2-3 SP through auto-attacks and support actions.
SP Efficiency Targets: Maintain 2+ SP reserve for emergency Ultimate, enable support Ultimate rotations every 3-4 cycles, and avoid SP starvation during burst windows.
SP Conservation Techniques
Advance Forward Synergy: Pair with Sunday or Remembrance Trailblazer for 100% Advance Forward (0 SP cost), effectively doubling turn frequency without resource drain.
Auto-Attack Phases: Vendetta's forced auto-attacks generate SP through inaction. Use these 2-3 turn windows for support Ultimate rotations, healing, and buffs without impacting resource economy.
Support Selection: Prioritize SP-friendly supports like Sparkle (SP regeneration to 3, +50% damage/CRIT buffs) or Tribbie (RES PEN zones, minimal SP requirements).
Team SP Coordination
Optimal SP Flow: Sunday (0 SP Advance) → Mydei Skill (1 SP) → Tribbie buffs (1 SP) → Gallagher heal (0 SP on Besotted) creates sustainable 4-turn cycles with SP surplus.
Crisis Recovery: If SP management fails, use Technique for +50 Charge without SP cost, then immediately enter Vendetta for SP-free damage phases.
Recommended Relic Sets & Stats
Primary Relic Combinations
4-piece Scholar Lost in Erudition dominates with 100% DPS efficiency and 96% usage rate.
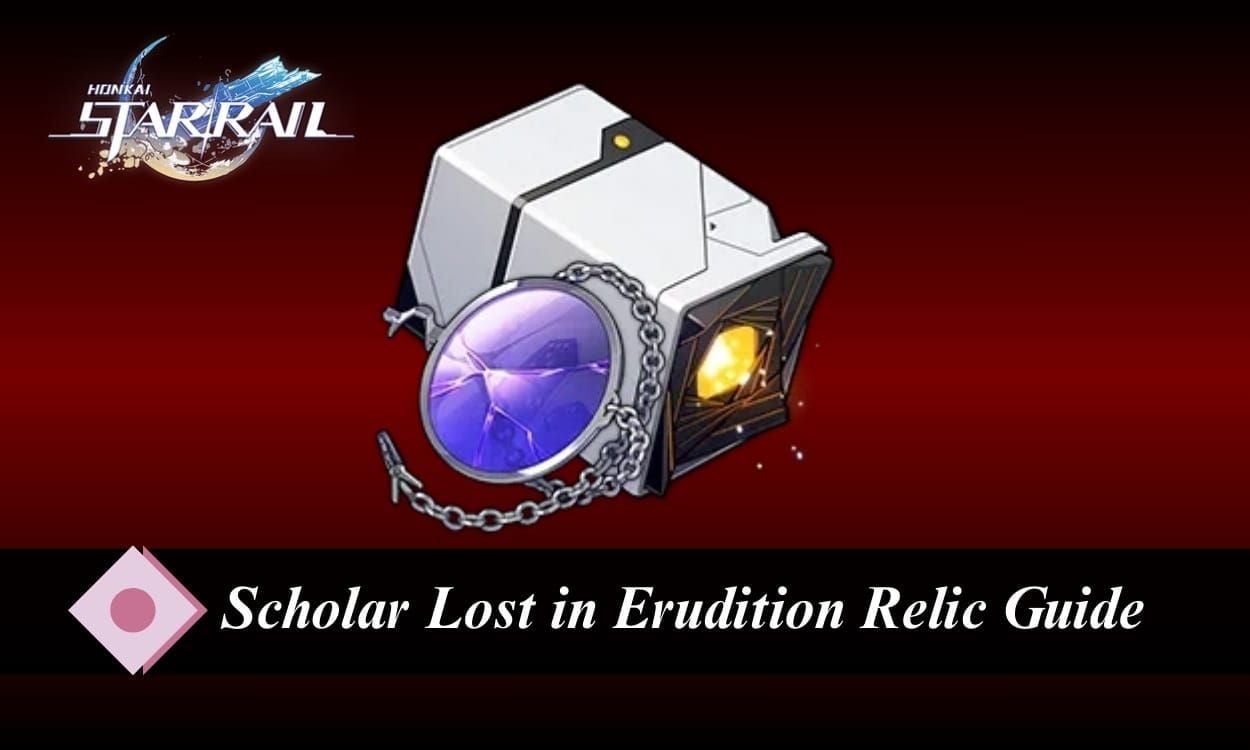
2-piece gives +8% CRIT Rate, 4-piece provides +20% Skill/Ultimate damage plus +25% next Skill damage after Ultimate. Perfect synergy with Ultimate → Skill spam → Vendetta cycles.
4-piece Longevous Disciple alternative at 94% DPS efficiency. 2-piece: +12% HP, 4-piece: +8% CRIT Rate per stack when consuming HP (maximum 2 stacks). More HP scaling for survivability focus.
Planar Ornaments:
- Rutilant Arena: +12% Max HP, +28% CRIT DMG when HP ≥5000. 100% DPS, 94% usage rate
- Bone Collection's Serene Demesne: +12% HP, +28% CRIT DMG at 5000+ HP. 99.2% DPS
- Izumo Gensei: +8% CRIT Rate, +20% Skill DMG at 70%+ CRIT Rate. 100% DPS, 4% usage
Stat Priority Guide
Main Stat Priorities:
- Body: CRIT DMG (77% usage)
- Feet: SPD (70% usage)
- Sphere: Imaginary DMG (47%) or HP% (53%) – honestly, both work
- Rope: HP% (99% usage) – this one's non-negotiable
Target Thresholds: HP 8000+ (out of combat), CRIT Rate 90-100% (in-combat), CRIT DMG 150%+ baseline/200%+ optimized, SPD 134+ for MoC speed tuning.
Average MoC Statistics: HP 8276, CRIT Rate 39% (pre-combat), CRIT DMG 211%. Use these as benchmarks.
Substats Optimization
Priority Ranking:
- HP% – Scales damage, CRIT Rate, and survivability
- CRIT Rate – Essential until 90%+ in-combat
- CRIT DMG – Primary damage amplification
- SPD – Important for speed tuning
- Flat HP – Acceptable filler
- ATK%/DEF% – Avoid entirely
Optimization Process: Achieve 4000+ HP for Bloodied Chiton → 8000+ HP for maximum benefits → 90%+ CRIT Rate including buffs → maximize CRIT DMG → fine-tune SPD for team coordination.
Team Composition & Synergy
Best Support Partners
Sunday represents optimal Harmony support.

100% Advance Forward without SP cost, damage/CRIT buffs that scale independently of ATK. Ideal speed tuning: 135 SPD Mydei, 134 SPD Sunday for -1 coordination.
Tribbie excels as secondary support through +24% RES PEN zones and damage amplification. AoE complement enhances team clearing, and her SP-efficient kit maintains resource balance.
Sparkle offers an alternative with SP regeneration and 50% Advance Forward. Damage/CRIT buffs enable base SPD builds, while SP restoration to 3 supports extended rotations.
Remembrance Trailblazer provides 100% Advance Forward plus True DMG buffs. Solid F2P option with comparable performance to limited supports.
Sustain Options
Gallagher dominates with 36% usage rate. Besotted debuff triggers healing on enemy actions without SP cost. Blast synergy aligns perfectly with Mydei's AoE patterns.
Luocha offers field healing that maintains HP without manual intervention. Ultimate provides team-wide sustain during critical phases.
Huohuo enables Skill spam through Energy regeneration and healing. Ultimate restores team Energy while providing ATK buffs.
Team Examples:
- Hypercarry Core: Mydei + Sunday + Tribbie + Gallagher (5.33 average cycles)
- F2P Alternative: Mydei + Remembrance TB + Pela + Lynx
- Dual DPS: Mydei + Castorice + Tribbie + Gallagher (9.33 cycles)
Eidolon Investment Analysis
Eidolon Priority Ranking
E1 transforms Godslayer into full AoE with +30% main target damage.
We're talking 105-174% DPS gains depending on enemy count. This shifts him from Blast specialist to true AoE hypercarry. Highest value investment – often prioritized over Signature Light Cone.
E6 provides instant Vendetta at battle start and reduces Godslayer requirement from 150 to 100 Charge. 200-371% DPS gains in optimal scenarios. Enables 0-cycle potential for whales.
E2 adds 15% DEF ignore during Vendetta and converts 40% healing to Charge (maximum 40). Enhances damage and sustainability with heal-based Charge generation.
E4 gives +30% CRIT DMG during Vendetta and +10% Max HP restoration on hit. Incremental rather than transformative benefits.
Cost-Benefit Analysis
E0 Viability: 50% usage rate with complete hypercarry functionality. 6.28 average MoC cycles demonstrates competitive performance without investment.
E1 Investment Value: Full AoE transformation justifies highest priority. Pure Fiction usage increases to 0.54% vs 0.31% MoC. Roughly 90 pulls average, 180 guaranteed.
E2 Stopping Point: E1+E2 provides comprehensive improvements. Optimal investment for most players without whale-tier spending.
F2P Recommendations: Prioritize E1 over Signature LC for multi-target value. E0 remains viable for all content.
Advanced Tips & Common Mistakes
Pro Player Strategies
HP Threshold Management: Maintain 8000+ HP out of combat for maximum Bloodied Chiton benefits. Use HP% Rope/Sphere to reach thresholds, rely on substats for additional scaling.
Ultimate Timing Optimization: Use strategically to mark priority targets for Godslayer. That 2-turn taunt controls positioning while +20 Charge accelerates the next cycle.
Speed Tuning Mastery: 134+ SPD for MoC breakpoints. With Sunday: 135 SPD Mydei, 134 SPD Sunday for immediate follow-ups after Advance Forward.
Emergency Protocols: Use revival mechanics aggressively. Earth and Water allows 3 killing blow survivals, enabling high-risk strategies that would kill other DPS units.
Mistakes to Avoid
CRIT Rate Overcapping: Don't invest beyond 100% in-combat. Mydei achieves roughly 61% through Scholar set and Bloodied Chiton naturally.
ATK Stat Investment: Never prioritize ATK-based substats, light cones, or buffs. Damage scales exclusively with HP – this isn't negotiable.
Preservation Support Usage: Avoid shields that prevent enemy damage from generating Charge stacks. Use Abundance healers for HP restoration instead.
Manual Combat in Vendetta: Don't attempt manual targeting during the auto-attack system. It disrupts rotation timing and reduces efficiency.
Optimization Checklist
Pre-Combat: Verify 8000+ HP, confirm 90%+ in-combat CRIT Rate, check speed tuning, ensure 2+ SP available.
Rotation Execution: Use Technique for +50 Charge, spam Skill to 100 Charge, allow auto-attacks without intervention, time Ultimate for marking/restoration.
Performance Monitoring: Track average cycles (<7 target), monitor Vendetta uptime (50%+ target), verify Godslayer frequency (2+ per cycle).
FAQ
What are the best light cones for Mydei hypercarry build? Signature Flame of Blood, Blaze My Path (138% DPS), The Unreachable Side (117% DPS), Ninja Record: Sound Hunt (100% DPS, F2P). Avoid ATK-based options entirely.
How should I prioritize Mydei's trace upgrades? Skill > Ultimate > Talent > Basic Attack. Focus Skill/Ultimate to Level 10 first, then major traces: Bloodied Chiton (A6), Thirty Tyrants (A4), Earth and Water (A2).
What's the optimal SP management strategy? SP-neutral overall. Use 1 SP for Skills during setup, rely on SP-free auto-attacks during Vendetta. Pair with SP-positive supports like Sunday or Sparkle.
Which rotation maximizes DPS potential? Technique (+50 Charge) → Skill spam (reach 100 Charge) → Vendetta auto-attacks → Ultimate (HP restoration/marking) → repeat cycle.
Should I invest in eidolons for hypercarry builds? E1 offers highest value (105-174% DPS gain, full AoE), often prioritized over Signature LC. E6 enables instant Vendetta (200-371% DPS). E0 remains completely viable.
What team compositions work best? Optimal: Mydei + Sunday + Tribbie + Gallagher. F2P: Mydei + Remembrance TB + Pela + Lynx. Focus on Advance Forward supports, RES PEN, and Abundance healing.


