

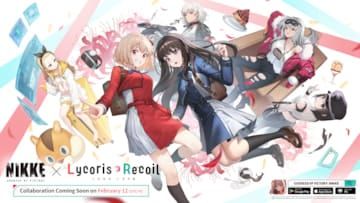
Lycoris Recoil Collaboration Overview
Announced February 2, 2026, this event integrates Lycoris agents into NIKKE's universe. Both characters arrive as SSR rarity units with standard 4% SSR recruit probability during featured banners.
These are limited-time special event units. Unlike permanent additions, strategic investment during the collaboration window is critical. Balance gem spending against your roster while considering their unique mechanics in February 2026's meta.
For efficient gem acquisition, buy Goddess of Victory NIKKE gems monthly card through BitTopup for competitive pricing and instant delivery.
Character Classes and Base Stats
Both enter as SSR units sharing the same leveling framework. SSR units limit break three times, each adding 40 levels:
- Start: Level 80
- 1★: Level 120
- 2★: Level 160
- 3★: Level 200
The 160 wall requires five MLB SSR units at level 200 to unlock Synchro Device at Chapter 4-15. Non-3★ SSR units cap at 160.
Weapon ranges:
- Shotgun: 0-25
- SMG: 15-35
- Assault Rifle: 25-45
- Machine Gun: 35-55
- Sniper Rifle: 45-100
Understanding weapon type determines optimal positioning and combat effectiveness.
Acquisition Methods
Standard SSR mechanics apply: 4% SSR, 43% SR, 53% R probability. Prepare substantial gem reserves for targeted pulls, especially for limit breaks.
Limited-time exclusivity means no future standard banner appearances or Mileage shop availability. Secure at least one copy during the February 12 launch window.
February 2026 Meta Relevance
Type advantage grants 10% bonus damage but imposes 10% bonus damage taken during disadvantageous matchups. This affects team building decisions.
Burst mechanics:
- Full burst: 10 seconds
- Burst I/II cooldown: 20 seconds
- Burst III cooldown: 40 seconds
- Optimal team: 1 Burst I, 1 Burst II, 2 Burst III
Understanding where Chisato and Takina fit reveals their strategic value beyond raw stats.
Chisato Complete Build Guide

Kit Analysis
Burst classification determines team composition flexibility. Her burst generation efficiency affects how quickly she enables team rotations.
Passive abilities provide sustained value outside burst windows. Identify which passives scale best with skill investment to guide resource allocation.
Weapon type determines optimal formation placement. Misaligned positioning reduces damage output and compromises survivability.
Skill Leveling Priority
Skill progression from 1-10 requires exponentially increasing materials. Prioritization is essential.
Investment path:
- Burst skill first (concentrated impact during 10-second window)
- Key passives second (consistent value)
- Percentage-based scaling outperforms flat values at high levels
The 1-7-7 distribution (burst 7, passives 7) balances performance against resource constraints. Reserve expensive 8-10 levels for core roster units. Full 10-10-10 investment depends on long-term viability.
Equipment Recommendations
Farm equipment through Interception and campaign stages. Tier 9 Overload Gear upgrades to Tier 10 at level 5, providing up to 3 bonus sub-stats:
- 1st sub-stat: 100% chance
- 2nd sub-stat: 50% chance
- 3rd sub-stat: 30% chance
Stat priorities for DPS:
- Attack %
- Critical rate
- Critical damage
- HP %/Defense (when survivability matters)
Manufacturer matching enables OL gear upgrades but sometimes forces suboptimal stat lines.
For accelerated progression, top up Goddess of Victory NIKKE gems battle pass via BitTopup for fast delivery and secure transactions.
Cube Selection
Three categories:
- Onslaught: Attack bonuses, offensive set effects (best for DPS)
- Bastion: Balanced stats
- Resilience: Defensive focus
Choose based on Chisato's role. If primary DPS, use Onslaught. If survivability thresholds matter, consider Bastion/Resilience.
Cube upgrades are expensive. Prioritize core roster units before specialized characters.
Manufacturer Synergy and Positioning
Manufacturer bonuses activate with multiple matching team members, providing team-wide stat increases.
Position Chisato within her weapon's effective range throughout encounters. Poor positioning drastically reduces combat contribution.
Certain slots receive more enemy attention, requiring higher survivability. Understand which slots Chisato can safely occupy.
Takina Complete Build Guide
Kit Analysis
Burst classification determines rotation timing. If Burst III, she competes with the 2 Burst III requirement.
Unique mechanics differentiate her from generic units. Special buffs, conditional damage amplification, or utility effects reveal niche applications.
Role definition (primary DPS, sub-DPS, support, hybrid) guides all build decisions.
Skill Priority
Analyze each ability's scaling efficiency:
- Burst skills affecting team-wide performance justify early investment
- Passives with percentage-based scaling provide better long-term returns
- Calculate breakpoints where levels unlock meaningful improvements
Resource cost from level 7-10 is steep. If Takina's a specialist for specific content, maintain skills at 7. If she's a staple across modes, full 10-10-10 is justifiable.
Equipment Setup
PvE priorities:
- Sustained damage output
- Encounter-specific survivability
- Attack %, crit rate, crit damage core
PvP priorities:
- Burst damage
- Survivability during opposing burst windows
- Speed tuning for favorable action order
Accept 2-sub-stat OL gear rather than chasing perfect 3-sub-stat pieces if farming becomes excessive.
Cube Recommendations
Follow Resilience-Bastion-Onslaught framework based on role. If support/hybrid, Bastion's balanced stats might outperform pure Onslaught.
Set bonus activation requires coordinating cube types across team members. Evaluate within target team context.
Overload Gear Considerations
Tier 9 upgrades to Tier 10 at level 5. Sub-stat variance (100%/50%/30%) creates significant RNG in achieving optimal combinations.
Manufacturer matching constrains equipment flexibility. Balance immediate optimization against long-term upgrade potential.
Evaluate Takina's long-term viability before extensive OL farming. If meta shifts threaten relevance, investment becomes questionable.
Team Composition Strategies
Team structure demands 1 Burst I, 1 Burst II, 2 Burst III. This creates specific slot constraints.
Chisato Team Templates
Campaign:
- Sustained damage + survivability
- Proper burst distribution
- Complementary Burst III partner
Raids:
- Burst window damage concentration
- Synergy with raid-focused buffers
- Type advantage (10% bonus damage)
PvP:
- Burst damage + survivability
- Speed tuning
- Must survive to participate in rotations
Takina Team Compositions
If support/hybrid, emphasize amplifying primary DPS rather than maximizing individual damage.
Campaign viability requires consistent performance across diverse encounters. Type coverage and manufacturer synergy influence flexibility.
Boss raid effectiveness depends on team-wide impact versus individual performance metrics.
Meta Unit Synergies
Units like Modernia, Scarlet, Liter represent common staples. Identify positive synergies with these meta units.
Burst timing coordination is critical. The 20-second Burst I/II cooldown and 40-second Burst III cooldown create specific patterns.
Manufacturer synergies with meta units provide team-wide bonuses. Mismatches may require composition adjustments.
F2P Alternatives
SR units limit break twice, reaching level 160 cap. SR recruit probability (43%) exceeds SSR (4%).
Synchro Device at Chapter 4-15 allows SR units to reach competitive power when supported by five MLB SSR units at 200.
Burst Rotation Optimization
Maximize damage by coordinating burst activations during the 10-second full burst window.
Energy generation mechanics govern rotation speed. Understand which units generate burst energy efficiently.
Coordinate offensive buffs, defensive debuffs, and DPS skills within the 10-second window. Suboptimal timing wastes damage.
Skill Book and Core Dust Investment
Resource Allocation Strategy
Priority hierarchy based on:
- Unit versatility
- Content coverage
- Long-term viability
Core roster units performing across Campaign, PvP, and raids justify higher investment than specialists.
Collaboration exclusivity creates urgency but doesn't automatically justify maximum investment. Balance FOMO against practical needs.
Skill Book Farming
Identify efficient farming locations for optimal skill book returns per energy.
Event participation provides accelerated acquisition through currency exchanges and milestones.
Shop purchases offer supplementary sources. Evaluate relative value versus alternative purchases.
Core Dust ROI
Core dust enables progression beyond certain thresholds. Escalating costs from level 7-10 create resource pressure.
Calculate performance gains per core dust invested. Percentage-based scaling or new mechanics justify higher investment.
If competitive at skill 7, reserve expensive 8-10 upgrades for proven core units.
Budget vs Whale Paths
Budget:
- Single copies
- Skills to level 7
- Functional but not perfect gear
- Conserves resources
Whale:
- Multiple limit breaks
- Skill level 10 all abilities
- Perfect OL gear
- Maximum individual potential
If 80% performance at 40% cost, budget provides superior efficiency. If critical thresholds require near-max investment, whale paths become necessary.
Performance Analysis Across Modes
Campaign Viability
Type coverage determines which chapters favor inclusion (10% type advantage bonus).
Stage-specific recommendations identify where collaboration units excel versus alternatives.
If they solve common progression bottlenecks, viability increases substantially.
PvP Arena Performance
Emphasizes burst window damage, survivability, speed tuning. The 10-second window is decisive.
Meta matchup analysis reveals performance against prevalent teams. If they counter popular compositions, strategic value increases.
Ranking bracket considerations affect investment priorities. Top-tier demands optimized units; mid-tier allows moderate investment.
Boss Raid Effectiveness
Union Raid scoring rewards optimized burst rotations. Contribution during these rotations determines value.
Anomaly Interception introduces specialized mechanics. If kits address Interception challenges, niche value emerges.
If they enable meaningful rank improvements translating to better rewards, investment becomes self-sustaining.
Tribe Tower and Events
Tribe Tower restricts to specific character types. If Chisato/Takina belong to underrepresented categories, specialized value emerges.
Special events often feature mechanics showcasing collaboration units. However, event-specific utility doesn't guarantee long-term viability.
Damage Benchmarks
Objective performance metrics enable direct comparison. Test under controlled conditions replicating realistic scenarios.
Include proper team compositions, buff/debuff applications, representative enemy types.
Performance variance reveals consistency. Stable performance across scenarios provides reliable value.
Limit Break Priority
Is MLB Necessary?
Compare performance at different limit break stages. If competitive at 0-1 breaks, conserve resources.
The 160 wall requiring five MLB SSR at 200 creates roster-wide pressure. Balance individual priorities against collective Synchro Device needs.
Content-specific requirements vary. Campaign might tolerate lower breaks; competitive PvP/raids might demand maximum.
Chisato vs Takina Priority
Evaluate which provides superior returns on limit break investment. If one demonstrates significantly higher performance, concentrate resources.
Resource constraints force choosing between both or maximizing one. Depends on viability at different stages and roles.
Body Labels vs Duplicates
Body Labels provide alternative progression without duplicate pulls. Relative scarcity versus gem rates determines optimal allocation.
Collaboration exclusivity affects Body Label priority. They might represent the only post-event limit break method.
Cost-benefit: compare gem expenditure for duplicates against Body Label opportunity costs.
Performance Gaps (0★ to 5★)
If 0★ to 3★ delivers 70% of total power while 3★ to 5★ provides 30%, acceptable performance without max breaks.
Units with high percentage-based scaling receive amplified benefits from limit break stat increases.
Identify minimum requirements for specific content. If clearing targets at 1★, additional breaks provide diminishing returns.
Common Mistakes
Skill Leveling Errors
Uniform leveling wastes resources on low-impact skills. Cap those at intermediate levels.
Premature 8-10 investment before confirming viability is a resource trap. Test at level 7 first.
Neglecting breakpoint analysis leads to suboptimal patterns. Certain levels unlock disproportionate value.
Equipment Mistakes
Pursuing perfect lines before functional baseline delays improvements. Acceptable 2-3 stat gear suffices for most content.
Manufacturer mismatches compromise OL upgrade paths. Plan manufacturer-consistent sets from the beginning.
Overinvesting in uncertain units wastes farming resources.
Team Composition Pitfalls
Burst distribution violations prevent proper rotation execution. Maintain 1-1-2 distribution.
Type coverage neglect creates vulnerability (10% disadvantage penalty).
Role imbalance (multiple DPS, insufficient support) fails in challenging content.
When NOT to Invest
Roster redundancy: Existing units fulfill roles more effectively.
Resource scarcity: Core roster needs insufficient resources.
Meta misalignment: Units don't address current progression bottlenecks.
Long-Term Value Assessment
Meta Longevity Prediction
Power creep trajectories suggest replacement speed. Rapid escalation limits competitive windows; stable curves suggest extended viability.
Kit uniqueness determines replacement risk. Generic kits face higher risk than unique mechanics.
Content evolution considerations: if upcoming modes align with strengths, long-term value increases.
Permanent Roster Comparison
Direct performance comparison reveals meaningful advantages. If only marginal improvements over accessible alternatives, limited availability becomes primary value.
Accessibility differences: permanent units offer ongoing acquisition; collaboration units remain exclusive.
Investment efficiency: if permanent alternatives achieve 90% performance at 60% cost, they often provide superior efficiency.
Player Type Recommendations
F2P: Secure single copies for collection. Limit duplication pursuit. Conserve for future banners.
Moderate spenders: Justify targeted duplication filling roster gaps. Selective investment while maintaining reserves.
Whales: Evaluate against absolute meta ceiling. If enabling top-tier competitive performance, max investment justifiable.
Final Verdict
Pull strategy depends on roster needs and resources. If lacking strong units in their roles, prioritize one copy each.
Tiered priority: secure one copy → evaluate baseline performance → decide duplication based on demonstrated value.
Limited-time creates urgency, but resist FOMO compromising long-term account health. Value exists only if addressing actual needs.
Resource Acquisition
Gem Management
Stockpile gems months before February 12, 2026 launch. Daily missions, Campaign, PvP, events provide steady income.
Understand pity thresholds for calculable resource requirements. Prevents incomplete pulls wasting resources.
If rotating rate-ups, strategic timing concentrates resources during favorable periods.
Event Currency Farming
Efficient routes maximize currency per energy. Balance event farming against daily routine maintenance.
Event shop priority: limited items (exclusive equipment, skill books, materials) justify priority purchases. Skip infinite-stock poor-value items.
How BitTopup Accelerates Progression
BitTopup provides secure, efficient gem acquisition with competitive pricing and fast delivery.
Wide game coverage and excellent customer service create reliable experiences. High user ratings reflect consistent quality.
For optimal builds, BitTopup's secure transactions and competitive rates make it the preferred platform during the limited collaboration window.
FAQ
Is Chisato worth pulling?
Depends on roster gaps and resources. If lacking strong units in her role with sufficient gems for pity, one copy provides value. If superior alternatives exist or limited resources, prioritize core roster development.
What's Takina's best team?
Depends on burst classification and role. Requires 1-1-2 burst distribution with synergistic buffs/debuffs. Manufacturer matching with meta units enhances bonuses.
Chisato or Takina for skill upgrades?
Test both at level 4-5, then concentrate on whichever addresses content challenges better. If resources allow, bring both to 7 before committing to 8-10.
What equipment for Chisato?
Attack %, crit rate, crit damage with manufacturer-matched pieces for OL progression. Farm Tier 9 upgrading to Tier 10 at level 5. Accept functional 2-sub-stat OL gear.
How's Takina in PvP?
Depends on burst window damage, survivability against Arena threats, and PvP team synergy. The 10-second window determines outcomes. Test against prevalent teams before significant investment.
Can Chisato replace Modernia?
Depends on roles, burst types, and performance metrics. Direct replacement requires similar burst slots and comparable performance. If different slots/roles, they might complement rather than replace.


