

Understanding PUBG Mobile Rondo Map Layout
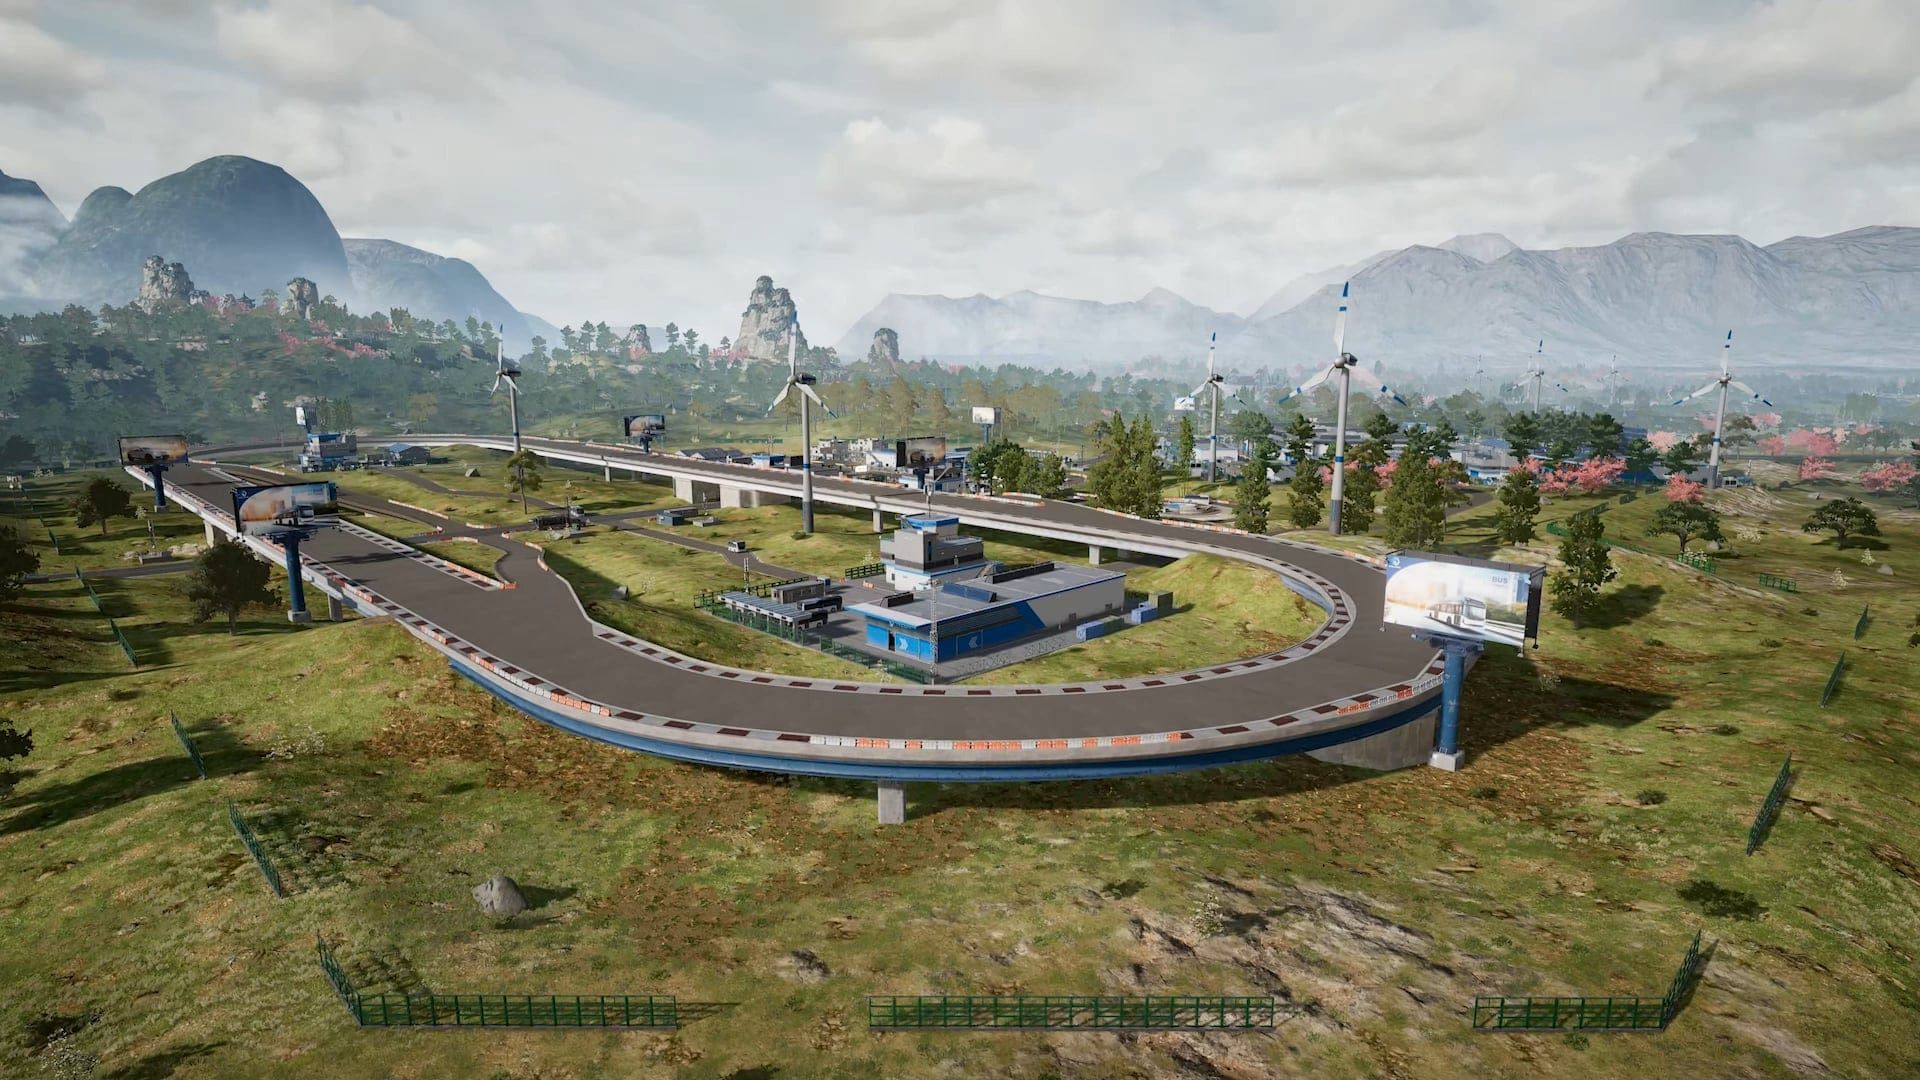
Let’s be real here – Rondo’s a beast of a map. We’re talking 8x8 km of pure chaos with 100 players all trying to be the last one standing.
Key Geographical Features and Landmarks
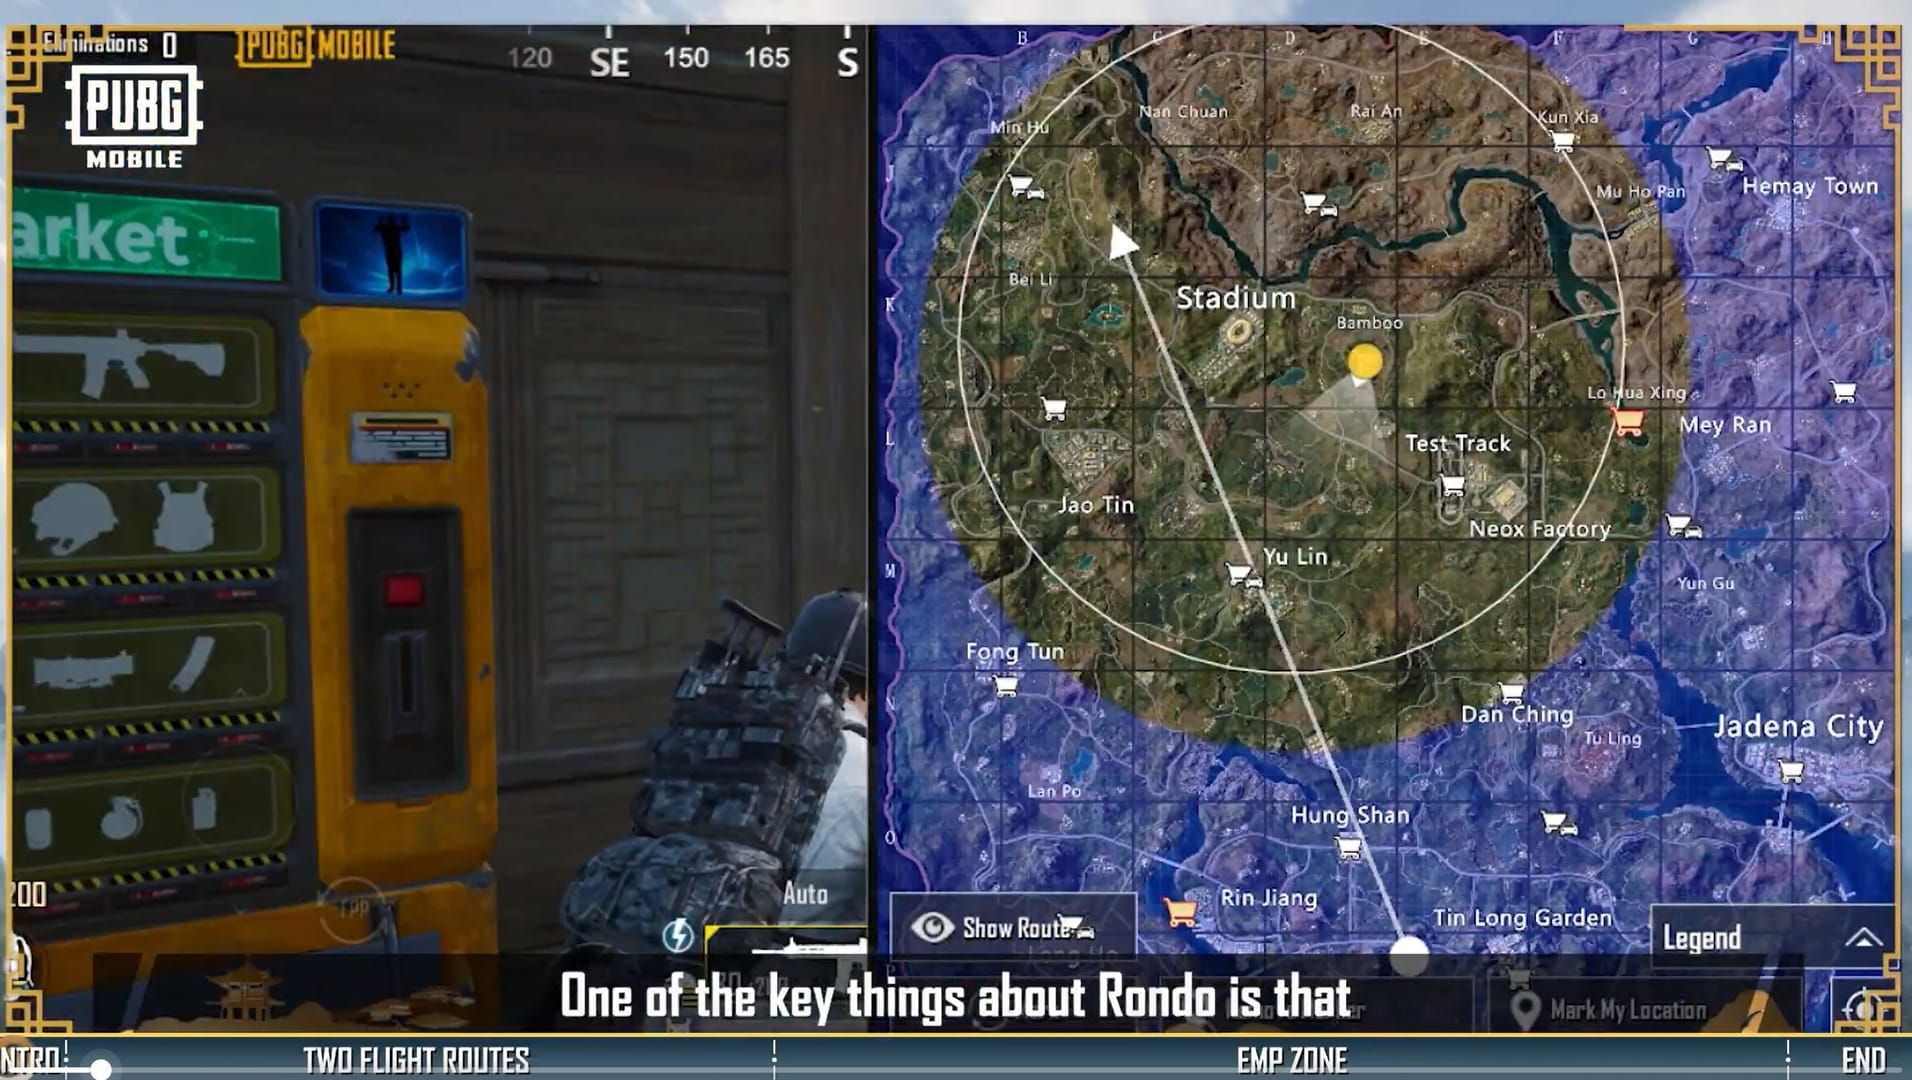
Here’s where things get interesting. Rondo throws you a curveball right from the start with its dual plane system – two aircraft launch simultaneously, splitting that 100-player lobby across wider areas. Smart design choice, honestly. Reduces those insane landing clusters we’ve all suffered through.
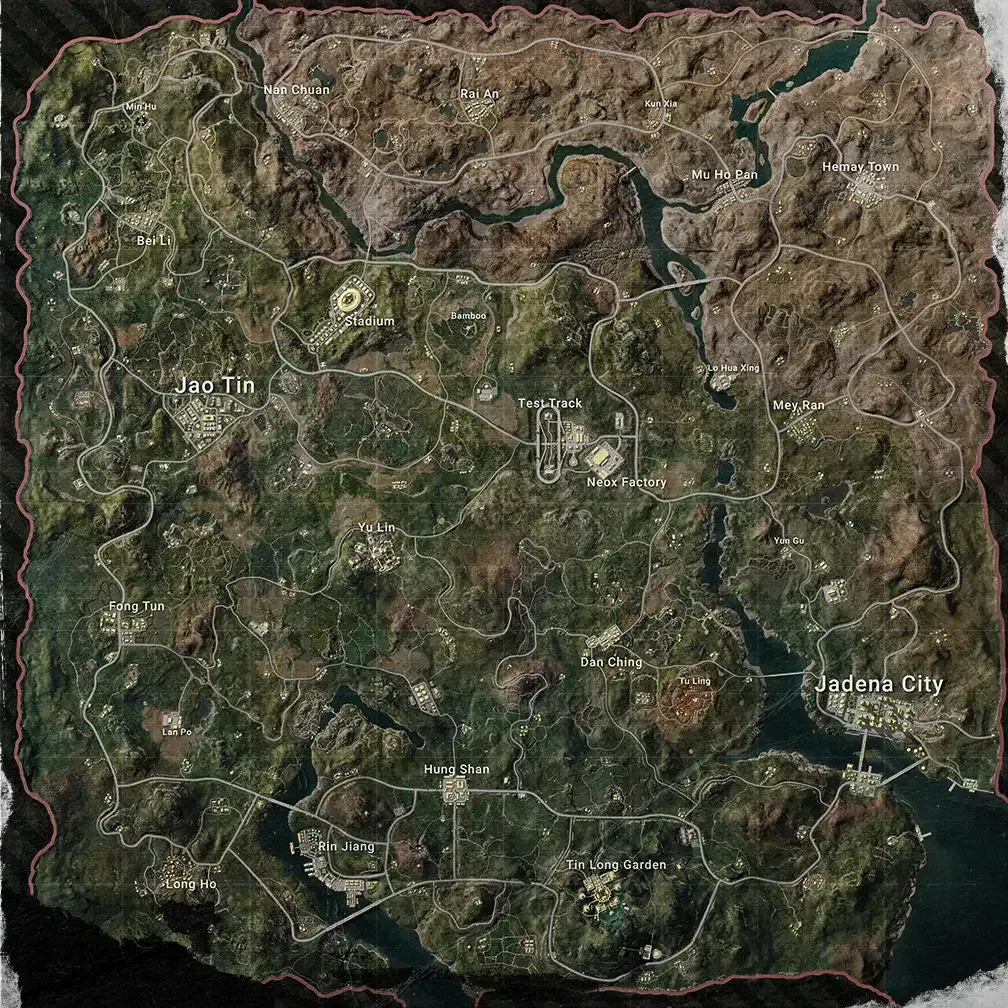
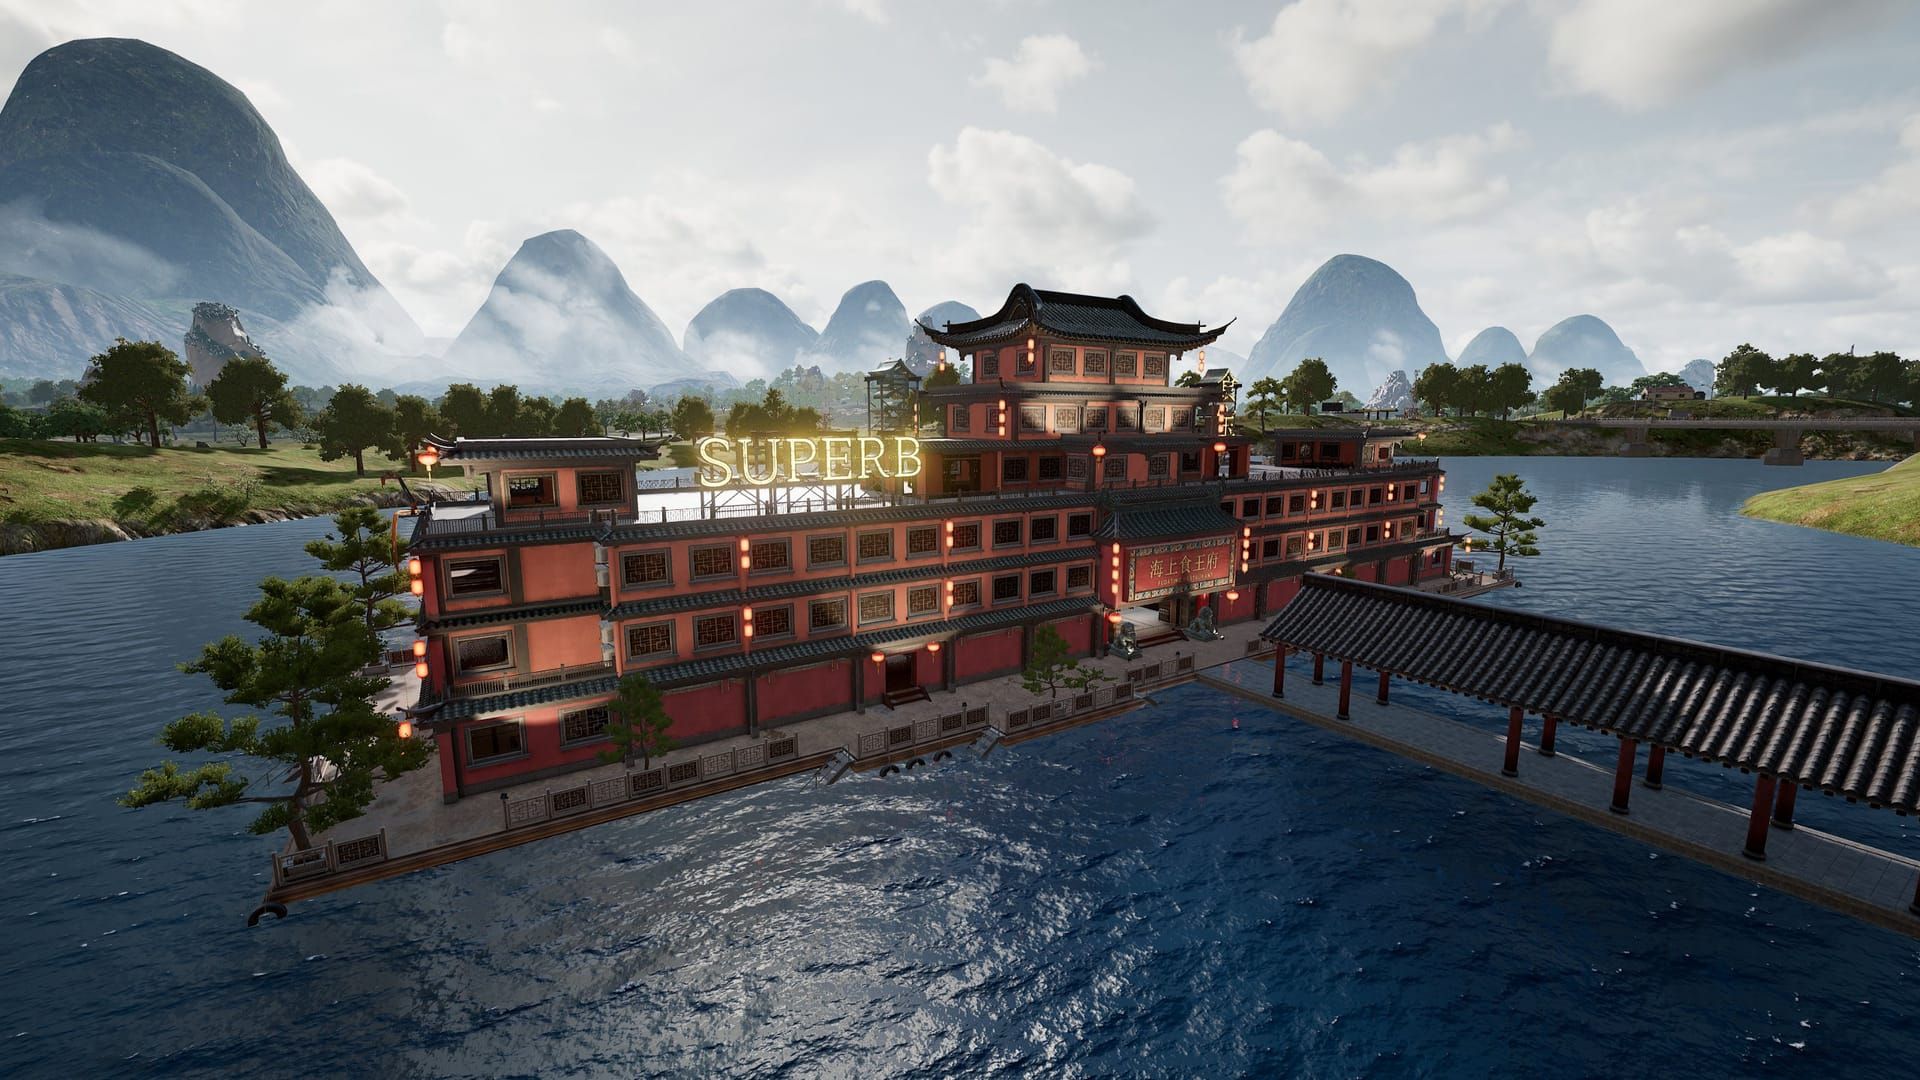
The heavy hitters? Jadina City’s where everyone wants to flex (and subsequently die), while Rin Jiang’s got this floating restaurant that’s become my personal favorite for newer players. Yu Lin’s all green and peaceful until it isn’t, and Tin Long Garden… well, those stone mountains aren’t just for show.
Central compound areas pack multi-story buildings with the good stuff – higher-tier weapons that’ll actually keep you alive past the first circle. Coastal regions lean heavily toward SMGs and shotguns (perfect for those close-quarters panic moments). That northwest military base? Premium attachments and scopes, but you’ll be fighting half the lobby for them.
Zone Distribution and Loot Density
Premium Stores in Renang and Low H Shine are where the magic happens – we’re talking MG3s and Level 3 armor, though those AI guards aren’t exactly welcoming. Basic Stores keep things simple with common supplies and let you trade spare attachments for essentials.
High-risk zones like Jadina City offer excellent loot and those escalators for quick vertical plays, but expect firefights within seconds. Stadium’s similar – premium equipment with intense competition. Central Plaza and Central Oasis? Classic hot-drop zones where dreams go to die.
Low-risk spots like Rin Jiang give you decent loot without the immediate death sentence.
Vehicle Spawn Locations and Routes
NEOX Factory’s your go-to for wheels, especially those electric vehicles. Silent operation’s a game-changer when you’re trying to rotate undetected.
Here’s something crucial – the EMP Zone mechanic completely shuts down engine-powered vehicles. You’ll get advance warning, and it disappears after the third Blue Zone, but plan accordingly.
Essential Route Planning Principles
Risk Assessment Framework
Three things matter: loot quality (tier 1-3 equipment), how likely you are to get third-partied (check that flight path), and your escape options. Rin Jiang gives you 60-70% survival rates through early game. Jadina City? You’re guaranteed instant action but potentially superior gear.
The math’s simple – risk versus reward.
Loot Quality vs Safety Balance
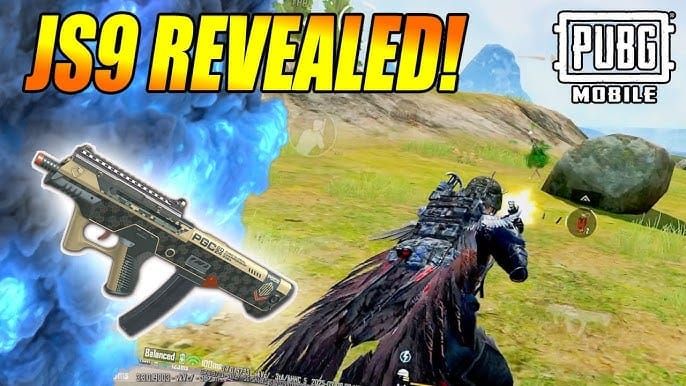
The JS9 SMG’s Rondo-exclusive and honestly perfect for beginners. Stable recoil, 9mm ammo that’s everywhere, and it won’t fight you during those panic sprays. High-tier weapons cluster in central compound buildings, while coastal areas favor close-range weapons.
Plan your route based on how you actually play, not how you think you should play.
Timing and Circle Prediction
Signal Jammer Backpack lets you tank Blue Zone damage longer, but EMP zones disable everything electronic – scope reticles vanish, vehicles die. Start moving 30-45 seconds before circle closure, always have a Plan B.
Top 5 Low-Risk, High-Loot Routes
Route 1: Rin Jiang to Underground Tunnel Network
Start at that floating restaurant in Rin Jiang. Easy loot, fewer immediate fights, solid tier-2 spawns. The underground tunnel network becomes your secret weapon – protected movement and perfect ambush spots.
Close-quarters down there, so bring SMGs and shotguns. Rotate after the first circle announcement. This route consistently delivers 60-70% survival rates through the first three circles.
Route 2: Neox Factory Vehicle Acquisition Path
Land at Neox Factory, grab those electric vehicles immediately. Clear the factory systematically – always check upper floors for campers (learned that the hard way).
Those unnamed perimeter compounds offer incredible loot-to-risk ratios. With wheels, you can hit 3-4 additional locations before the first circle closes.
Route 3: Jao Tin Theater Strategic Positioning
Theater area gives you balanced loot with strategic positioning. Those elevated spots let you scout enemies before committing to anything risky. The zipline system? Quick rotations to adjacent zones when things get spicy.
Theater’s position is perfect for reconnaissance before making your next move.
Safe Landing Zone Selection and Initial Loot Strategy
Identifying Optimal Drop Points
Watch those flight paths like a hawk. When they cross Jadina City or Stadium, peripheral locations suddenly become much more attractive. Landing near Basic Stores gives you immediate trading opportunities.
Squad play tip: split landing strategies work wonders for crossfire support.
Building Clearing Sequence
Ground floor perimeter first, then work your way up systematically. Destructible terrain lets you create new entry points with Pickaxes – but only soil and mud surfaces work. Those escalators offer rapid vertical movement but announce your presence to everyone nearby.
Early Game Positioning
Secure defensible spots with multiple exits. Never camp in escalator-accessible buildings – you’re just asking to get flanked. Emergency Cover Flare drops two triangular bunkers for instant cover, just don’t stand under the impact zone (trust me on this one).
Buy PUBG UC to access premium cosmetics and battle pass content that’ll enhance your Rondo Map experience.
Vehicle Usage and Rotation Strategies
Vehicle Priority and Spawn Timing
Get wheels within 2-3 minutes of landing. Electric vehicles run silent with limited range, motorcycles handle narrow paths, UAZs power through rough terrain. Park in covered positions with multiple exits, keep that engine ready.
Safe Rotation Paths
Use natural cover, avoid those obvious landmark-to-landmark routes everyone takes. Underground tunnels provide the safest rotation for close-quarters specialists, though you’ll need backup routes for EMP zone appearances.
When to Abandon Vehicles
Ditch them when approaching contested areas or final circles. EMP zone activation forces immediate abandonment. Late-game strategy: use abandoned vehicles as mobile cover, position them strategically for final engagements.
Loot Prioritization Guide
Essential Equipment Hierarchy
Primary weapons matter most – assault rifles for versatility, SMGs for close-quarters panic, sniper rifles for long-range picks. That JS9 SMG’s beginner-friendly with its stable recoil. Stun Gun fires electric shocks that temporarily immobilize enemies. Battle Ready Kit provides instant full heal and maximum energy (save it for clutch moments).
Inventory Management Tips
Signal Jammer Backpack extends Blue Zone presence but becomes useless in EMP zones. Stock up on 9mm when carrying JS9s. Electronic scopes fail in EMP zones – practice those iron sight skills now.
Situational Gear Selection
Emergency Cover Flare’s invaluable during final circles in open areas. Pickaxe serves multiple purposes: terrain destruction, cover creation, escape routes. Quiet operation maintains stealth compared to explosives.
PUBG Mobile UC Top Up through BitTopup ensures you’ve got sufficient premium currency with competitive pricing and instant delivery.
Circle Management and Zone Rotation Timing
Reading Circle Patterns
That 8x8 km size creates longer rotation distances than you might expect. EMP zones affect electronic devices until the third Blue Zone. First circle gives you 4-5 minutes for looting and positioning – use them wisely.
Early vs Late Rotation Strategy
Early rotation: start moving 60-90 seconds before closure, prioritize safe positioning over perfect loot. Late rotation: maximize loot time but requires superior skills and relies heavily on vehicles, tunnels, or Signal Jammer Backpack.
I prefer early rotation for beginners – better safe than sorry.
Safe Zone Positioning
Avoid obvious chokepoints like bridges or tunnel entrances. Secure elevated positions with escape routes and good visibility. Building positioning should prioritize escalator access for vertical repositioning. Emergency Cover Flare becomes crucial when circles end in open areas.
Common Beginner Mistakes and How to Avoid Them
Overcommitting to Loot
Set strict 3-4 minute limits per location. The shop system lets you buy equipment with gold bars anyway. Adequate gear with good positioning beats perfect loadouts with terrible positioning every single time.
Poor Timing Decisions
EMP zones disable vehicles and electronics but give advance warning. Circle timing: first circle takes 4-5 minutes, second takes 3-4 minutes, then intervals decrease. Plan rotations based on timing, not reactions.
Predictable Movement Patterns
Stop taking obvious routes between landmarks. Mix vehicle and foot movement. Use destructible terrain for unpredictable paths – Pickaxes or explosives create new routes through walls.
Advanced Tips for Route Optimization
Adapting Routes Based on Flight Path
That dual plane system requires strategic flight selection. Aggressive players should target central areas, survival-focused players prefer peripheral locations. Account for wind direction and weather in parachute deployment.
Team Coordination Strategies
Assign roles: drivers for vehicles, scouts for reconnaissance, support for covering fire. Develop standardized callouts for EMP zones, tunnels, escalators. Split landing in large locations provides crossfire support.
Mobile-Specific Control Optimization
Customize sensitivity settings – lower for long-range precision, higher for close-quarters chaos. Position vehicle controls, healing items, weapon switching for easy access during firefights. Enhance footstep audio while reducing ambient noise. Practice gesture controls until they’re muscle memory.
PUBG Top Up Cheap through BitTopup provides cost-effective premium access with secure payment and 24/7 support.
FAQ
What are the safest landing spots on PUBG Mobile Rondo Map for beginners? Rin Jiang’s southern end offers easy loot without the chaos, Jao Tin’s Theater provides balanced risk-reward, and Neox Factory gives immediate vehicle access. These spots offer decent equipment while avoiding those instant firefights that end your match in thirty seconds. Basic Stores provide immediate trading opportunities too.
How do you effectively use the underground tunnel network for rotations? Equip close-quarters weapons like the JS9 SMG or shotguns before entering – it’s tight down there. Use tunnels for mid-game rotations toward circle center or when surface routes are contested. They offer excellent ambush opportunities against surface travelers who don’t expect underground flanks.
What should you do when caught in an EMP Zone? Switch to iron sights immediately since electronic scopes get disabled. Abandon engine-powered vehicles and proceed on foot. Use the chaos as a tactical advantage – everyone’s dealing with the same limitations. Remember, zones appear with advance notification and disappear after the third Blue Zone.
How do you prioritize loot on Rondo Map for optimal survival? Focus on versatile weapons: JS9 SMG for close-range encounters, assault rifles for long-range flexibility. Save that Battle Ready Kit for critical moments. Stock up on 9mm ammunition for JS9s since it’s everywhere. Always carry Emergency Cover Flare for final circles in open areas.
What’s the best strategy for vehicle usage and fuel management? Secure vehicles within 2-3 minutes of landing, prioritize electric vehicles for silent operation. Motorcycles work best for narrow paths, UAZs handle rough terrain better. Always carry extra fuel and monitor gauges closely. Plan backup foot routes for when EMP zones force abandonment.
How do you avoid common beginner mistakes on Rondo Map? Set strict 3-4 minute location limits to avoid overcommitting to loot. Plan rotations 60-90 seconds before circle closure instead of reacting last-second. Use underground tunnels and destructible terrain for unpredictable movement patterns. Focus on adequate equipment with good positioning rather than chasing perfect loadouts in dangerous areas.


