

Poppo Live face authentication failures halt hosting, but manual verification offers a reliable alternative. This guide reveals the exact 3-step manual identity verification process, including document requirements, photo specs, and approval timelines. With a 70% pass rate for automated face authentication and approval times from 30 minutes to 5 days by region, understanding both methods ensures you start streaming without delays.
Understanding Poppo Live Face Authentication System
What Is Face Authentication for Poppo Live Hosts
Face authentication is mandatory biometric verification requiring hosts to complete a live front-camera selfie with specific head movements. The system captures real-time head tilts and nods matching a cropped passport-style photo you upload. This dual-layer verification ensures one account per person and restricts hosting to users 18+. Facial data is retained for maximum 60 days, then automatically purged.
The process integrates with Level 5 KYC requirements, unlocking withdrawal capabilities for earnings exceeding 100,000 points. Successful completion rewards 20,000 points. Requires Android 6.0+ or iOS 12.0+.
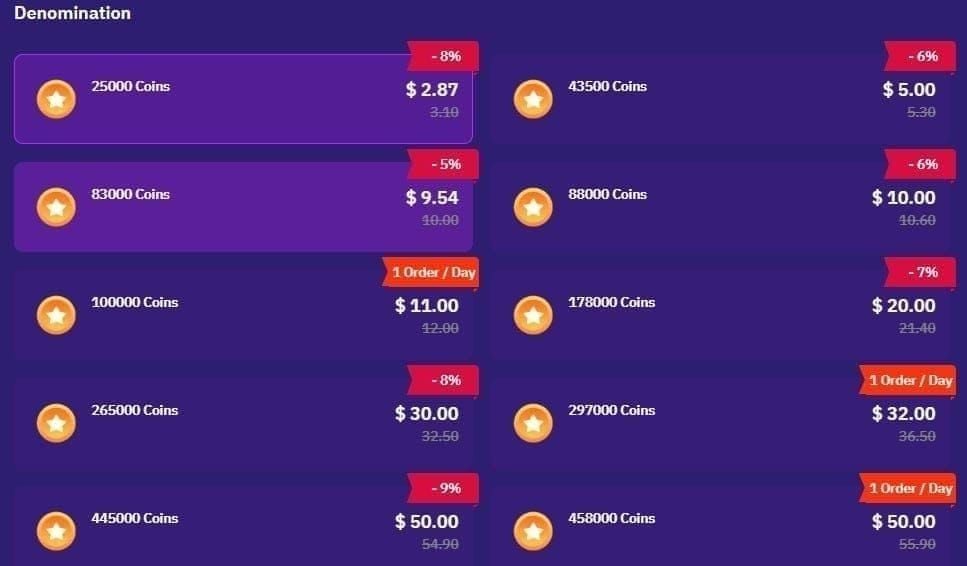
For hosts enhancing their streaming experience, BitTopup offers poppo live coins recharge with competitive pricing and secure transactions.
Why Identity Verification Matters for Host Accounts
Identity verification defends against fraudulent accounts, underage users, and duplicate profiles. The platform enforces strict one-person-per-account policies to maintain community integrity and comply with international regulations. Verified hosts access monetization features, premium streaming tools, and withdrawal privileges unavailable to unverified accounts.
Verification protects legitimate hosts by creating a trusted ecosystem where viewers confidently engage with authenticated creators. This trust directly impacts viewer retention and gift-giving behavior—the foundation of host earnings.
How Face Recognition Technology Works
Face recognition employs liveness detection algorithms analyzing micro-movements during authentication. Head tilts and nods create a three-dimensional profile preventing photo spoofing. The October 9 app version 2.9.6 update boosted accuracy by 30% and reduced fake detection errors by 30%.
The technology cross-references your live selfie against the uploaded passport-style photo, checking facial structure, skin tone, and distinctive features. Network stability is crucial—VPNs trigger a 30% risk flag causing automatic failure.
Common Scenarios Triggering Authentication Requirements
New host registration automatically triggers face authentication before accessing broadcasting features. Existing hosts face reverification when making significant profile changes, attempting withdrawals over 100,000 points, or after extended inactivity.
Regional compliance updates occasionally require batch reverifications for hosts in specific countries. The platform initiates checks when detecting suspicious activity patterns like login attempts from multiple locations within short timeframes.
Top 8 Reasons Why Poppo Live Face Authentication Fails
Poor Lighting Conditions During Face Scan
Inadequate lighting accounts for ~30% of failures. The system requires natural, eye-level illumination evenly lighting your entire face without harsh shadows. Overhead lighting creates dark shadows under eyes and nose; backlighting from windows turns your face into an unprocessable silhouette.
Optimal setup: face a window during daytime or position yourself before soft, diffused artificial light. Avoid direct sunlight creating glare spots that interfere with facial mapping. Full-face illumination ensures accurate facial contour capture.
Camera Quality and Permission Issues
Blurry documents and selfies fail 30% of attempts, stemming from low-resolution cameras or improper focus. The system requires 1080p quality for live selfies. Cameras below 8 megapixels struggle to meet standards, particularly in lower light.
Camera permission denials prevent app access to your front-facing camera. iOS: Settings > Privacy > Camera > enable Poppo Live. Android: Settings > Apps > Poppo Live > Permissions > grant camera access.
Facial Obstructions and Accessories
Glasses, masks, heavy makeup, and filters create verification obstacles. The algorithm needs clear visibility of natural facial features: eyebrows, eyes, nose, cheeks, mouth. Sunglasses block eye recognition; prescription glasses create reflective glare.
Remove all accessories before starting. Tie back long hair covering forehead or cheeks. Avoid hats, headbands, or headwear altering facial outline. The system rejects selfies with filters or suggestive poses.
Device Compatibility Problems
Devices below Android 6.0 or iOS 12.0 lack necessary processing capabilities for real-time liveness detection. The authentication software requires specific hardware acceleration features and camera API access older systems don't support. iOS version 2.9.5 (September 28, 2025) fixed 99% of crash issues.
Tablets with front cameras below 5 megapixels frequently fail due to insufficient image quality. The app performs best on smartphones manufactured within the last four years.
Network Connection Interruptions
Unstable connections cause authentication timeouts registering as failed attempts. Face authentication uploads real-time video data requiring consistent bandwidth of at least 2 Mbps. Network interruptions during head movement capture corrupt the data stream, forcing restart.
Switch to Wi-Fi instead of mobile data when possible. Avoid weak signal areas or peak congestion hours. Each failed attempt counts toward your daily limit of 3 retries per 24 hours.
Outdated App Version Conflicts
Running outdated Poppo Live versions creates compatibility issues with latest authentication protocols. The platform regularly updates security algorithms and liveness detection methods older versions can't execute. Version mismatches result in automatic rejection.
Update through official app store before attempting authentication. October 9 version 2.9.6 specifically addressed authentication accuracy. Enable automatic updates to prevent future version-related failures.
Mismatched Identity Documents
Submitting a live selfie not matching your uploaded passport-style photo triggers immediate rejection. Common mismatches: significant weight changes, different hairstyles, facial hair growth/removal, aging effects if ID photo is several years old. The system compares bone structure and facial proportions.
Ensure your uploaded photo represents current appearance. If government ID photo is 2+ years old and appearance changed significantly, consider updating official documents before Poppo Live verification.
Technical Server-Side Errors
Platform-wide technical issues occasionally affect authentication services, particularly during major updates or server maintenance. These appear as generic failure messages without specific explanations. Server-side problems typically resolve within 24-48 hours.
Screenshot every authentication step, including error messages and timestamps. This documentation proves invaluable when contacting support about technical failures beyond your control. Switch app to English mode for clearer error messages.
Prerequisites Before Starting Manual Verification
Required Documents Checklist
Level 5 KYC demands three document types: government-issued ID valid for 6+ months beyond submission, address proof dated within last 90 days, and high-quality live selfie. Acceptable IDs: passports, national identity cards, driver's licenses displaying full legal name, date of birth, photo, and expiration date.
Address proof must show current residential address: utility bills, bank statements, or official government correspondence dated within 90 days. Ensure all four corners visible with text clearly legible.
Live selfie requires specific head movements while camera captures your face in real-time. 1080p quality showing entire face within designated frame, with natural lighting illuminating all features evenly.
Photo Quality Standards
Document photos must meet 1080p minimum resolution for text legibility and security feature visibility. Capture in well-lit environments using highest quality camera setting. Avoid flash creating glare spots obscuring details.
Position documents flat against contrasting background—dark documents on light surfaces and vice versa. Entire document fits within frame with all four corners visible, no edge cropping. Camera parallel to document surface preventing perspective distortion.
For selfies, position face center-frame with adequate space around head. Eyes at approximately upper third line. Natural, eye-level lighting from front provides optimal illumination.
Device and Environment Preparation
Clear app cache before starting to prevent data conflicts. iOS: uninstall and reinstall Poppo Live for clean cache. Android: Settings > Apps > Poppo Live > Storage > Clear Cache.
Choose quiet, well-lit room with minimal background distractions. Close other apps to maximize processing power. Ensure device battery charged above 50%.
Test camera focus with practice document photos. Verify text appears sharp when zoomed. Check internet connection maintains stable speeds above 2 Mbps.
Account Information Needed
Gather complete legal name exactly as on government ID, including middle names and suffixes. Prepare accurate date of birth in required format. Have current residential address written in full: apartment numbers, street names, city, state/province, postal code.
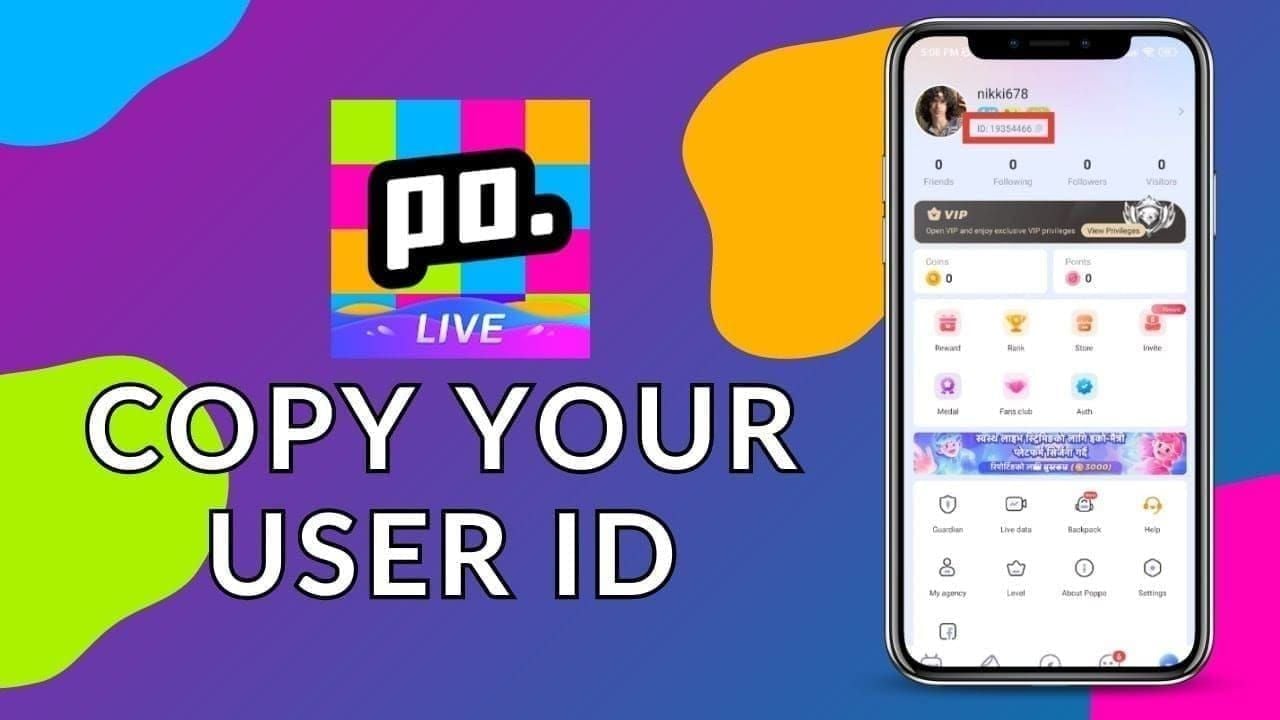
Your Poppo User ID (8-10 digit numeric identifier) appears below profile picture. iOS: tap Me tab, long-press ID below profile picture to copy. Android: tap My, long-press UID below nickname to copy. Copy-paste reduces User ID errors by 90% vs manual typing.
If applying for host verification, locate Host Code in My Agent option alongside Poppo ID.
Step 1: Access Manual Verification Portal
Navigating to Verification Center
Launch Poppo Live and log into account requiring verification. Tap profile icon in bottom navigation. Look for verification/authentication section, typically marked with shield icon or Auth label.
Verification center displays current authentication status and available methods. If you've failed face authentication, manual verification appears as alternative pathway. Interface shows verification level, pending requirements, and estimated processing times.
Navigate through Profile > Auth to access complete verification workflow. This path takes you through initial information entry screen for name, birthdate, gender, and country before document submission.
Selecting Manual Verification Option
After accessing authentication section, look for manual verification or document upload option, labeled Alternative Verification or Manual Review. This typically appears after automated face authentication failure or as secondary choice.
Some regional versions display manual verification as default; others require attempting face authentication first. If you don't see manual option, complete one face authentication attempt to trigger alternative pathway.
Manual verification selection screen explains required documents and estimated processing timeline for your region. EU/North American users see 30 minutes-48 hours; MENA/African regions show 3-5 days.
Understanding the Verification Interface
Manual verification interface presents step-by-step workflow with progress indicators showing submitted and pending documents. Each document type displays specific requirements: file format (PNG/JPG), maximum file size, quality standards.
Interface includes example images demonstrating proper document positioning and lighting. Study examples carefully before capturing photos. Red text highlights critical requirements frequently causing rejections.
Progress bar tracks completion percentage. Save progress at each stage to prevent data loss from crashes or connection drops.
What to Do If Manual Option Doesn't Appear
If manual verification remains hidden after multiple face authentication failures, switch app language to English through Settings > Language. This often reveals menu options regional translations may obscure.
Clear app cache and restart. Sometimes manual option appears only after app syncs with server to confirm failed authentication attempts. Wait 24 hours after last face authentication failure before rechecking.
Contact Poppo Live support through in-app help center if manual verification remains inaccessible after 48 hours. Provide Poppo User ID and screenshots showing failed attempts. Support can manually enable alternative verification pathway.
Step 2: Upload Identity Documents Correctly
Acceptable ID Document Types by Region
Government-issued passports qualify in all regions. National identity cards work for most countries, particularly European, Asian, and African nations. Driver's licenses accepted in North America, Australia, and select European countries with standardized security features.
Regional variations affect acceptance—some Middle Eastern countries require specific national ID formats; certain Asian regions accept residence permits for foreign nationals. Document must display full legal name, clear facial photograph, date of birth, document number, and expiration date.
All documents must remain valid for 6+ months beyond submission. Expired documents trigger automatic rejection regardless of photo quality.
Taking Clear Photos of Identity Documents

Position ID on solid-colored surface contrasting with document color. Ensure entire document fits within camera frame with small margins around edges. Hold camera parallel to document surface, 12-18 inches away, preventing perspective distortion.
Use natural daylight from window or soft artificial lighting at 45-degree angles minimizing glare on laminated surfaces. Avoid direct overhead lighting creating shadows. Disable flash—it creates bright spots obscuring security features and text.
Capture using highest resolution setting. Zoom in to verify all text appears sharp and readable. Check holograms, watermarks, and security features are visible. Retake photos showing blur, glare, or shadows obscuring information.
Uploading Front and Back of ID Card
Upload interface requires separate submissions for front and back. Label each photo clearly. Front displays photo, name, document number; back shows address, additional ID numbers, issuing authority.
Verify each uploaded image displays correct orientation—sideways or upside-down photos suggest carelessness and delay processing. Platform accepts PNG and JPG formats, typically capped at 5MB per image. Compress high-resolution photos exceeding size limits while maintaining text legibility.
After uploading both sides, use preview function confirming images appear clear and complete. System may automatically crop/adjust photos—verify no critical information was cut.
Common Document Upload Mistakes to Avoid
Photographing documents held in hand creates shadows and perspective angles failing verification. Always place documents on flat surface. Avoid capturing through protective sleeves or lamination pouches creating reflective glare.
Partial document photos missing corners/edges trigger automatic rejection. Verification requires visibility of complete document perimeter confirming authenticity. Don't crop photos after capture—submit full frame showing small margins.
Submitting photos of photocopies instead of originals results in immediate failure. System detects texture differences between originals and copies. Screenshots of digital documents don't meet standards—photograph physical card.
Ensuring Document Validity and Legibility
Zoom in on uploaded photos verifying all text remains readable at 200% magnification. Critical information (name, date of birth, document number, expiration date) must be clearly legible without squinting.
Check security features like holograms, watermarks, microprinting are visible. These prove document authenticity; their absence may flag submission for additional scrutiny. Ensure color accuracy—some security features rely on specific color patterns black-and-white or heavily filtered photos obscure.
Verify document expiration extends 6+ months beyond submission. Calculate carefully—submitting documents expiring within 6-month window causes automatic rejection even if technically valid.
Step 3: Submit Verification Selfie and Confirm Details
Proper Selfie Positioning and Lighting
Position yourself before neutral, solid-colored background free from distracting patterns. Face should occupy ~60-70% of frame, eyes at upper third line following portrait standards. Maintain neutral expression with mouth closed, eyes open, looking directly at camera.
Natural lighting from window provides optimal illumination. Position yourself facing light source so it evenly illuminates entire face. Avoid side lighting creating dramatic shadows interfering with facial recognition algorithms.
Hold device at eye level, approximately arm's length away. Avoid high/low-angle shots distorting facial proportions. Camera parallel to face, not tilted. Remove glasses, hats, accessories obscuring features; ensure hair doesn't cover forehead or cheeks.
Holding ID Next to Face Requirements
Verification selfie requires holding government ID next to face at cheek level, with ID photo clearly visible. Position ID so it doesn't cover face while remaining close enough for camera to capture both live face and ID photo simultaneously.
Angle ID slightly away from face preventing shadows from falling across document. Ensure ID photo on card is clearly visible and well-lit. Fingers grip ID edges without covering critical information like name or photo.
System compares live face against ID photo in real-time—maintain neutral expression similar to ID photo. Avoid smiling if ID shows neutral expression; significant expression differences trigger failures.
Filling Out Personal Information Accurately
Enter full legal name exactly as on government ID, including proper capitalization and spacing. Middle names, suffixes, prefixes must match documents character-for-character. Any discrepancy triggers automatic rejection.
Select date of birth using calendar interface, double-checking month, day, year. Single digit error creates mismatch failing verification. Choose gender as on official documents, not preferred identity—system performs strict document matching.
Select country from dropdown matching ID issuing country. Submitting passport from one country while selecting different country creates verification conflicts. Copy-paste Poppo User ID rather than typing manually—eliminates 90% error rate.
Double-Checking All Submitted Information
Review every field before final confirmation. Read entered name aloud catching spelling errors eyes might skip. Verify birthdate by calculating current age confirming it matches actual age.
Check all uploaded photos display correctly in preview. Tap each image viewing full-screen verifying clarity, orientation, completeness. Confirm ID front/back photos aren't accidentally swapped.
Review terms and conditions understanding how Poppo Live handles personal data. Platform retains facial data maximum 60 days, then automatically deletes.
Final Submission and Confirmation Process
After final review, tap submit sending verification package to review team. System generates confirmation screen displaying submission timestamp and reference number for tracking. Screenshot this confirmation immediately—serves as proof if technical issues arise.
App displays notification confirming successful submission and estimated review timeline by region. EU/North American submissions show 30-minute to 48-hour estimates; MENA/African regions display 3-5 day windows.
You'll receive in-app notification when verification status changes. Enable push notifications for immediate updates. Notification indicates approval, rejection, or request for additional information.
After Submission: What to Expect
Manual Verification Processing Timeline
Processing times vary significantly by region. European and North American submissions benefit from larger review teams: 30 minutes to 48 hours for straightforward cases.
MENA and African submissions face 3-5 day windows due to additional compliance checks and smaller teams. Complex cases may extend beyond standard timelines regardless of region.
Weekend/holiday submissions experience delays as verification teams operate on reduced schedules. Submit during weekday business hours to maximize speed. Fastest approvals: 9 AM-3 PM local time Tuesday-Thursday.
How to Track Verification Status
Access status through same Profile > Auth pathway used for submission. Status screen displays: Under Review,Approved,Rejected, or Additional Information Required. Each includes timestamp showing last update.
Under review indicates submission in queue awaiting manual inspection. Approved unlocks host privileges and triggers 20,000-point reward deposit. Rejected includes reason code explaining failure. Additional information required specifies which documents need resubmission.
Check status at least once daily during processing window to respond promptly to requests.
Notification Methods
Poppo Live sends push notifications when verification status changes. Notifications appear in device notification center and within app notification tab. Enable push notifications in device settings for immediate updates.
Email notifications arrive at account-associated address, typically within 15 minutes of status change. Check spam folder if not in inbox.
In-app messages appear in Poppo Live inbox with detailed outcome information. Approval messages include instructions for accessing newly unlocked features. Rejection messages specify failed aspects and provide resubmission guidance.
What to Do While Waiting
Avoid making profile changes during review period. Profile modifications trigger security flags delaying or complicating verification. Don't submit additional verification requests—duplicate submissions create confusion extending processing times.
Continue engaging as viewer to maintain account activity. Watch streams, participate in chat, send small gifts demonstrating legitimate platform engagement. This activity pattern supports verification showing you're genuine user.
For hosts preparing for streaming debut, explore coin recharge through BitTopup's top up poppo coins cheap services with fast delivery and secure transactions.
Temporary Account Limitations During Review
Unverified accounts can't access broadcasting features or host-specific tools during review. You can watch streams and interact as viewer, but hosting privileges remain locked until approval. Withdrawal functions completely disabled preventing coin/point movement.
Gift-receiving capabilities may be limited depending on verification status. Some regions allow unverified accounts to receive small gifts while restricting larger transactions.
Profile visibility may be reduced for unverified accounts, appearing lower in search results and discovery feeds. Full visibility restores immediately upon approval.
Troubleshooting Manual Verification Rejections
Understanding Common Rejection Reasons
Document quality issues account for majority of rejections. Blurry photos, poor lighting, or partially visible documents fail legibility standards. Verification team can't approve submissions where critical information is unclear or unreadable.
Mismatched information between documents and entered data triggers automatic rejection. Even minor spelling variations or single-digit errors create verification conflicts. System performs exact character matching.
Expired or soon-to-expire documents fail regardless of photo quality. Documents must remain valid 6+ months beyond submission. Submitting document expiring in 5 months results in rejection even though technically valid.
How to Resubmit After Rejection
Wait 24+ hours after rejection before resubmitting. This allows system to fully process previous attempt and clear it from queue. Immediate resubmission creates duplicate entries confusing verification system.
Carefully review rejection reason in notification. Address specific issues mentioned rather than resubmitting identical documents. If photo quality cited, retake in better lighting with higher resolution. If information mismatch, verify entered data matches documents exactly.
Platform limits verification attempts to 3 retries per 24 hours preventing system abuse. Plan resubmission carefully rather than rushing through multiple attempts. Each failed attempt counts toward limit, potentially locking you out for full day.
Improving Document Quality for Resubmission
Invest time creating optimal photography conditions. Use tripod or stable surface eliminating camera shake causing blur. Natural daylight from window provides superior lighting vs artificial sources, particularly for capturing security features.
Increase camera resolution settings to maximum quality. Most modern smartphones capture 12+ megapixel images far exceeding 1080p minimum. Higher resolution provides more detail for verification team, increasing approval likelihood.
Clean camera lens before photographing documents. Fingerprints and smudges create soft focus and haze reducing clarity. Use microfiber cloth to gently clean lens, then test focus photographing text ensuring sharpness.
When to Contact Support
Contact support after three consecutive rejections despite following all guidelines and addressing cited issues. Persistent failures may indicate technical problems requiring manual intervention. Provide Poppo User ID and detailed descriptions of submission attempts.
Reach out if verification status remains Under Review for more than double estimated processing time. EU/NA submissions stuck beyond 96 hours or MENA/Africa exceeding 10 days warrant support inquiry.
Email support with chronological PNG/JPG screenshots documenting entire verification journey if you believe rejection was erroneous. Include submitted documents, entered information, rejection notices, error messages. Auth appeals success rate remains below 5%—ensure case has genuine merit before appealing.
Alternative Verification Methods
Some regions offer video call verification as alternative for users experiencing persistent failures. This involves live video session with verification agent who visually confirms identity and documents in real-time. Availability varies by region and account history.
Third-party identity verification services integrate with Poppo Live in select markets, allowing completion through established KYC providers. These typically charge fees but offer faster processing and higher success rates for complex cases.
Agency-sponsored verification provides alternative pathway for hosts joining established talent agencies. Agencies with verified partnerships can expedite host verification for talent roster. This requires joining agency network and may involve revenue-sharing agreements.
Face Authentication vs Manual Verification Comparison
Processing Speed Differences
Automated face authentication delivers real-time results when successful—entire process completes in under 2 minutes from start to approval. System instantly analyzes live selfie, compares against uploaded photo, grants verification without human review for straightforward cases.
Manual verification requires human review creating inherent delays. Fastest manual approvals in EU/North American regions take 30 minutes when verification teams have low queue volumes. Average 24-48 hours more typical.
MENA/African regions face significantly longer 3-5 day timelines due to smaller teams and higher volumes. Complex cases requiring additional scrutiny extend to 7-10 days regardless of region. Manual verification trades speed for higher success rates when automated systems fail.
Success Rate Comparison
Face authentication achieves 70% pass rate under optimal conditions: natural eye-level lighting, clean camera lens, neutral background, proper device positioning. Pass rate drops significantly under poor lighting, with older devices, or when wearing accessories obscuring features.
Manual verification success rates exceed 85% for properly prepared submissions meeting document quality standards and information accuracy requirements. Human review accommodates minor variations automated systems reject, like slight appearance changes between ID photos and current appearance.
First-time submission success rates favor manual verification for users with older ID photos, significant appearance changes, or device limitations. Face authentication performs better for users with recent ID photos, modern devices, and optimal environmental conditions.
Security Level Analysis
Face authentication provides superior security against identity theft through liveness detection preventing photo spoofing. Real-time head movement requirements ensure live person is present, not static photo or video playback.
Manual verification relies on document authenticity checks and human judgment detecting fraudulent submissions. Experienced agents identify fake IDs, photoshopped documents, inconsistent information patterns. However, sophisticated forgeries occasionally bypass human review.
Both methods store facial data maximum 60 days before automatic deletion, maintaining equivalent privacy protections. One-account-per-person enforcement applies equally to both pathways, preventing duplicate accounts regardless of method.
When to Choose Manual Over Automatic
Choose manual verification after failing face authentication multiple times despite following guidelines. After 2-3 failed automated attempts, manual review offers fresh evaluation without technical limitations causing repeated failures.
Users with significant appearance changes since ID photo benefit from manual verification's human judgment. Verification agents accommodate weight changes, hairstyle differences, aging effects confusing automated facial recognition algorithms.
Older devices not meeting camera quality or processing power requirements for real-time face authentication should use manual verification from start. This saves time and retry attempts by bypassing technical limitations device can't overcome.
Can You Switch Between Methods
Platform allows switching from face authentication to manual verification after experiencing failures. Most regional versions unlock manual verification after 1-2 failed face authentication attempts.
Switching from manual back to face authentication is possible but rarely beneficial. If manual submission is rejected, attempting face authentication offers second chance through different evaluation method. However, same underlying issues causing manual rejection often trigger face authentication failures.
Some users successfully combine methods by completing initial face authentication for basic verification, then submitting manual Level 5 KYC documents for withdrawal privileges. This hybrid approach leverages automated verification speed while providing manual review thoroughness for higher-security features.
Maintaining Verified Host Status
Periodic Reverification Requirements
Poppo Live doesn't enforce automatic periodic reverification for hosts maintaining consistent activity and profile information. Verified status remains valid indefinitely as long as you continue streaming regularly and don't trigger security flags through suspicious activity.
Accounts inactive for 6+ months may face reverification when reactivating. This prevents account takeovers and ensures original verified user still controls account.
Regulatory changes in specific regions occasionally trigger batch reverification requests for all hosts in affected countries. These compliance-driven reverifications typically provide 30-60 day notice periods.
Profile Changes Triggering Reverification
Changing legal name in app requires reverification with updated government documents reflecting new name. Name changes from marriage, divorce, or legal processes must be supported by official documentation showing both old and new names.
Significant profile photo changes making you unrecognizable compared to verified selfie may trigger security reviews. While you can update profile photo freely, dramatic changes suggesting different person may prompt reverification requests.
Changing registered country/region triggers automatic reverification under new region's requirements. This prevents exploiting regional verification differences by switching locations after initial approval.
Best Practices for Account Security
Enable two-factor authentication preventing unauthorized access compromising verified status. Two-factor authentication requires secondary code from phone when logging in from new devices, blocking account takeover attempts.
Never share account credentials with agencies, managers, or third parties. Shared account access violates terms of service and can result in verification revocation. Legitimate agencies don't require login credentials to provide management services.
Regularly review account login history in security settings identifying unauthorized access attempts. Immediately change password and contact support if noticing login attempts from unfamiliar locations or devices.
Protecting Verified Host Privileges
Avoid violating community guidelines and content policies resulting in account suspension or permanent ban. Verified status doesn't protect from enforcement actions against policy violations. Serious or repeated violations can result in verification revocation along with account penalties.
Maintain consistent streaming activity demonstrating ongoing legitimate use of verified host account. Accounts receiving verification but never streaming or suddenly changing patterns may face security reviews.
Respond promptly to verification-related communications from Poppo Live. Ignoring requests for additional information or updated documents can result in temporary suspension of host privileges until compliance.
Expert Tips for First-Time Host Verification Success
Optimal Photo Environment Setup
Create dedicated photo station with consistent lighting and neutral background. Blank wall in room with large windows provides ideal natural lighting during daytime. Position chair facing window so you can sit comfortably while maintaining proper camera distance.
Invest in simple phone tripod or stand eliminating camera shake and ensuring consistent framing. Tripods allow positioning camera at exact eye level and maintaining steady shots for document photography and selfies. Budget tripods under $15 provide sufficient stability.
Test lighting setup taking practice photos at different times of day. Morning and late afternoon typically provide softest, most flattering natural light. Avoid midday when harsh overhead sun creates strong shadows. Identify optimal photography window and schedule verification session accordingly.
Document Preparation Checklist
Gather all required documents 24 hours before planned verification session. Verify expiration dates ensuring each remains valid 6+ months. Check address proof dated within last 90 days—utility bills or bank statements older than this threshold will be rejected.
Clean government ID with soft cloth removing fingerprints, dust, smudges reducing photo clarity. Ensure laminated surfaces free from scratches or damage obscuring security features or text. Replace damaged IDs before attempting verification if possible.
Prepare checklist: government ID (front and back), address proof, list of account information including Poppo User ID. Having everything organized before starting prevents mid-session scrambling leading to errors or forgotten items.
Common Mistakes New Hosts Make
Rushing through verification without reading instructions causes majority of first-time failures. New hosts often skip example images and requirement explanations, then submit photos not meeting basic standards. Invest 10-15 minutes reviewing all instructions before capturing first photo.
Using filters or beauty modes on selfies triggers automatic rejection, yet new hosts frequently forget disabling these features. Check camera settings before taking verification selfies ensuring all enhancement features turned off. Verification system needs natural, unaltered appearance.
Submitting photos of photocopied documents instead of original IDs is surprisingly common mistake. New hosts sometimes photograph ID photocopy from previous verification process rather than physical card. Always photograph original government-issued document.
How to Speed Up Approval Process
Submit verification during weekday business hours in your region ensuring immediate queue entry. Submissions at 2 AM local time sit in queue for hours before verification teams begin workday. Tuesday-Thursday between 9 AM-3 PM typically offers fastest processing.
Provide perfect submissions on first attempt avoiding delays associated with resubmission cycles. Spending extra 30 minutes ensuring photo quality, information accuracy, document validity saves days of processing time vs rushed submissions failing and requiring resubmission.
Choose manual verification from start if you know device or circumstances make face authentication unlikely to succeed. Attempting face authentication 2-3 times before switching to manual wastes days that could've been spent in manual review queue.
Regional Specific Requirements
EU hosts must ensure submitted documents comply with GDPR data handling requirements. Some EU countries require explicit consent checkboxes for biometric data processing appearing during verification. Missing consent confirmations causes automatic rejection.
Middle Eastern and North African regions often require Arabic-language documents or certified translations of documents in other languages. Check region's specific language requirements before submitting documents in English or other languages.
North American hosts using driver's licenses should verify their state/province issues licenses meeting federal identification standards. Enhanced driver's licenses or REAL ID compliant licenses have higher acceptance rates than standard licenses.
Asian region hosts may need additional documentation for foreign nationals or residents. Residence permits, work visas, or other legal status documents supplement standard government IDs for non-citizens. Check region-specific requirements in verification interface.
FAQ
Why does Poppo Live face authentication keep failing?
Face authentication failures typically result from poor lighting, camera quality issues, or facial obstructions like glasses. System requires natural, eye-level illumination, 1080p camera quality, and clear visibility of all facial features. VPNs trigger 30% risk flag; blurry photos account for 30% of failures. Ensure device runs Android 6.0+ or iOS 12.0+, updated to app version 2.9.6+, and attempt verification in optimal conditions with natural lighting and clean camera lens.
How long does manual host verification take?
Manual verification processing varies by region. EU/North American submissions: 30 minutes to 48 hours. MENA/African regions: 3-5 days. Complex cases may extend beyond standard timelines. Submitting during weekday business hours (Tuesday-Thursday, 9 AM-3 PM local time) speeds processing vs weekend/holiday submissions. Fastest approvals occur for high-quality submissions meeting all requirements on first attempt.
What documents are needed for manual verification?
Manual verification requires: government-issued ID valid 6+ months (passport, national ID card, or driver's license), address proof dated within last 90 days (utility bill, bank statement, or government correspondence), and high-quality 1080p live selfie. All documents must show full legal name, with ID displaying photo, date of birth, and expiration date. Documents photographed in clear lighting with all four corners visible and text fully legible. Selfie requires holding ID next to face with neutral expression and proper lighting.
Can I stream on Poppo Live without face authentication?
No, face authentication or manual verification is mandatory for accessing host broadcasting features. Unverified accounts can watch streams and interact as viewers but can't broadcast or access monetization features. Platform enforces strict one-account-per-person policies requiring identity verification for all hosts. Level 5 KYC verification specifically required for withdrawing earnings over 100,000 points. Bypassing verification violates terms of service and can result in permanent account suspension.
How many times can I retry face authentication?
Poppo Live limits face authentication attempts to 3 retries per 24-hour period. Each failed attempt counts toward this limit, potentially locking you out for full day if exhausting all attempts. After 2-3 failed automated attempts, platform typically unlocks manual verification as alternative. Plan attempts carefully ensuring optimal conditions—natural lighting, clean camera lens, neutral background, stable internet—before starting each attempt. If you've failed multiple times, consider switching to manual verification.
What happens if manual verification is rejected?
Manual verification rejection includes specific reason code explaining why submission failed. Common reasons: document quality issues, mismatched information between documents and entered data, or expired/soon-to-expire documents. You can resubmit after waiting 24+ hours and addressing cited issues. Auth appeals success rate remains below 5%—focus on correcting specific problems mentioned rather than appealing. After three consecutive rejections despite following guidelines, contact Poppo Live support with User ID and chronological screenshots documenting submission attempts for technical assistance.
Successfully verified your Poppo Live host account? Boost streaming success with instant coin top-ups from BitTopup! Enjoy secure transactions, competitive rates, and 24/7 support designed specifically for Poppo Live hosts. Visit BitTopup now and claim your exclusive welcome bonus to maximize hosting potential!


