Stuck at high combat power deficits? Master the 2026 Nikke tier list, recruit priorities, and team comps to clear high-deficit campaign stages and Solo Raid.
Pushing campaign stages while deep in the red is the true endgame filter in Goddess of Victory: Nikke. When your squad sits 35% below the recommended Combat Power (CP), the game hits you with brutal stat penalties that turn routine raptures into one-shot executioners. You cannot brute-force these walls with random SSRs pulled from the standard banner.
You need mathematically broken kits, disciplined burst cycling, and extreme hyper-carries. Every single skill book, custom module, and Core Dust crate must land on units that scale through massive stat deficits.
The Realities of High-Deficit Combat Power Scaling
Nikke handles deficit math aggressively. Once your team falls below the stage's baseline CP recommendation, the engine applies a severe flat stat penalty to your entire squad. Understanding the breaking points tells you whether a stage is beatable through manual micro or strictly locked behind account levels.
The drop-off accelerates dramatically once you leave the single-digit deficit bracket.
| CP Deficit Percentage | Incurred Squad Stat Reduction | Gameplay Impact and Viability |
|---|
| 0% – 5% | Up to 25% Reduction | Minimal friction; auto-aim clears consistently with solid burst cycles. |
| 10% – 20% | 35% to 47% Reduction | Punishing; stray sniper shots kill squishy units. Requires cover manipulation. |
| 35%+ | Massive Hard Stat Wall | Near-zero room for error. Mandatory hyper-carries, invulnerability windows, and manual targeting. |
Takeaway: Clearing at a 35%+ deficit demands dedicated manual play and specialized DPS kits capable of circumventing raw stat cuts through piercing multipliers and massive self-buffs.
At 35% or deeper, baseline damage formulas cause regular attacks to hit for 1 damage unless your attacker has absurd self-contained multipliers. The standard PvE combined tier list weights character viability roughly 60% toward Raid boss content (Union Raid, Solo Raid, Interception) and 40% toward Campaign progression, ignoring PvP entirely. If an SSR cannot contribute to breaking deficit stages or shredding high-tier Solo Raid health bars, they sit unbuilt in your inventory.

Definitive PvE Tier List for 2026
Rankings prioritize high-deficit campaign clears alongside performance against endgame Solo and Union Raid bosses.
- Tier 0 (Meta Staples): Crown, Red Hood, Scarlet: Black Shadow, Naga.
- Tier 1 (High-Deficit Clears & Raid Core): Vesti: Tactical Upgrade, Rapi: Red Hood, Snow White: Heavy Arms, Mint, Helm (with Favorite Item), Liter.
- Tier 2 (Niche Counters & Boss Flexes): Privaty (with Favorite Item), Moran (with Favorite Item), Flora (with Favorite Item), Biscuit, Noah, Jackal.
- Tier 3 (Sub-Optimal / Powercrept): Blanc, Noir, and standard non-synergy SSRs.
A common beginner recommendation is leaning on the classic bunny duo—Blanc and Noir—for passive heals and extended ammo. That advice is out of date. High-deficit endgame clears have largely abandoned the duo because their damage ceilings cannot match Crown pairings. Crown completely warps the Burst II slot around her personal kit.
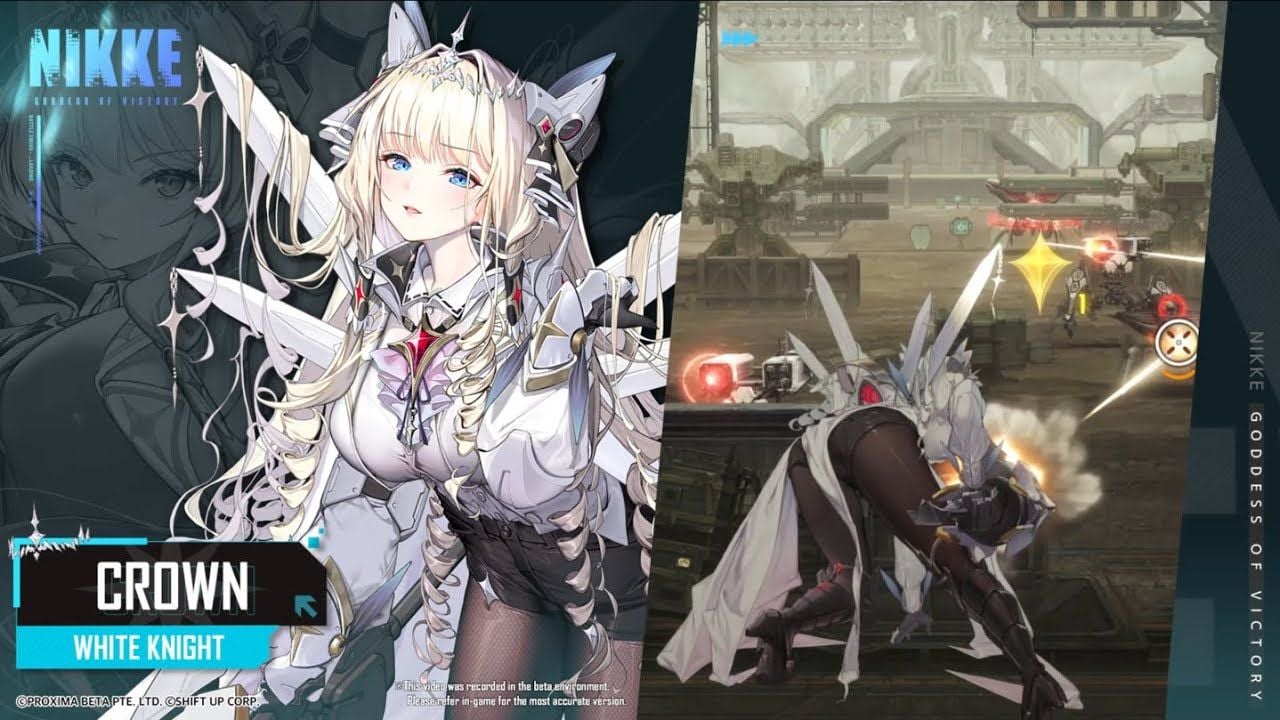
Crown: The Undisputed Queen of Burst II
Crown anchors the entire PvE meta. Her kit combines offensive buffs and defensive passives that sustain squads through high-deficit penalties while multiplying overall damage output.
Her Skill 1 (One for All) fires at the start of Full Burst. It grants all allies who cast a Burst an ATK buff equal to 64.51% of Crown's own ATK, along with a 44.35% reload speed boost for 15 seconds on a 20-second cooldown. That reload buff alone changes the flow of combat for rocket launcher and sniper rifle carries.
Crown's defensive kit is equally stacked. Skill 2 tracks normal attacks. Every 43 attacks, she builds a stack of Relax up to 20 times. At max stacks, she gains a 5-second invulnerability taunt and restores 5.23% of her Max HP. Whenever Crown receives an HP recovery effect, she grants all allies a +20.99% Attack Damage buff for 7 seconds.
[Normal Attacks (43 hits/stack x 20)]
       │
       ▼
[5-Second Invulnerability Taunt + 5.23% Max HP Heal]
       │
       ▼
[Crown Receives Healing] ──► Triggers Skill 2 Passive: +20.99% Team ATK DMG (7s)
There is a major contradiction in the game's localized text here. Crown's in-game description claims that HP restoration from team-wide recovery effects will not trigger her Attack Damage buff. In practice, that description is inaccurate. Group healers like Helm, Pepper, and Mary reliably trigger Crown's 20.99% team-wide damage boost the split-second their healing ticks on her model.
Her weapon class matters too. Machine guns fire at 60 rounds per second when running at 60 FPS, meaning hardware performance directly dictates how fast Crown cycles her 43-attack Relax stacks. Run your game at 60 FPS. If you drop frames, you drop your buff uptime.
Crown also casts a 1-tick shield during Burst. This single shield absorbs any incoming lethal hit, completely negating wipes from boss wipe mechanics. Even better, that shield automatically enables Naga's conditional Skill 2 core-damage passives, allowing you to run Crown and Naga together without fielding Tia.
To stock summon resources before the next Pilgrim banner drops, pick up cheap Nikke gems to keep roster progression moving.
Red Hood: Burst Flexibility and Overload Priorities
Red Hood remains the premier hyper-carry for cracking campaign walls. Her core mechanic breaks the strict Burst step rules of the game: she can activate Burst I, Burst II, or Burst III. She carries a base 40-second Burst cooldown, but that cooldown drops by 40 seconds once per battle independently whenever she triggers Step 1 (Beast Cage) or Step 2 (The Last Howl).
This means Red Hood can trigger all three Burst steps herself in a single rotation (B1 -> B2 -> B3), generating an overwhelming opening spike of damage that clears elite raptures before they can fire. While some players relegate her to a standard B3 slot, utilizing her Step 1 Burst—which hands out a massive 77.55% ATK buff—allows high-deficit teams to blow through boss waves in two to three swift rotations.
Red Hood features unique stat conversion mechanics: normal attacks stack up to 38.1% Charge Speed. Any Charge Speed exceeding 100% is converted into Charge Damage at a 1:2.4 ratio (240% of the excess value). To maximize this scaling, your Overload gear rolls must follow a strict priority.
| Overload Sub-Stat Roll | Target Quantity | Build Rationale and Mechanical Synergy |
|---|
| Increase ATK | 4x (Priority 5/5) | Core baseline scaling required to counter high-deficit stat penalties. |
| Increase Element Damage | 4x (Priority 4/5) | Pure independent multiplier vital for pushing Solo and Union Raid boss scores. |
| Increase Charge Speed | 3-4x (Priority 4/5) | Speeds up attacks and converts excess past 100% into Charge Damage at a 1:2.4 ratio. |
| Increase Max Ammo | 1x (Priority 2/5) | Red Hood receives infinite ammo during Burst III; 1 roll is plenty for off-burst gauge building. |
| Hit Rate / DEF | 0x (Priority 0/5) | Pure dead rolls on sniper units; reroll these immediately. |
Takeaway: Roll for ATK and Elemental Damage across all four gear pieces, stacking Charge Speed until you trigger her conversion threshold for massive piercing damage.
Invest in Red Hood fully. Take her skills directly to 10/10/10. Her gear upgrade order should always prioritize Head first, followed by Gloves, Chest, and finally Boots to maximize raw offensive output.
The Three Best Campaign Meta Compositions
Clear requirements shift depending on the stage's specific threat profile.
1. The High-Deficit Crown Hyper-Carry (Universal Push)
- Burst I: Liter / Dorothy
- Burst II: Crown
- Burst III: Red Hood
- Burst III: Scarlet: Black Shadow (or Vesti: Tactical Upgrade)
- Flex / Support: Naga
This is the most reliable campaign team in Nikke. Crown takes position one to draw aggro with her taunts, Naga provides healing ticks to trigger Crown's 20.99% attack damage buff, and Crown's shield enables Naga's bonus core damage. Scarlet: Black Shadow shreds distributed waves, while Red Hood punches through high-priority targets. When pushing 35%+ deficits, run Red Hood through B1 -> Crown B2 -> Scarlet: Black Shadow B3 on turn one to delete the screen instantly.
2. The Rapid Burst Pierce Squad (Single-Target / Elite Walls)
- Burst I: Red Hood (Burst 1 Trigger) / Liter
- Burst II: Crown
- Burst III: Snow White: Heavy Arms
- Burst III: Rapi: Red Hood
- Burst III / Healer: Helm (with Favorite Item)
Built for stages where an elite rapture spawns with an impenetrable shield or absurd health pool. Red Hood opens with Step 1 for the 77.55% ATK steroid, Crown triggers Step 2 for reload and defense, and Snow White: Heavy Arms drops a massive single-target pierce shot to delete the target. Helm provides burst gauge generation, steady healing ticks for Crown, and strong off-burst damage.
3. The Raid Rotation Composition (Sustained Solo Raid)
- Burst I: Liter
- Burst II: Mint
- Burst III: Red Hood
- Burst III: Scarlet: Black Shadow
- Flex: Naga
Mint shines as an Iron Burst II supporter built for raid endurance. She alternates states: her Vocal state grants a 45% ATK buff along with projectile and pierce amplification, while her Dance state restores team health. Rotating Mint alongside high-tier pierce units ensures continuous damage amplification across extended 3-minute boss fights.
To avoid stalling during limited recruitment windows, grabbing a quick Nikke account top up secures key rate-up units before their banners cycle out.
Conquering the Level 160 Wall and Core Dust Bottlenecks
Every Nikke account hits the infamous Level 160 wall. SR units cannot surpass level 160 because they max out at 2 Limit Breaks. SSR units, however, can reach level 200 once upgraded with 3 Limit Breaks (MLB / Maximum Limit Break).
To unlock your account's progression, you must collect five 3-star SSR characters and place them into the top five slots of the Synchro Device.
- Conserve Your Ordinary Recruit Black Mileage: Do not spend spare body mileage tickets casually. Save them until you have multiple SSRs at 2 stars, then purchase the specific spare bodies needed to finish your fifth MLB.
- Lock in the Wishlist: Keep your standard banner wishlist tightly focused on Nikkes you already have dupes for rather than chasing unowned units.
- Manage Reset Costs: Resetting any character's level only costs 10 gems, refunding 100% of the invested resources. Do not hesitate to reset an SR unit once an SSR hits MLB.
- Synchro Slot Strategy: Unlock extra Synchro Device slots for 500 gems each, or pick up 15 free slots by completing Tactics Academy lessons 6-1, 8-1, and 9-1.
Once five MLB units reach level 200, the system unlocks Advanced Synchro. From this point forward, leveling affects your entire roster at once.
Every single level in Advanced Synchro costs exactly 10,000 Core Dust. Battle Data and Credits stop being your main concern; Core Dust becomes the sole gating resource. Since 10,000 Core Dust equates to roughly 9 to 10 days of base Outpost Defense generation per level, open your hourly Core Dust boxes only when your Outpost level is maximized.
Duplicates acquired past MLB provide Core Up ranks from Core 1 to Core 7. Each Core Up gives a 2% stat boost, capping out at a cumulative 14% bonus. While nice for Raid rankings, Core Ups are not required for campaign progress. Raw Synchro levels matter far more.
Endgame Progression: Favorite Items and PvP Meta
Endgame investment extends beyond raw stats. The Favorite Item (Treasure) system rescues older units from the bench, reshaping their viability entirely.
| Character | Favorite Item Impact | Content Focus & Meta Ranking |
|---|
| Helm | Adds permanent team attack buffs, burst gen, and continuous healing. | S-Tier: Essential for Solo Raid and high-deficit campaign teams. |
| Moran | Drastically ramps taunt damage mitigation and defense scaling. | S-Tier: Elite PvP wall and niche high-damage campaign tank. |
| Privaty | Accelerates reload buffs and bolsters last-bullet weapon synergies. | A-Tier: Essential flex for last-bullet teams and shotgun comps. |
| Flora | Provides skill cooldown manipulation and situational survivability. | A-Tier: High-tier flex option for Solo Raid team 4 or 5 setups. |
Takeaway: Focus your maintenance materials on Helm's Favorite Item first; her team-wide offensive buffs and consistent healing make her an invaluable Campaign and Solo Raid asset.
PvP in the Rookie and Special Arena operates on an entirely different axis than campaign. Deficit scaling does not exist here. Instead, matches are decided by Burst generation speed and invulnerability timers. Units like Jackal lead the meta by transferring burst energy instantly upon taking hits. Biscuit protects Defenders by granting invulnerability when their health drops, while Noah casts a team-wide damage immunity shield that blanks enemy Burst III nukes. Do not bring campaign squads into Arena; build for pure burst speed.
To maintain skill manual reserves and accelerate progression, a Goddess of Victory Nikke recharge gives direct access to high-value monthly passes.
FAQ
Who is the absolute best Burst II character to invest in for campaign and raids?
Crown is the definitive top-tier Burst II character across all PvE content. She provides unmatched attack power buffs, reload speed, an invulnerability taunt, and a shield that triggers passives for top supports like Naga.
How does Combat Power deficit affect stage clearing?
Combat Power deficit applies a steep stat reduction penalty to your entire squad, cutting stats by 35% to 47% at just a 10% to 20% deficit. Clearing at 35%+ deficits requires hyper-scaling carries, invulnerability timings, and manual aiming.
What skill investment level does Red Hood require?
Red Hood should be brought to 10/10/10 skill investment as soon as possible. Her Skill 2 and Burst should be prioritized first to maximize personal and team damage, followed closely by Skill 1.
What is the Level 160 wall and how is it broken?
The 160 wall occurs because SR characters cap at level 160, halting account leveling until five SSR characters are upgraded to 3 Limit Breaks (MLB). Placing those five level 200 SSRs into the Synchro Device unlocks Advanced Synchro to progress your entire roster.
Which resource is the main bottleneck after Synchro Level 200?
Core Dust is the primary leveling bottleneck beyond Level 200, demanding 10,000 Core Dust per Synchro level. Battle Data and Credits become secondary concerns, making Core Dust selection boxes the top priority in event shops.
Does Crown's Skill 2 trigger from team-wide healers?
Yes, Crown's Skill 2 triggers from team healers like Helm and Pepper despite conflicting in-game skill text. The 20.99% attack damage buff activates consistently as long as Crown herself receives incoming HP restoration.
Which Favorite Items (Treasures) offer the highest return on investment?
Helm, Moran, Privaty, and Flora are the highest meta priority for Favorite Item upgrades. Helm's Favorite Item is especially valuable for campaign and raids because it adds permanent attack damage, healing, and burst gauge acceleration.
Final Roster Verdict
Pushing high-deficit campaign stages and climbing Solo Raid rankings comes down to resource discipline. Crown and Red Hood demand your absolute top-tier investment; taking their core skills to level 10 and securing optimal Overload stats on Red Hood will yield more campaign progress than spreading skill books across twenty average SSRs.
Stop spreading your custom modules thin. Lock down your Crown and Naga pairing, build a reliable pierce hyper-carry, hoard every single Core Dust box until your Outpost production peaks, and pilot your Burst steps manually. The stat penalties in the red are brutal, but with the right kits executing precise rotations, no campaign wall stays unbroken.