

Why Distorted Valley Is a Top Money Map in Arena Breakout S5
The map's S5 overhaul didn't just change aesthetics — it fundamentally shifted the loot economy. New rivers, swamps, and warped terrain created isolated pockets that most squads skip entirely. Community testing confirms bot density here runs higher than other maps, which means more AI loot carriers to strip and fewer contested zones if you know where to land.
The anomaly system (triggered on bell tolls) scares off casual players. But experienced farmers treat bell events as a loot reset signal, not a threat. Abilities chosen pre-raid let you tailor your kit to the zone you're targeting.
Solo vs Squad: Solo runs in Distorted Valley are genuinely viable — arguably better for budget farming. Squads dominate the high-tier PVP zones but split loot four ways. Solo players running Hotel or the river basin consistently clear 600k–900k Koen with minimal gear investment. Squads should target the multi-building clusters where clearing speed matters more than stealth.
One S5 change that directly affects profitability: high-tier gear is now raid-only, no market flooding. That keeps item values elevated and your loot worth more at the flea market.
How We Ranked These 7 Locations
Rankings weight four factors: average Koen per run, risk level (gear loss exposure), solo accessibility, and S5 meta relevance. "Risk" here means realistic gear loss probability against the current bot and player mix — not theoretical worst-case. Koen estimates assume a budget loadout (Deagle, medium backpack, basic rig) risking roughly 100k Koen.

Risk tiers used below:
- 🟢 Low — budget kit, minimal PVP exposure
- 🟡 Medium — occasional player contact, some gear value at stake
- 🔴 High — frequent Tier 6 PVP, gear loss likely without skill
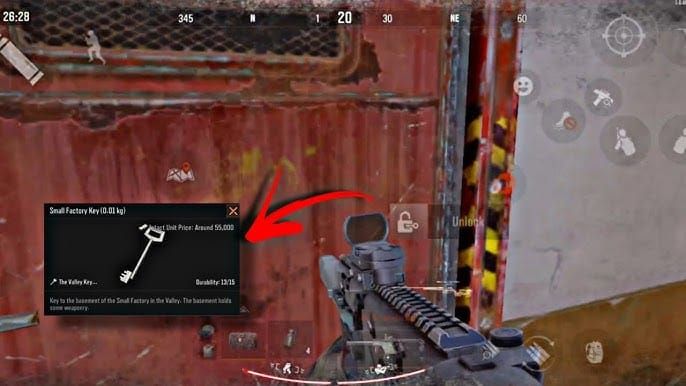
Farm #1: Small Factory Basement — Premium High-Risk Hotspot
Avg Koen/Run: 900k–1.5m | Risk: 🔴 High | Best For: Experienced solos, full squads
This is the ceiling for Distorted Valley farming. The Small Factory Basement is a confirmed quest POI — you need to survive 45 seconds inside — which means it draws players every raid. That traffic is also why loot density stays high; not everyone extracts successfully.
What spawns here: High-value tech components, Three Axis Gyro Red (a confirmed S5 Distorted Valley drop), and dense container clusters. The Gyro Red alone can flip a run from average to exceptional.
Approach: Enter from the north side to avoid the main player funnel. Clear the outer room before committing to the basement stairs — bot teams here are thicker than anywhere else on the map. Prioritize locked containers first; they reset less frequently and hold the highest-value items.
Extraction: Don't linger after looting. The nearest extraction is northeast. If you hear a bell toll while inside, use your pre-selected ability immediately and move — anomalies in enclosed spaces are brutal.
Mistake to avoid: Running T7 gear here early in S5. Community experience confirms Distorted Valley isn't worth T7 investment until the economy stabilizes. Mid-tier gear with good positioning beats expensive kits with bad angles.
Farm #2: Hotel Area — Best Balance of Value and Safety
Avg Koen/Run: 600k–1m | Risk: 🟡 Medium | Best For: Solo players, duos
The Hotel is the single best entry point for players new to Distorted Valley farming. Experienced solo runners consistently flag this as the easiest money on the map — and the S5 terrain rework actually improved it by adding adjacent resource sites that chain naturally into a 10–15 minute loop.
Key loot: Multiple room containers, occasional weapon parts, and consistent mid-tier valuables. Nothing as flashy as the Gyro Red, but the volume is reliable every run.
S5 change: The new river system near Hotel creates a natural barrier that funnels bot patrols into predictable paths. Learn those paths and you'll rarely take unexpected contact.
Solo route: Start at the east entrance, sweep top floors first (higher container density), then ground floor on exit. Don't backtrack — the loop exits naturally toward the northeast extraction cluster.
Farm #3: Forbidden Farm — Best for Budget Loadout Runners
Avg Koen/Run: 500k–800k | Risk: 🟢 Low | Best For: Budget solos, beginners
Forbidden Farm has high loot potential relative to the player traffic it sees. Most squads skip it for flashier zones, which is exactly why budget runners should love it. You're not competing for spawns.
Why it works with low-tier gear: Bot density is manageable with a Deagle and basic armor. The open layout means you see threats before they see you — no tight corridors forcing close-range fights you can't win under-geared.
Loot priority: Focus containers over loose loot. Skip anything under 15k Koen value when your backpack is filling — extraction efficiency matters more than grabbing everything.
Extraction timing: Get out before the 30-minute mark. Late-raid players rotating from contested zones will push through Forbidden Farm on their way to extract. You don't want to be there when that happens.
Farm #4: Northridge Boss Rally Zone — Underrated Squad Farm
Avg Koen/Run: 800k–1.3m (squad total) | Risk: 🔴 High | Best For: Full squads only
Boss Rally is an official S5 event running on Farm and Northridge — multiple bosses, enhanced guards, and confirmed better loot than standard raids. Squads dominate here because the enhanced guards hit hard and bosses require coordinated focus fire.
Squad coordination: Assign one player to boss aggro, two to guard suppression, one to loot collection. Don't let everyone pile on the boss — guards will wipe distracted players from the flanks.
High-value items unique to this zone: Boss drops in S5 include gear and valuables that don't appear in standard loot tables. The enhanced guard drops alone often cover your loadout cost.
Risk mitigation: Run medium-tier gear, not budget. The investment is justified by the loot ceiling. Solo players should skip this entirely — the enhanced guard density makes solo Boss Rally a gear-burning exercise, not a money farm.
Farm #5: Valley River Basin — Consistent Mid-Tier Earner
Avg Koen/Run: 500k–750k | Risk: 🟢 Low | Best For: Solos, patient players
The new S5 rivers and swamp terrain created resource site clusters that weren't on the old Valley map. Community testing shows these sites reset consistently and see low player traffic — most squads don't bother navigating the swamp terrain.
Reliable spawns: Mid-value components, crafting materials, and occasional weapon attachments. Nothing spectacular, but the consistency is the point. Three runs here equals one risky Small Factory run with far less gear exposure.
Chain routing: The river basin connects naturally to the Hotel area. Run basin first, then rotate Hotel on the same raid for a combined 800k–1.2m run without hitting any high-risk zones.
Farm #6: Guoyapo Airport — The Speed Run Spot
Avg Koen/Run: 400k–650k | Risk: 🟡 Medium | Best For: Fast farmers, time-limited sessions
Action-packed but fast. Guoyapo Airport is the best location when you want a 10-minute in-and-out run. The layout is straightforward, extraction is close, and the loot density rewards speed over thoroughness.
Fast strategy: Hit the main terminal containers first — they hold the highest value per slot. Skip the outer buildings unless you've already cleared the terminal and have backpack space. Every extra minute here increases player contact probability.
What to grab first: Weapon parts and tech components over bulk items. High value-to-weight ratio matters when you're moving fast and can't afford to be overloaded at extraction.
Farm #7: Valley Map Outer Resource Sites — The Hidden Gem
Avg Koen/Run: 350k–600k | Risk: 🟢 Low | Best For: Beginners, quest grinders
With 700+ resource sites added in S5, the outer edges of the Valley map are genuinely underexplored. Most players cluster around named POIs and ignore the resource site density in the map's periphery. That's a mistake — and your opportunity.
Why it's underused: No obvious landmark draws players here. The loot isn't flashy. But the S5 container count in outer zones is substantial, and you'll rarely see another player.
S5 addition worth noting: The Season 5 quest requiring 20 unsearched containers in Farm overlaps with outer Valley resource routes. You can complete quest objectives and farm Koen simultaneously — something most guides completely ignore.
If you're also working through the Kamona intel system (the new S5 intel tracker with Distorted Valley HD footage), outer site runs give you time to observe patrol patterns without pressure.
Quick-Reference Comparison: All 7 Farms Ranked
| Farm Location | Risk | Avg Koen/Run | Solo Viable | Squad Bonus | Best Loadout Tier |
|---|---|---|---|---|---|
| Small Factory Basement | 🔴 High | 900k–1.5m | Yes (skilled) | Strong | Mid-tier |
| Hotel Area | 🟡 Medium | 600k–1m | ✅ Best | Moderate | Budget |
| Forbidden Farm | 🟢 Low | 500k–800k | ✅ Yes | Minimal | Budget |
| Northridge Boss Rally | 🔴 High | 800k–1.3m | ❌ No | ✅ Essential | Mid-tier |
| Valley River Basin | 🟢 Low | 500k–750k | ✅ Yes | Moderate | Budget |
| Guoyapo Airport | 🟡 Medium | 400k–650k | ✅ Yes | Moderate | Budget |
| Outer Resource Sites | 🟢 Low | 350k–600k | ✅ Best | Minimal | Budget |
Playstyle match: Budget solo grinders should chain Hotel → River Basin → Outer Sites for 1m+ Koen with minimal risk. Squads with coordination should target Small Factory Basement and Boss Rally exclusively — those two locations have the highest ceiling and reward team play most.
Best Budget Loadout for Distorted Valley Farming Runs
The standard community-tested setup: Deagle, medium backpack, basic rig. Total risk: ~100k Koen. Potential return: 500k–1.5m. That's a 5:1 to 15:1 risk-reward ratio — better than almost any other map at equivalent gear tier.
Gear breakdown:
- Weapon: Deagle handles bot encounters reliably. The new S5 FAMAS is a strong upgrade if you want more PVP capability without going full T6 — community testing confirms it's meta for Distorted Valley specifically.

- Backpack: Medium tier. Large backpacks slow extraction and aren't worth the cost on budget runs.
- Rig: Basic armor. Enough to survive bot contact, cheap enough that losing it doesn't hurt your margins.
- Ammo: Don't cheap out here. S5 rebalanced red ammo (nerfs confirmed), so check current tier performance before loading out.
When to upgrade: Once you're consistently clearing 800k+ per run, reinvest 20% into gear. Don't jump to T6 until you're averaging 1m+ — the margin compression isn't worth it until your routing is optimized.
If you're gearing up for higher-tier runs and need Bonds quickly, Arena Breakout cheap recharge 2026 options can bridge the gap between your current stack and the loadout you need.
Common Distorted Valley Farming Mistakes
Over-gearing kills your margins. Running T6 kit into budget farm zones is the most common error. You're risking 400k+ to earn what a 100k kit earns in the same location. The math doesn't work.
Ignoring extraction timing. Late-raid rotations are real. Players who spent the first 20 minutes in hot zones will push through your farm location on their way out. Know your extraction window and use it.
Skipping the chain routes. Hotel and River Basin connect naturally. Outer Sites and Forbidden Farm are 2 minutes apart. Players who treat each zone as an isolated run leave 200k–400k Koen on the table every session.
Avoiding Distorted Valley because of anomalies. This is the misconception that keeps the map profitable for everyone who pushes through it. Anomalies trigger on bell tolls and are manageable with pre-selected abilities. If you're skipping the map entirely because of distortions, you're handing free Koen to players who aren't.
Running T7 early in S5. Community experience is clear: Distorted Valley isn't worth T7 investment in early season. Economy hasn't stabilized, loot values fluctuate, and the risk-reward math favors budget kits until mid-season.
Frequently Asked Questions
How much Koen can you realistically make per hour in Distorted Valley? Two budget runs per hour is realistic for most players. At 600k–900k per run on the Hotel/River Basin chain, that's 1.2m–1.8m Koen/hour with low gear risk. High-skill players hitting Small Factory Basement can push 2m+, but that requires consistent extraction.
Is Distorted Valley better than Armory for farming in S5? For budget farming: yes. Distorted Valley's 700+ resource sites and lower player competition give budget kits better margins than Armory, where PVP pressure is constant. Armory has a higher ceiling for skilled T6 players, but Distorted Valley wins on risk-adjusted returns for the average farmer.
Can you farm Distorted Valley effectively in casual mode? No Man's Land (the official S5 PvE mode) is the casual-mode equivalent — it comes with a gear preset and is explicitly beginner-friendly for Koen stacking. Standard Distorted Valley runs are normal mode. If you're not comfortable with PVP exposure yet, No Man's Land is the better starting point before transitioning to Distorted Valley proper.
What's the best single item to target in Distorted Valley? Three Axis Gyro Red. It's a confirmed Distorted Valley drop in S5 and significantly outvalues most other items you'll find. Small Factory Basement is your best shot at it, but it's not guaranteed — don't build your entire run around chasing it.
Does squad size affect Koen per player in Distorted Valley? Yes, and it's a real trade-off. Squads clear faster and handle high-risk zones better, but loot splits reduce per-player earnings in low-density zones. Solo and duo runs outperform squads in Hotel, River Basin, and Outer Sites. Only bring a full squad to Boss Rally and Small Factory Basement where the loot ceiling justifies the split.
Should I use the FAMAS in Distorted Valley? If you're moving beyond pure budget runs, yes. The FAMAS is the S5 meta pick for Distorted Valley specifically — community testing confirms it handles the map's bot density and occasional PVP encounters better than the Deagle at medium engagement ranges. It costs more to kit out, so factor that into your margin calculations before switching.
For players ready to scale into mid-tier loadouts after stacking Koen through these routes, checking Arena Breakout top up discount deals can stretch your Bond budget further when you're investing in gear upgrades between seasons.
The map is yours. Start with Hotel, chain into River Basin, and build from there. The players avoiding Distorted Valley because of anomalies are doing you a favor.


