

Crimson Moon's Semblance: What You're Actually Getting
The Numbers Game
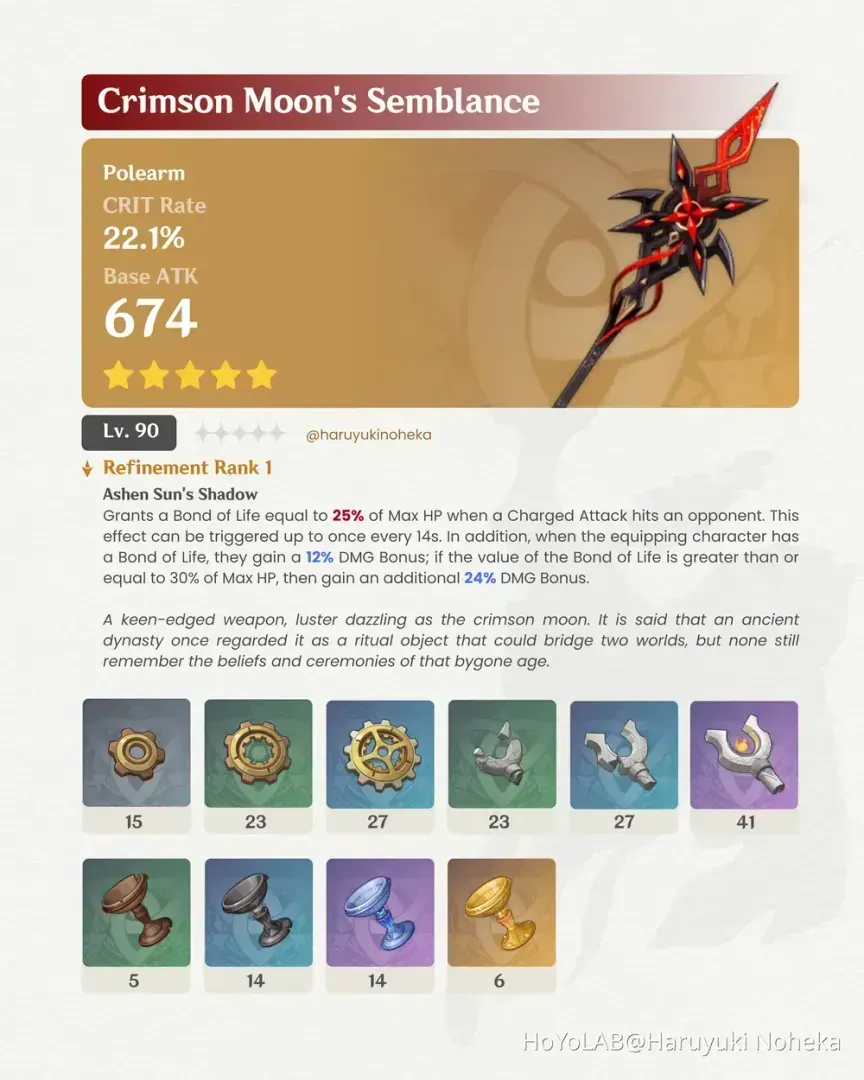
Let's cut straight to the stats: 674 base ATK with 22.1% CRIT Rate at Level 90. Sound familiar? That's because it mirrors Primordial Jade Winged-Spear exactly – but here's where things get interesting. The passive mechanics are where this weapon truly shines for Bond of Life users.

For those planning weapon banner pulls, Genshin Impact weapon banner Primogem recharge through BitTopup offers competitive rates with instant delivery. Just saying – you'll probably need those top-ups.
Ashen Sun's Shadow: The Real Star of the Show
Here's where it gets spicy. Land a Charged Attack? Boom – 25% Max HP Bond of Life (14-second cooldown). Characters carrying Bond of Life get 12% DMG Bonus baseline, jumping to a hefty 36% when Bond hits 30%+ Max HP.
The timing? Chef's kiss. Aligns perfectly with standard rotation cycles.
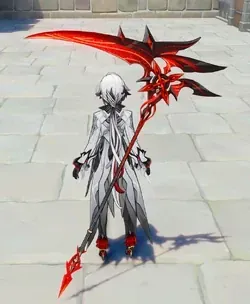
That Scythe Transformation Though
Okay, this part's just cool. When your character maintains 30%+ Bond of Life, the weapon literally transforms into a crimson scythe. Arlecchino triggers this consistently through her Masque of the Red Death state – and honestly, it never gets old watching those Normal/Plunging Attacks convert to Pyro damage with that visual flair.
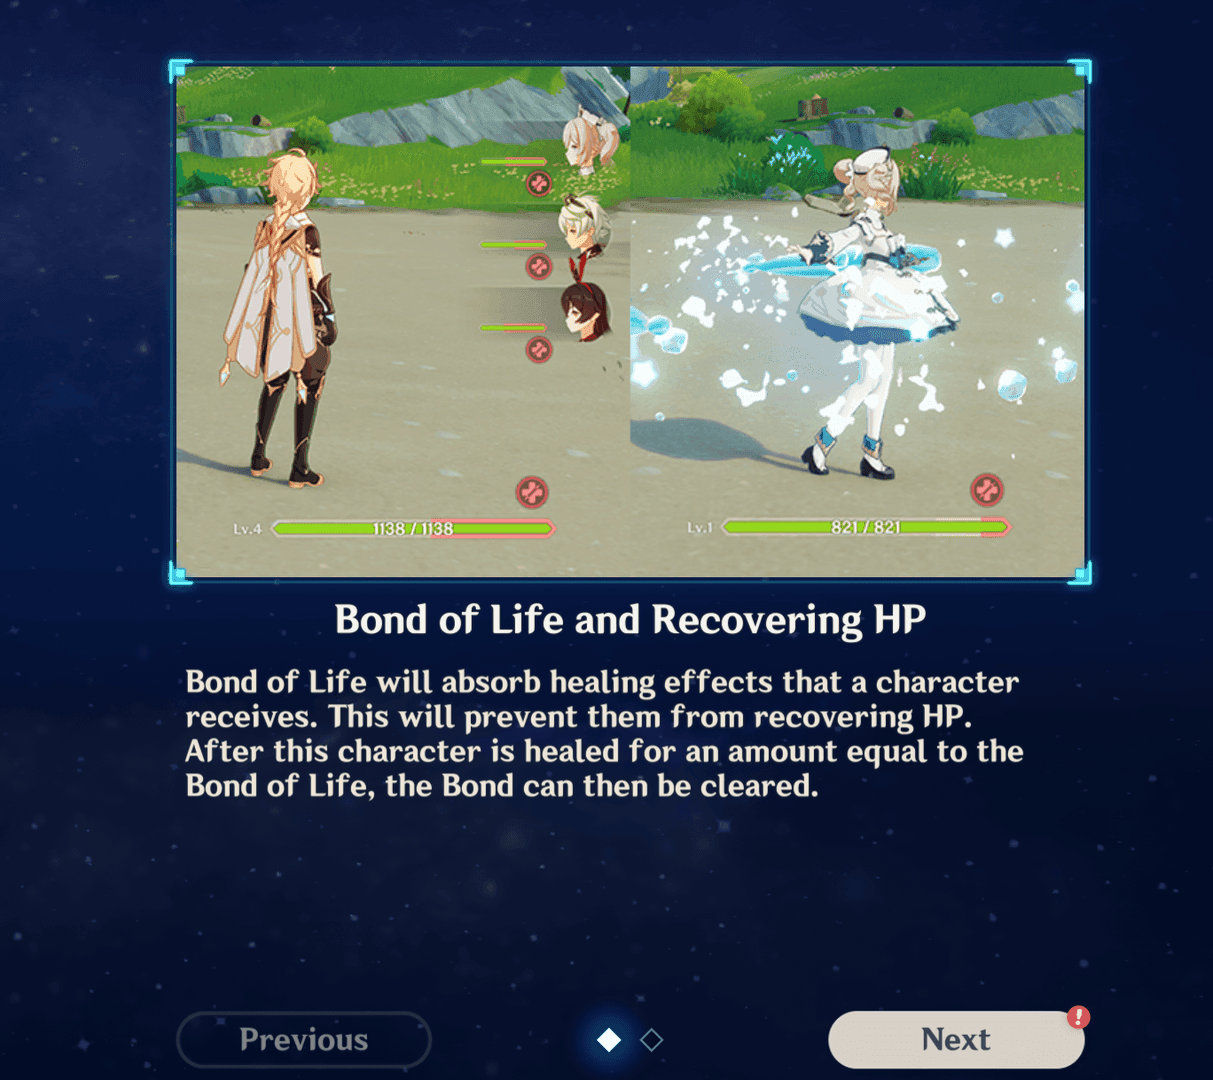
Bond of Life: The Mechanic That Changes Everything
How This Actually Works
Think of Bond of Life as non-healable HP absorption. The weapon generates 25% Max HP worth, but here's the kicker – it stacks with character abilities. Multiple pathways to hit that crucial 30% threshold.
Arlecchino's Perfect Storm
This is where the synergy gets ridiculous. Arlecchino's Elemental Skill applies Blood-Debt Directives that can absorb up to 145% Max HP Bond of Life. Her upgraded Directives (after 5 seconds) provide 130% Max HP when absorbed.
Weapon generation + character kit = consistent 36% DMG Bonus uptime. It's almost unfair.
Players serious about optimizing Arlecchino can secure resources through Crimson Moon's Semblance Genshin Impact top up via BitTopup's platform – competitive pricing, secure transactions, you know the drill.
The Healing Trade-off
Here's the catch: Bond of Life blocks all external healing while active. But Arlecchino? She doesn't care. Her Elemental Burst provides self-healing based on ATK and current Bond levels. Independent survivability at its finest.
That 14-second weapon cooldown integrates naturally with team rotations too.
The Great Weapon Showdown
Crimson Moon vs. Staff of Homa
Staff of Homa brings 608 base ATK, 66.2% CRIT DMG, 20% HP bonus, plus 0.8% ATK per 1% HP below 50%. Community polling shows a dead tie at 16.95% preference for each weapon – and honestly, I get it.
Homa's the generalist champion. Crimson Moon? It dominates Bond applications with immediate 36% DMG Bonus. No stack building, no conditions – just raw power.
Crimson Moon vs. Primordial Jade Winged-Spear
PJWS matches those stats (674 ATK, 22.1% CRIT Rate) but requires stack building through combat hits. Here's my take: Crimson Moon delivers maximum effectiveness immediately for Bond users, while PJWS offers broader character compatibility.
Different tools for different jobs.
Crimson Moon vs. Staff of the Scarlet Sands
Scarlet Sands actually ranks second for Arlecchino in Vaporize teams through that sweet EM-to-ATK conversion. But Crimson Moon maintains superiority in Mono Pyro or non-reaction teams with that consistent 36% DMG Bonus – completely independent of team composition.
R1 Signature vs. R5 4-Star Options
Deathmatch R5 gives +24% ATK (solo) or +16% ATK/DEF (multi-enemy) with CRIT Rate. White Tassel R5? +48% Normal Attack DMG that directly benefits Arlecchino's Masque state.
The performance gap? 15-25% damage difference. Significant, but not game-breaking for budget players.
F2P Alternatives That Actually Work
White Tassel: The Underdog Champion
This is where things get interesting. White Tassel's +48% Normal Attack DMG applies to Arlecchino's Pyro-converted Normal Attacks in Masque state. Sure, 401 base ATK at Level 90 means you'll need stronger artifact substats, but achieving 70-80% of Crimson Moon's damage output?

That's impressive. R5 refinement comes easily through standard wishes and exploration too.
The Middle Ground Options
Missive Windspear provides ATK% scaling through Elemental Skill usage. Blackcliff Pole offers CRIT DMG with ATK-stacking from enemy defeats – performs well in multi-enemy scenarios. Both require Starglitter purchases, sitting comfortably between White Tassel and premium options.
Who Else Can Actually Use This Thing?
Hu Tao: Not Really
Hu Tao can't generate Bond of Life through her kit, limiting passive activation to Charged Attack triggers. Staff of Homa remains superior through HP-based scaling and survivability benefits. Usage statistics show <0.2% of Crimson Moon builds on Hu Tao.
Yeah, it's that niche.
Xiao and Cyno: Expensive Stat Sticks
Both function with Crimson Moon but can't utilize Bond mechanics. PJWS provides superior value for Xiao through stacking mechanics during Burst windows. Cyno's Electro-focused kit gains minimal benefit from Bond of Life.
Xiangling and Raiden: Just... No
Xiangling's off-field role doesn't benefit from Charged Attack-triggered Bond generation. The Catch or Dragon's Bane provide superior value through ER/EM scaling. Raiden similarly gains minimal benefit – Engulfing Lightning offers substantially more value for her support/DPS roles.
Ascension Materials: The Grind Breakdown
What You'll Need
- Pristine Sea Goblets: 5 Broken, 14 Wine, 14 Silver, 6 Golden (Fontaine enemies/domains)
- Hilts: 23 Ruined, 27 Splintered, 41 Still-Smoldering (Fontaine enemies)
- Mechanical Gears: 15 Meshing, 23 Spur, 27 Artificed Dynamic (clockwork enemies)
- 225,000 Mora, 908 Mystic Enhancement Ore
Farming Strategy
Golem Captains in Court of Fontaine provide consistent material drops with daily respawn cycles. Co-op farming enables shared loot for group efficiency.
Timeline? 2-3 weeks casual farming, reducible through dedicated sessions and resin refresh. Not terrible, honestly.
The Big Question: C1 Arlecchino or R1 Weapon?
Raw Numbers Don't Lie
C1 Arlecchino delivers +100% Masque damage – that's a multiplicative increase to her primary damage source. R1 Crimson Moon? 15-25% increase over optimal 4-star alternatives.
Mathematical analysis typically favors C1 for damage per Primogem efficiency. But there's more to consider.
The Primogem Gamble
Weapon banner requires up to 240 pulls (38,400 Primogems) through Fate Points. That 37.5% featured weapon rate creates off-banner risk that can hurt. Character banners offer better guaranteed acquisition within 160-180 pulls maximum.
Your call on that risk tolerance.
Final Verdict: Pull or Skip?
Crimson Moon represents Arlecchino's definitive best-in-slot weapon through specialized Bond mechanics and optimal stats. But – and this is important – its hyper-specialized nature limits broader account value.
Worth it for dedicated Arlecchino mains with adequate Primogem reserves? Absolutely.
F2P players achieve competitive performance through White Tassel R5, enabling Primogem savings for character constellations or future banners. For Arlecchino mains though? The weapon delivers meaningful performance improvements and unique visual appeal that justifies acquisition costs.
Just know what you're getting into.
FAQ
Does Crimson Moon's Semblance work well on Hu Tao? Suboptimal – Hu Tao can't generate Bond of Life through her kit. Staff of Homa remains superior for HP scaling and survivability.
Is White Tassel really competitive with the signature weapon? White Tassel R5 achieves 70-80% of Crimson Moon's damage output, making it an excellent F2P alternative with significant Primogem savings.
How does Bond of Life affect healing? Prevents all external healing while active. Arlecchino compensates through Elemental Burst self-healing based on ATK and Bond levels.
Should I prioritize C1 Arlecchino or her signature weapon? C1 provides better damage per Primogem (+100% Masque damage). Weapon offers permanent account value and works at C0.
What are total ascension costs? 225,000 Mora, 908 Mystic Enhancement Ore, plus Fontaine materials from regional enemies and domains.
Can other characters trigger the scythe visual effect? Yes, any character with 30%+ Bond of Life triggers transformation. Currently only Arlecchino has reliable Bond generation though.


