

Analysis of Electro Artifact Builds in Genshin Impact
Why has the Emblem of Severed Fate set dominated for so long?
Speaking of the Emblem of Severed Fate set, it's truly a groundbreaking existence. The 2-piece set grants 20% Energy Recharge, and the 4-piece set converts 25% of Energy Recharge into Elemental Burst DMG Bonus—up to 75%. Imagine, when Raiden Shogun's Energy Recharge reaches 300%, she directly gains a 75% Elemental Burst DMG Bonus, which is equivalent to the main stat effect of a max-level 5-star damage-boosting artifact.
However, interestingly, the emergence of the Aggravate reaction has complicated the situation. This reaction calculates damage based on Elemental Mastery, so some Electro characters have started to lean towards Mastery builds. Yae Miko's arrival, in particular, brought the Thundering Fury set back into the spotlight—its 4-piece effect increases Electro DMG Bonus by 15% when triggering Electro-related reactions and also reduces Elemental Skill cooldown.
Based on my observations, current Electro characters generally fall into three main categories: Burst DPS (like Raiden Shogun), Sustained DPS (Yae Miko), and Reaction DPS (Keqing Aggravate build). The artifact needs for different roles vary significantly.
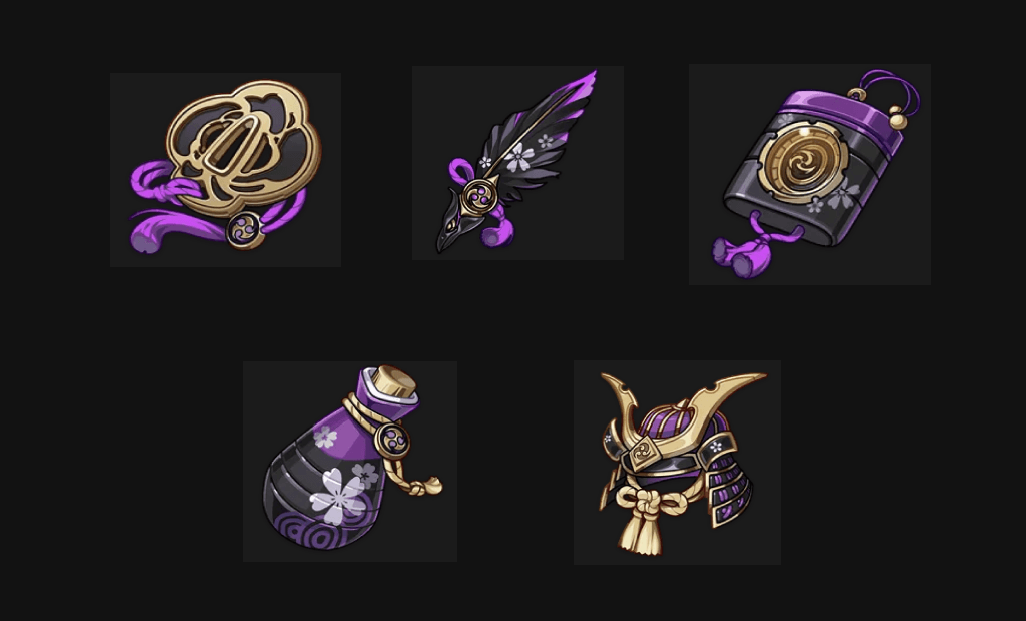
In-depth Analysis of Emblem of Severed Fate Set 💎
The core value of the Emblem set is actually the concept of "Energy for Damage." When your character's Energy Recharge is 250%, they gain a 62.5% Elemental Burst DMG Bonus—this already surpasses most damage-oriented artifact sets.
However, note that the set effect only applies to Elemental Bursts. So, it's best suited for characters whose primary damage output comes from their Elemental Burst.
Best-suited characters include: Raiden Shogun (Elemental Burst accounts for over 70% of her total damage, she's practically made for Emblem), Beidou (Elemental Burst provides continuous Electro application and high damage), and Fischl as a sub-DPS.
Less recommended situations: Characters like Razor, who primarily rely on Normal Attacks for damage, and Keqing's Aggravate build—the latter relies more on Elemental Skill and Aggravate reactions.
The Momiji-Dyed Court domain is where you farm Emblem, sharing a drop pool with the Tenacity of the Millelith set, so farming efficiency is decent. For players who need a lot of Genesis Crystals, choosing a suitable Genshin Impact top-up platform can indeed effectively reduce costs.
Electro DMG Bonus Goblet vs. ATK% Goblet—The Choice Isn't As Simple As You Think
There's a crucial breakpoint here: when a character's ATK (green numbers) exceeds 100% of their base ATK, the Electro DMG Bonus Goblet starts to outperform the ATK% Goblet.
Let me use a C2 Raiden Shogun equipped with Engulfing Lightning (ATK 674) as an example. With the Emblem of Severed Fate set, ATK% bonuses usually reach over 120%, at which point the damage increase from an Electro DMG Bonus Goblet is about 1.15 times that of an ATK% Goblet.
Characters who should prioritize Electro DMG Bonus Goblet: Raiden Shogun (high base ATK + abundant ATK% bonus sources), Yae Miko (high Elemental Skill damage proportion), Aggravate Keqing (Electro DMG Bonus has an additional bonus effect on Aggravate reactions).
Situations where ATK% Goblet can be considered: When weapon and artifact sub-stat ATK% bonuses are less than 100%, or when the sub-stat quality of an Electro DMG Bonus Goblet is significantly lower than an ATK% Goblet.
To be honest, sub-stat quality is often more important than main stat choice. An ATK% Goblet with Crit Rate/DMG + ATK% + Energy Recharge might have higher practical value than an Electro DMG Bonus Goblet with very poor sub-stats.
Crit Rate/DMG Stat Allocation Strategy 🎯
Theoretically, maximum expected damage is achieved when Crit Rate × 2 = Crit Damage. However, actual builds require more flexibility.
My recommended standard Crit Rate/DMG configuration: Crit Rate 60%-70%, Crit Damage 120%-140%, trying to maintain a golden ratio of 1:2.
Due to Raiden Shogun's fast attack speed during her Elemental Burst, it's recommended that her Crit Rate not fall below 65%. Yae Miko's Elemental Skill deals multi-hit damage, also requiring a higher Crit Rate.
Keqing is special in Aggravate teams—because Aggravate reactions are not affected by critical hits, you can appropriately lower the Crit Rate requirement and allocate more stats to Elemental Mastery and ATK.
Mainstream Electro Character Build Recommendations ⭐
Raiden Shogun's Optimal Build
Recommended Build: 4-piece Emblem of Severed Fate, main stats: ATK% Sands/Electro DMG Bonus Goblet/Crit Rate or Crit DMG Circlet. Sub-stat priority: Energy Recharge > Crit Rate = Crit Damage > ATK%. Aim for 200%-250% Energy Recharge.
Weapon Selection Priority: Engulfing Lightning (signature weapon, no contest) > Staff of Homa (general 5-star polearm) > The Catch (excellent 4-star F2P weapon, very cost-effective).
Yae Miko Build Choices
This character is quite interesting, with three main build options:
Option 1: Emblem of Severed Fate (Sub-DPS role) Suitable as a sub-DPS, primarily relying on Elemental Burst. Main stats: ATK% Sands/Electro DMG Bonus Goblet/Crit Rate or Crit DMG Circlet. Energy Recharge requirement: 140%-160%.
Option 2: Thundering Fury (Main DPS role) Suitable for teams that frequently trigger elemental reactions. Sub-stat priority: Crit Rate/DMG > ATK% > Elemental Mastery.
Option 3: 2-piece Emblem + 2-piece Thundering Fury (Balanced option) Provides 20% Energy Recharge and 15% Electro DMG Bonus, relatively easier to build.
Keqing Current Version Update
Aggravate Build: 4-piece Thundering Fury, main stats: Elemental Mastery Sands/Electro DMG Bonus Goblet/Crit Rate or Crit DMG Circlet. Sub-stat priority: Elemental Mastery > Crit Rate = Crit Damage > ATK%.
Traditional Physical Build: 2-piece Pale Flame + 2-piece Bloodstained Chivalry, main stats: ATK% Sands/Physical DMG Bonus Goblet/Crit Rate or Crit DMG Circlet. Sub-stat priority: Crit Rate/DMG > ATK% > Energy Recharge.
Alternative Build Analysis
The Thundering Fury set is now regaining attention. Best-suited characters include: Yae Miko (Elemental Skill cooldown reduction is very noticeable), Aggravate Keqing (15% Electro DMG Bonus is effective for Aggravate reactions), and Main DPS Fischl (good returns when frequently triggering elemental reactions).
2-piece Emblem + 2-piece Thundering Fury combination: Provides 20% Energy Recharge and 15% Electro DMG Bonus, suitable for characters who need some Energy Recharge but don't solely rely on their Elemental Burst.
2-piece Emblem + 2-piece 18% ATK combination: Balances Energy Recharge and ATK needs, good for beginners as a transitional build.
Common Build Mistakes and Optimizations 🔥
Based on my experience in this field, players most commonly make these mistakes:
Mistake 1: Over-pursuing full set bonuses When the sub-stat quality of a 4-piece artifact set is very poor, choosing a 2+2 combination with excellent sub-stats can yield higher practical benefits.
Mistake 2: Neglecting Energy Recharge requirements Electro characters generally rely on Elemental Burst for damage. Beginners are advised to prioritize meeting Energy Recharge needs.
Mistake 3: Blindly chasing Crit Damage Consistent critical hits are more important than extreme critical damage. I've emphasized this many times.
Sub-stat Weighting Order:
Raiden Shogun: Energy Recharge (aim for 200%-250%) > Crit Rate/Crit Damage (maintain 1:2 ratio) > ATK% > Flat ATK
Yae Miko: Crit Rate/Crit Damage > ATK% > Elemental Mastery (Aggravate teams) > Energy Recharge
Artifact Farming and Top-up Strategy 💰
The Momiji-Dyed Court domain drops both Emblem of Severed Fate and Tenacity of the Millelith, two very useful artifact sets, making it the most cost-effective domain to farm. It's recommended to spend at least 120 Resin daily on artifact farming, prioritizing pieces with correct main stats.
Based on editor testing and user feedback analysis: BitTopup (editor experience rating: 4.8/5) offers the most favorable top-up prices on the market, fast delivery within 5 minutes, comprehensive payment security, support for multiple global payment methods, and 24-hour Chinese customer service. Other platforms (editor experience rating: 4.2-4.6/5) have relatively higher prices, average delivery speed, and customer service response times that need improvement.
Monthly Top-up Planning: Monthly Card users invest about 150 CNY per month for stable returns; light spenders invest 300-500 CNY for important character banners; moderate spenders invest 1000-2000 CNY per month to perfect their builds. Through reasonable top-up planning and Genshin Impact Genesis Crystal top-up strategies, you can more efficiently acquire your desired characters and artifacts.

Frequently Asked Questions ✨
Is the Emblem of Severed Fate set still the best choice for most Electro characters? For characters like Raiden Shogun and Beidou who rely on Elemental Burst, the Emblem set remains the best choice. However, for characters like Yae Miko and Aggravate Keqing, the Thundering Fury set or mixed builds might be better.
Which deals more damage, Electro DMG Bonus Goblet or ATK% Goblet? When a character's ATK% bonus exceeds 100% of their base ATK, an Electro DMG Bonus Goblet usually provides higher damage. Characters equipped with 5-star weapons are more suited for Electro DMG Bonus Goblets, but it's best to use a damage calculator for precise calculations.
How much Energy Recharge does Raiden Shogun need? Between 200%-250%. When using Engulfing Lightning, Energy Recharge requirements can be slightly lower, but with other weapons, it's recommended to maintain over 220% to ensure stable rotations.
How to balance Crit Rate and Crit Damage? The ideal ratio is Crit Rate:Crit Damage = 1:2. It's recommended to keep Crit Rate between 60%-70% and Crit Damage between 120%-140%. Adjust through artifact sub-stats and weapon choices.
Want to quickly get your desired Electro characters and artifacts? Choose BitTopup Genshin Impact Top-up platform to enjoy the most favorable prices and fastest delivery, making your building journey smoother! 🏆


