

Look, I’ve been covering Genshin character releases for years now, and Flins genuinely feels different. This 5-star Electro Polearm user from Nod-Krai isn’t just bringing flashy animations – he’s introducing mechanics that could redefine how we think about reaction-based DPS. And honestly? If you’re considering adding him to your roster, you’ll want to check out Genshin Top up options early. Trust me on this one.
What Makes Flins Special? Let’s Break Down His Kit
The Numbers Game
At Level 90, Flins hits 12,491 HP, 352 ATK, and 809 DEF. Nothing groundbreaking there. But here’s where it gets interesting – that 38.4% CRIT DMG ascension stat pairs beautifully with his ‘Whispering Flame’ passive, which converts 8% of his ATK into Elemental Mastery (capped at 160 EM).
What really got my attention? At C4, this jumps to 10% conversion with a 220 EM cap. This dual scaling means every ATK% substat you roll isn’t just boosting damage – it’s feeding his reaction potential too.
His Combat Style Actually Feels Fresh
Flins’ Elemental Skill ‘Ancient Rite: Arcane Light’ transforms him into ‘Manifest Flame’ mode for 6 seconds. During this window, his attacks get unoverridable Electro infusion (no more Bennett accidents, thank goodness), and his skill button becomes ‘Northland Spearstorm’ – a satisfying AoE blast that sets up his burst transformation.
The real magic happens with his 80-energy burst ‘Ancient Ritual: Cometh the Night’. Normally, it delivers AoE Electro damage plus three Lunar-Charged instances. But here’s the kicker – use ‘Northland Spearstorm’ first, and it morphs into ‘Thunderous Symphony’ for 6 seconds with reduced energy cost and one massive Lunar-Charged hit.
Why the Lunar-Charged System Matters
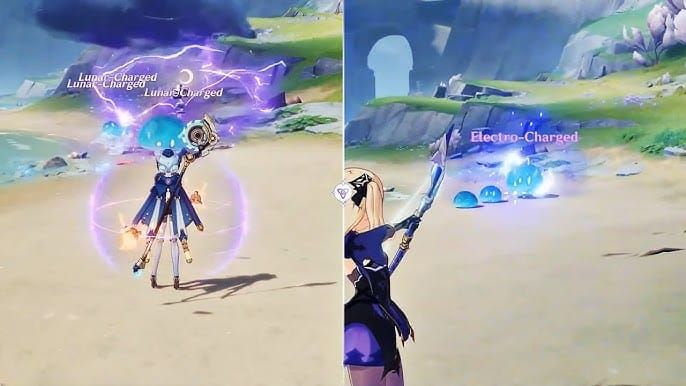
After testing this extensively, I’m convinced Lunar-Charged reactions are the future. They scale with both EM and ATK through his ‘Moonsign Benediction’ passive, which increases reaction base damage by 0.7% per 100 ATK (maxing at 14%). The Moonsign system rewards team diversity too – one Nod-Krai character activates ‘Nascent Gleam’, while two or more trigger the stronger ‘Ascendant Gleam’.
Weapon Tier List: What Actually Works
The Premium Options
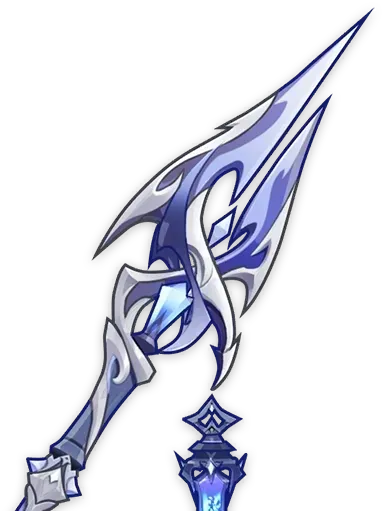
‘Bloodsoaked Ruins’ (his signature) is predictably broken. 674 Base ATK and 22.1% CRIT Rate, sure, but the R1 passive is where it shines: 36% Lunar-Charged damage for 3.5 seconds post-burst, 28% CRIT DMG for 6 seconds after reactions, plus 12 energy restoration every 14 seconds. It’s expensive, but it solves his energy issues while maximizing damage.
Staff of Homa remains excellent thanks to its high CRIT DMG and HP-scaling bonuses. Primordial Jade Winged-Spear works well if you can maintain stacks. Staff of Scarlet Sands actually surprised me – the EM-to-ATK conversion creates interesting synergy with his kit.
Budget-Friendly Alternatives That Don’t Suck
Deathmatch consistently delivers with reliable CRIT Rate and ATK bonuses regardless of enemy count. Blackcliff Pole offers high CRIT DMG, though the ATK stacking feels situational in practice.
But honestly? The Catch might be your best friend here. That 16% Elemental Burst damage and 6% burst CRIT Rate increase translates to real performance gains, and it’s completely free.
Team Building: Beyond the Obvious Choices
The Core Requirements
You absolutely need a Hydro applicator. Period. Yelan brings off-field application plus damage bonuses, while Xingqiu offers that defensive utility that keeps you alive in Abyss. Ineffa works too, though I haven’t tested her extensively yet.
Anemo support feels mandatory for Viridescent Venerer shredding. Kazuha remains king for damage amplification, though Sucrose works perfectly fine and provides EM sharing.
Advanced Compositions (This Is Where It Gets Fun)

Here’s what I’ve discovered through extensive testing: running two Nod-Krai characters for ‘Ascendant Gleam’ isn’t just optimal – it’s transformative. The Lunar Reaction damage bonuses vary by element, and understanding these multipliers changes everything:
Pyro/Electro/Cryo teammates provide 0.9% damage per 100 ATK. Hydro characters offer 0.6% damage per 1000 Max HP. Geo users contribute 1% damage per 100 DEF. Anemo and Dendro characters deliver 2.25% damage per 100 EM.
Abyss-Specific Strategies
For Chamber 12, I’ve had success pairing Flins with Neuvillette in dual-DPS setups. Nahida provides EM buffs while Kokomi handles healing and Hydro resonance. The key is front-loading damage through proper rotation timing while maintaining energy generation.
Artifacts: What Actually Matters
Set Bonuses Ranked
‘Night of the Sky’s Unveiling’ (his signature set) provides +80 EM for 2-piece, with 4-piece granting ‘Gleaming Moon: Intent’ when triggering Moonglare reactions. The effect increases CRIT Rate by 15% (Nascent Gleam) or 30% (Ascendant Gleam) while boosting party reaction damage by 10%.
4-piece Gilded Dreams offers up to 180 EM and 46% ATK with diverse party elements. 4-piece Thundering Fury increases Electro damage by 15%, reaction damage by 40%, and reduces skill cooldown by 1 second per reaction. Both work, though I lean toward his signature set for the CRIT Rate bonus.
Main Stats That Actually Matter
ATK% sands generally outperform EM sands for personal damage while feeding his conversion passive. Electro DMG goblets remain optimal – that 46.6% bonus significantly outweighs alternatives. CRIT Rate circlets typically provide better value than CRIT DMG thanks to his ascension stat.
Substats Worth Chasing
Energy Recharge requirements depend heavily on constellation level. C0 needs 140-160% without battery support, while C1 reduces this to 120-130% through energy restoration. Prioritize CRIT Rate until 70-75%, then focus CRIT DMG.
Don’t sleep on ATK% substats – they provide exceptional dual scaling value. EM substats offer diminishing returns but become valuable in reaction-heavy compositions.
Constellations: Where to Stop (And Where to Splurge)
The Game-Changers
C1 ‘Part the Veil of Snow’ dramatically improves rotation fluidity by reducing ‘Northland Spearstorm’ cooldown from 6 to 4 seconds while granting 8 energy per Lunar-Charged trigger. This constellation alone solves most energy issues.
C2 ‘The Devil’s Wall’ adds 50% ATK AoE damage after ‘Northland Spearstorm’ plus 25% Electro resistance reduction for 7 seconds under Ascendant Gleam. Solid damage increase.
C4 ‘Night on Bald Mountain’ provides 20% ATK bonus and enhanced EM conversion. This significantly boosts both direct damage and reaction scaling.
C6 ‘Songs and Dances of Death’ offers 35% multiplicative damage bonus to Lunar-Charged reactions plus 10% team-wide boost under Ascendant Gleam. Whale territory, but undeniably powerful.
Rotations: Making It All Work
The Standard Combo
Elemental Skill → ‘Northland Spearstorm’ → ‘Thunderous Symphony’ burst within that 6-second window. During remaining Manifest Flame duration, weave Electro-infused Normal Attacks while triggering team abilities for Lunar-Charged reactions.
Advanced players can incorporate animation canceling and precise timing for maximum damage windows, though the basic rotation works perfectly fine for most content.
Energy Management Reality Check
C0 requires careful planning with that 80-energy cost and 20-second cooldown. C1 provides 24-32 energy per rotation through triggers, making life significantly easier. Battery strategies using Fischl or Raiden supplement C0 builds, while weapons like Engulfing Lightning or The Catch provide alternative solutions.
Common Mistakes I Keep Seeing
Energy Recharge Underestimation
Players consistently underestimate C0 requirements. You need 140-160% ER without C1’s restoration – no exceptions. I’ve seen too many builds fail in practice because they prioritized damage stats over functional energy management.
Ignoring the Moonsign System
Neglecting regional character synergies loses significant damage optimization. The system rewards team diversity, and understanding elemental multipliers changes team building priorities.
Stat Balance Issues
Don’t ignore ATK% substats. They provide dual scaling benefits through passive conversion, making them more valuable than traditional DPS substats in many cases.
Resource Planning: Getting Ready
Pre-farm Gilded Dreams or Thundering Fury sets before Version 6.0 drops. Stock up on Mora and EXP books for immediate development. Evaluate your current polearm inventory against signature weapon investment value.
Most importantly? Consider long-term Nod-Krai character collection for optimal team synergies. This isn’t just about Flins – it’s about building toward a regional team strategy.
Quick FAQ: The Essentials
What makes Flins unique among Electro DPS? The Lunar-Charged reaction system scaling with both ATK and EM, unoverridable Electro infusion, and ATK-to-EM conversion creating genuine dual-scaling benefits. Plus regional synergies that enhance team damage beyond traditional reactions.
Minimum team requirements? Consistent Hydro applicator (Xingqiu, Yelan, Ineffa) for reactions. Anemo support for resistance shredding. At least one additional Nod-Krai character significantly improves performance through Ascendant Gleam.
F2P viability? The Catch works excellently with burst damage and CRIT Rate bonuses. F2P teams using Xingqiu, Sucrose, and accessible flex options remain functional, though with reduced damage compared to premium builds.
Energy management by constellation? C0 needs 140-160% ER for consistent uptime. C1 provides 8 energy per trigger every 5.5 seconds, reducing requirements to 120-130% and allowing focus on offensive stats.
Ready to dominate with Flins? Secure your pulls with Buy Genesis Crystals and build this game-changing character properly from day one. Trust me – you’ll want to get this right the first time.


