

Here’s something that caught my attention when PUBG Mobile Version 4.0 dropped on September 4, 2025 — the mortar system completely flipped compound breaking on its head. This lightweight explosive launcher sits in your pistol slot, which means you can finally breach those annoying fortified positions without walking into a death trap.
The real game-changer? Combining mortars with strategic smoke deployment. It’s not just about lobbing explosives anymore — you’re orchestrating coordinated assaults that force enemies out of cover while keeping your team in control. Pretty satisfying when you nail it.
Professional teams didn’t waste time adopting mortar-smoke combos as the new meta standard. Gone are those high-risk direct pushes that left half your squad knocked. Instead, we’re seeing calculated indirect bombardments with precise timing synchronization. The magic happens when you deploy smoke to block vision while positioning mortars for delayed strikes that flush enemies right into your kill zones.
BitTopup offers fast PUBG UC top up services with competitive pricing and instant delivery, ensuring access to premium battle passes and weapon skins. BitTopup’s secure payment processing and 24/7 customer support make it the preferred choice for competitive players.
Understanding Mortar and Smoke Mechanics in PUBG Mobile 4.0
Weapon Damage and Range Changes
The mortar’s got two personalities, and understanding both is crucial. Direct-fire mode hits enemies within 50 meters with immediate explosive impact — think of it as your oh crap, they’re rushing option. The blast radius covers 5-7 meters, which is enough to ruin someone’s day.

Indirect-fire is where things get interesting. You can target beyond line-of-sight using the map interface, but there’s a 3-5 second delay. That delay? It’s both your biggest weakness and your secret weapon if you time it right.
Key specs you need to memorize:
Ammunition Capacity: 4-6 explosive rounds per spawn (don’t waste them)
Area-of-Effect Range: 5-7 meter blast radius
Deployment: Needs stable ground with clear map access
Attachment Integration: Works with 4.0’s revamped foregrip system
Here’s a pro tip I learned the hard way — Angled Foregrips actually help with horizontal recoil for those post-blast engagements. Light Grips enhance view stability during map targeting. And yes, the realistic reloading system gives you +1 round if your weapon isn’t empty. Small details that matter in clutch moments.
Smoke Duration and Coverage
Smoke grenades aren’t just throw and pray anymore. You get 20-30 seconds of visual obstruction, but peak opacity only lasts the first 10-15 seconds. That’s your golden window.
Coverage extends 8-10 meters in diameter — enough for multiple compound entry points if you place it smart. Cook time is 2 seconds for 20-meter throws, so factor that into your timing calculations.
The critical timing insight? Deploy smoke 5-7 seconds before mortar marking. This masks both visual and audio detection. Keep moving within the smoke too — standing still creates predictable patterns that experienced players will exploit.
Audio Cues and Enemy Detection
Version 4.0 introduced enhanced audio feedback for mortar deployment, and honestly, it’s both a blessing and a curse. Enemy teams can detect your mortar setup through distinct sounds, which makes smoke timing absolutely crucial for masking those audio signatures.
Ghostie companion skills become invaluable here:
Scan Passive: Marks enemies inside compounds for 3-5 seconds
Boost Passive: Enables rapid repositioning during deployment
Guardian Shield: Provides portable barrier protection
(Personal note: I’ve seen too many teams get wiped because they ignored audio masking — don’t be that squad.)
The Perfect Timing Formula for Mortar + Smoke Combos
Pre-Engagement Positioning
Position yourself 100-150 meters from target compounds. This gives you indirect mortar range while maintaining escape routes — and trust me, you’ll need those escape routes.
Your team needs high-ground scouting to identify compound layouts and enemy positions before you start the sequence. No point in executing perfect timing if you’re hitting empty buildings.
Essential setup elements:
Scout Elevation: High ground for surveillance
Team Spacing: 20-30 meter intervals (prevents group wipes)
Escape Routes: Multiple withdrawal paths planned
Vehicle Access: Magic Broom’s 120 km/h speed for rapid repositioning
Execution Sequence Breakdown
After countless hours perfecting this, here’s the proven timing formula from T=0 to T=15:
T=0: Smoke grenade deployment toward compound entries
T=5: Mortar marking on compound interior via map
T=8-10: Blast impact during peak smoke density
T=10-15: Team advance under smoke cover
T=15+: Follow-up engagement or tactical withdrawal
This sequence accounts for smoke travel time, mortar delay mechanics, and optimal visibility obstruction. Training Mode’s unlimited respawn environment is perfect for practicing these adjustments until they become muscle memory.
Team Synchronization Requirements
Squad coordination isn’t optional — it’s everything. Here’s how to divide roles:
Mortar Operator: Handles deployment and targeting
Smoke Specialist: Manages grenade timing and placement
Overwatch: Monitors third-party approaches
Entry Team: Executes compound breach under cover
Voice communication must include timing callouts, enemy movement updates, and third-party warnings. Sloppy comms = failed execution. Period.
Identifying Prime Compound Breaking Opportunities
Map-Specific Compound Analysis
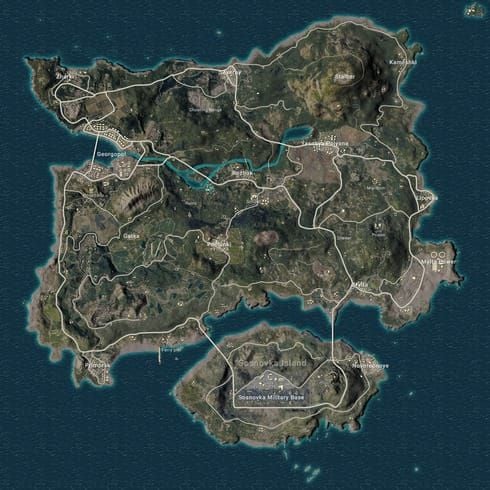
Erangel’s updated Lipovka seaside park has become my go-to practice area. The new cover elements create multiple entry points that benefit from smoke coverage, while open areas allow safe mortar positioning at optimal ranges.
Look for these compound types:
Multi-room structures: Maximum displacement potential
Elevated positions: Force predictable escape routes
Zone edge locations: Minimize third-party risks
Limited exit compounds: Control enemy movement patterns
Pochinki’s dense environment offers advanced scenarios, but requires careful third-party monitoring during mid-game rotations. High reward, higher risk.
Enemy Position Assessment
Ghostie’s Scan passive marks enemies through walls for precise indirect fire placement. Upgrading to level 3 extends marking duration and improves targeting precision — worth the investment.
Before engaging, confirm: enemy count, position density, movement patterns, and equipment status. Rushing into a full squad with level 3 gear using basic timing? Recipe for disaster.
Third-Party Risk Evaluation
Mid-game rotations present optimal opportunities when zone shrinkage forces static positioning. Teams trapped during circle transitions become prime targets with limited movement options and reduced third-party risks.
Risk mitigation checklist: Target during active circle movement, monitor audio for nearby engagements, maintain withdrawal routes, complete engagements within 30-45 seconds max.
Step-by-Step Execution Guide
Initial Mortar Placement
Mortar deployment requires stable ground and clear map interface access. Prone positioning enhances accuracy while reducing your exposure profile during setup.
Quick deployment checklist:
Ground Stability: Confirm level surface for accurate firing
Map Access: Ensure clear target compound view
Cover Position: Deploy from behind solid cover or elevation
Ammunition Check: Verify 4-6 rounds available
Smoke Deployment Timing
Smoke throws must account for that 2-second cook time and travel distance. Distance calculations require adjustments for elevation changes and wind effects — details that separate good players from great ones.
BitTopup provides reliable recharge PUBG UC online services with instant processing and competitive rates. The platform’s secure payment methods and excellent customer reviews make it trusted for accessing premium content enhancing competitive gameplay.
Timing execution breakdown: Calculate throw range, adjust 2-second base cook time for 20-meter targets, coordinate release with mortar marking, prepare secondary smoke for extended coverage.
Team Movement Coordination
Coordinated advances require precise timing and clear communication. Teams move during peak smoke density while maintaining 5-10 meter spacing. Monitor for third-party flanking constantly.
Movement protocol: Formation maintenance, continuous enemy position callouts, cover utilization using compound structures, established retreat signals with predetermined routes.
Avoiding the Third-Party Feed Trap
Common Feeding Scenarios
Third-party eliminations happen when teams get tunnel vision on compound clearing. Extended engagements exceeding 45 seconds? You’re basically sending up flares for nearby squads seeking easy eliminations.
High-risk scenarios to avoid: Extended sieges beyond 60 seconds, loud explosive sequences attracting attention, fighting during active circle movement, engaging when multiple squads are nearby.
Early Warning Signs
Your ears are your best early warning system. Audio cues, movement patterns, and zone positioning provide crucial intel.
Warning indicators: Distant gunfire, vehicle engine noise, teams rotating through your engagement area, enemy voice chat or footstep audio. Prankster Ghost skills provide additional detection capabilities — energy bar management is crucial for sustained reconnaissance.
Escape Route Planning
Every engagement needs predetermined withdrawal routes. Account for zone movement, terrain obstacles, and vehicle availability. Teams should identify multiple escape options before initiating attacks.
Planning elements: Primary route to safe zone, secondary alternatives if blocked, vehicle access for rapid disengagement, predetermined rally points for regrouping.
Map-Specific Mortar Smoke Strategies
Erangel Compound Tactics
Erangel’s diverse compounds require adapted approaches based on structure layout and terrain. The updated Lipovka area provides excellent practice opportunities with varied elevation and cover options.
Erangel considerations: Use hills for mortar positioning, leverage long-range capabilities in open fields, account for urban density with multiple nearby compounds, utilize rivers for third-party protection.
Counter-Strategies and Defensive Measures
Defensive awareness requires recognizing mortar deployment audio cues and unusual enemy positioning. Teams occupying compounds should maintain vigilance for indirect fire indicators while preparing rapid response protocols.
Detection methods: Audio recognition of deployment sounds, visual scanning for enemy elevated positioning, timing awareness of smoke without direct assault, team callouts for suspicious activity.
Counter-smoke deployment can disrupt enemy timing — requires rapid response and precise throw placement for effectiveness.
Practice Drills and Skill Development
Training Mode Exercises
Training grounds provide unlimited respawn environments for perfecting timing without ranked pressure. Three difficulty levels allow progressive development from basic timing to advanced coordination.
Essential drills: Basic smoke-to-mortar sequence repetition, various range throw practice, multi-player synchronization drills, rapid disengagement practice for emergency procedures.
Timing Precision Drills
Developing instinctive timing requires repetitive practice with measurement tools. The T=0 to T=15 formula provides the framework, but individual adaptation accounts for personal reaction times.
Precision development: Use timing apps for sequence practice, record and review execution timing, practice repetitive motions for consistency, simulate combat stress conditions.
Advanced Tips and Meta Adaptations
Equipment Optimization
Version 4.0’s attachment system provides new optimization opportunities. While mortars lack traditional attachments, supporting weapons benefit from improved stability and recoil control systems.
Optimization priorities: Angled foregrips for horizontal control, Light grips for stability, quick-switch scope capabilities, balanced grenade loadouts, Armorer passive for sustained engagements.
Situational Adaptations
Meta evolution requires flexible adaptation to changing landscapes. September 26, 2025 Predator vs Survivors Mode influences asymmetric tactics applicable to standard compound breaking.
Adaptation strategies: Monitor professional player innovations, practice multiple execution variations, prepare responses to defensive adaptations, utilize new features and mechanics.
FAQ
How long should you wait between smoke and mortar deployment? Deploy smoke at T=0, mark mortar at T=5 seconds. This ensures peak smoke density coincides with blast impact for optimal team advance cover.
What’s the optimal range for mortar-smoke compound breaking? Position 100-150 meters from targets for indirect effectiveness. This provides safety from counter-attacks while ensuring accurate targeting and sufficient smoke throw distance.
How do you avoid third-party elimination during attacks? Limit engagements to 30-45 seconds maximum. Monitor audio for approaching teams, maintain escape routes, execute during zone rotations when squads focus on positioning.
Which compounds work best for mortar-smoke tactics? Target multi-room structures with limited exits during mid-game rotations. Elevated compounds force predictable movement, zone-edge locations minimize third-party risks.
How has 4.0 update changed mortar effectiveness? Recoil adjustments and realistic reloading improve stability and timing. Enhanced foregrips provide better accuracy, improved audio cues require precise smoke timing.
What team coordination is essential for execution? Assign roles: mortar operator, smoke specialist, overwatch, entry team. Use standardized callouts, maintain 20-30 meter spacing, establish clear communication protocols.


