

Energy Recharge Fundamentals
Core Mechanics and Energy Sources
Here’s the thing about ER that trips up a lot of players – it’s not just more energy equals better. ER functions as a multiplier on base energy from Elemental Particles and Orbs. Every character starts with 100% ER, and any additional percentages directly boost your regeneration efficiency. But here’s what’s crucial: ER only affects particle and orb energy. Direct generation sources? They remain completely unaffected.
Energy Values at 100% ER (4-character party):
Active Character: Same Element Particle (3), Different Element (1), Same Element Orb (9), Different Element Orb (3)
Inactive Character (60% rate): Same Element Particle (1.8), Different Element (0.6), Same Element Orb (5.4), Different Element Orb (1.8)
Party size actually impacts off-field energy distribution more than most realize: 80% for 2-character teams, 70% for 3-character, and 60% for full 4-character parties. Same-element particles provide triple the energy compared to different elements – this is why element matching matters so much.
Editor’s note: I’ve seen too many players ignore this 3x multiplier and wonder why their rotations feel clunky.
When you’re building teams and need reliable resources for those ER-scaling characters, Primogem planner crystals top up from BitTopup ensures you’ve got what you need with competitive pricing and instant delivery.
ER Calculation Methods
Determining Requirements
Forget guesswork. Use the KQM Energy Recharge Calculator for precise, team-specific calculations. Input your teams, weapons, and rotations to get minimum ER requirements that ensure consistent burst usage.
The calculation process breaks down like this: First, identify your burst cost and cooldown. Then calculate energy generation per rotation. Account for particle timing (this is where most people mess up). Factor in weapon passives. Finally, apply a safety margin for 95%+ consistency.
Trust me – that safety margin isn’t optional if you want reliable performance in Abyss.
Character Burst Cost Categories
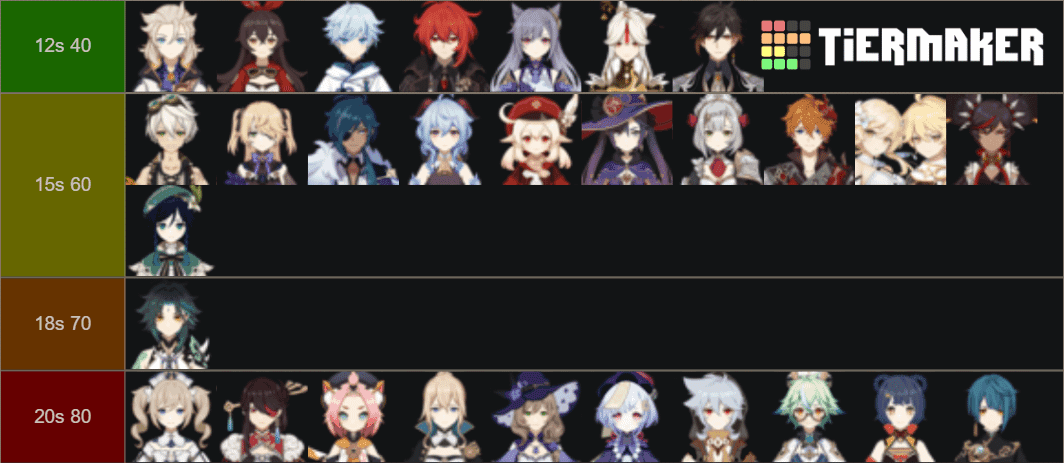
Low Cost (40 Energy): Diluc, Zhongli, Keqing typically need 110-130% ER Medium Cost (60 Energy): Bennett, Ganyu, Kazuha require 140-180% ER
High Cost (70-80 Energy): Xiao, Xingqiu, Xiangling, Beidou demand 180-220% ER Extreme Cost (90 Energy): Raiden Shogun, Yae Miko need 200-300% ER
Characters with ER ascension stats – like Mona’s 32.0% or Bennett’s 26.8% – naturally meet requirements easier. Battery characters can dramatically reduce teammate ER needs: Xingqiu generates 5 particles, Bennett provides 2.25, Sucrose offers 4, and Kaeya delivers 2.67.
Character-Specific ER Requirements
Main DPS Thresholds
Ayaka: 130-140% ER with a Cryo battery, but bump that to 160-180% if you’re running her solo Eula: 130-150% ER with battery support, 180-200% when she’s on her own Xiao: 120-140% ER with Anemo battery, 160-180% without (and yes, he really needs that battery) Hu Tao: 100-120% ER – honestly, low priority since she scales off HP anyway
Sub-DPS and Support Needs
Xingqiu: 180-200% ER for that consistent uptime we all depend on Xiangling: 160-180% ER with Bennett, but you’ll need 200%+ without him Beidou: 180-220% ER depending on your Electro generation setup Fischl: 120-140% ER (she’s beautifully self-sufficient)
For support characters, prioritize ER over personal damage every time. Their utility provides way more team value than offensive stats ever will.
Meta Team ER Configurations
National Team Setup
The Bennett/Xiangling/Xingqiu/Flex combo demonstrates optimal energy synergy better than any other team:
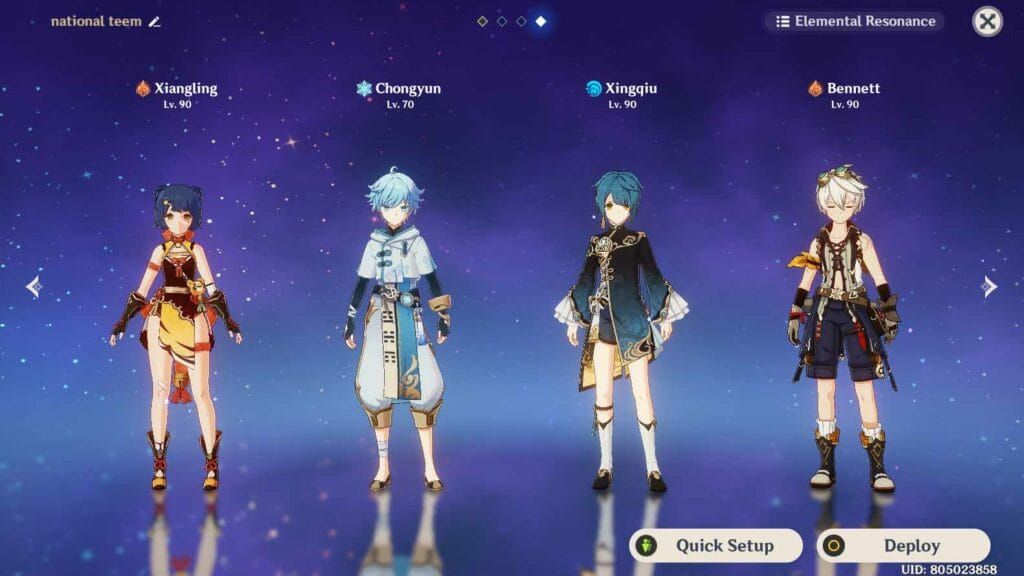
Bennett: 180-200% ER (he’s your battery, after all)
Xiangling: 160-180% ER (she benefits massively from Bennett’s particles)
Xingqiu: 180-200% ER (pretty self-sufficient with Sacrificial Sword)
Flex: 140-160% ER depending on which character you slot in
Morgana Freeze Team
Mona/Ganyu/Venti/Diona requires more careful ER balancing than you might expect:
Mona: 180-220% ER for consistent burst uptime
Ganyu: 120-140% ER with Cryo resonance helping out
Venti: 160-180% ER (benefits from that sweet ER ascension)
Diona: 180-200% ER for reliable shield and healing consistency
Cryo resonance actually provides additional energy through increased critical hits – something a lot of guides don’t mention.
Need to build these meta teams but short on resources? The Welkin + crystals bundle deal from BitTopup offers excellent value with secure payment processing and 24/7 support.
Hypercarry Teams
Raiden Hypercarry: Raiden (200-250% ER), Bennett (200%+ ER), Kazuha (160-180% ER), Sara (200%+ ER) Xiao Hypercarry: Xiao (120-140% ER), Jean/Sucrose (180-200% ER), Zhongli (150-170% ER), Albedo (130-150% ER)
Optimal Artifacts and Weapons
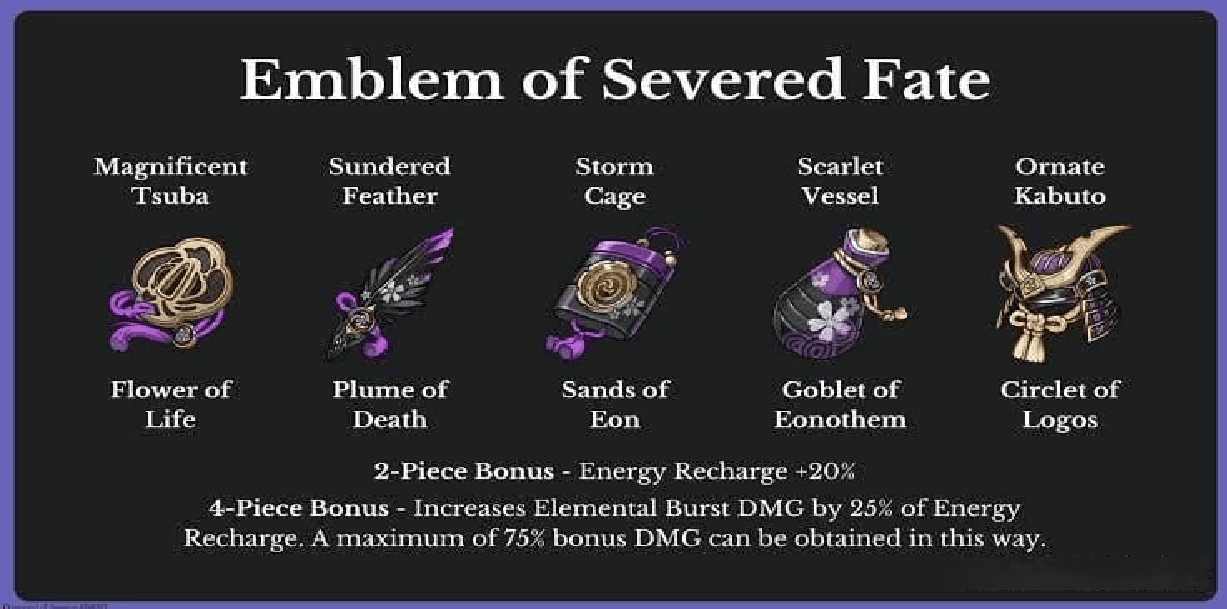
Artifact Set Recommendations
Emblem of Severed Fate: ER +20% (2pc), Burst DMG +25% of ER up to 75% (4pc). This set is absolutely broken on Raiden, Xingqiu, Yelan, and Xiangling.
The Exile: ER +20% (2pc), 6 total party energy on burst (4pc). Solid for early game supports.
Scholar: ER +20% (2pc), 3 energy to bow/catalyst users on particle absorption (4pc).
Weapon Comparisons
Favonius Series: 60-100% chance for 6 energy particles on CRIT with 12-6s cooldown. Requires 30-50% CRIT Rate investment, but benefits your entire team.
Sacrificial Series: 40-80% chance to reset skill cooldown with 30-16s cooldown. Doubles particle generation, but only for the wielder.
Quick math check: 5-star artifact ER values hit 51.8% on Sands main stat, 4.53-6.48% per substat roll, with 10% probability on Sands pieces.
Advanced Energy Management
Funneling Techniques
Want to maximize energy transfer? Timing is everything:
Cast your battery’s Elemental Skill
Immediately switch to your target character
Make sure the target’s on-field when particles arrive
Always prioritize same-element particles (that 3x vs 1x energy difference is huge)
Most effective pairs: Bennett→Xiangling, Diona→Eula, Sucrose→Xiao, Fischl→Beidou.
Rotation Optimization
Remember – particles take 1-2 seconds to reach characters. Cast skills early in your rotations, account for cooldowns, and prioritize same-element particles whenever possible.
Here’s something interesting: Kazuha generates 4 vs 3 particles with hold skill, but it extends his cooldown from 6s to 9s. Worth considering in your rotation planning.
Electro Resonance: Generates 1 Electro particle every 5 seconds from reactions. Anemo Resonance: Reduces skill cooldowns by 5%, increasing particle generation frequency.
Common ER Mistakes
Over-investment Issues
Excessive ER beyond what your rotation actually requires just wastes damage potential. Warning signs include bursts being available before cooldown expires, ER exceeding 200% without scaling benefits, and significant damage loss.
Use ER calculators for precise requirements and actually test your rotations to verify thresholds.
Team Synergy Oversights
Building characters in isolation completely ignores battery interactions. Replace low-utility healers like Qiqi or Barbara with particle generators. Make sure high-cost characters have proper energy support.
Consider Favonius weapons for team-wide energy – they’re more valuable than most players realize.
Poor Timing
Suboptimal skill usage kills efficiency. Avoid using skills too late, missing funneling opportunities, overlapping generation windows, and ignoring particle travel time.
F2P Solutions
Budget Weapons
The Catch: 45.9% ER plus 32% Burst DMG at R5. You get it through fishing, and it’s honestly the best F2P option for Raiden and Xiangling.

Prototype Amber: Regenerates 18 energy over 6 seconds post-burst at R5. Solid craftable catalyst option.
Amenoma Kageuchi: Provides up to 36 flat energy after burst at R5. Craftable sword with 55.1% ATK bonus.
F2P Battery Characters
Kaeya: 26.8% ER ascension and 2.67 Cryo particles make him excellent for Eula and Ayaka. Lisa: Provides Electro particles for Beidou and Razor. Her hold skill generates more particles. Traveler: Anemo batteries Xiao, Electro provides team ER buffs, Geo offers consistent generation.
Farming Strategies
Pre-AR45: Focus on main stats over sets, use 3-4 star ER sets, prioritize character and weapon ascensions.
Post-AR45: Farm that Emblem domain, use Genshin Optimizer, test thresholds practically, and optimize substats gradually.
FAQ
How much ER do main DPS characters actually need? Low-cost bursts (40 energy) typically need 110-130% ER, while high-cost (80+ energy) require 130-200% depending on battery support. Characters with ER ascension stats need less investment. The KQM Calculator gives you team-specific requirements.
What’s the real difference between particles and orbs for ER? Orbs provide 3x more base energy than particles. Same-element particles give 3 energy vs 1 for different elements. Off-field characters only receive 60% in 4-person teams, making element matching absolutely crucial.
Which characters make the best batteries? Xingqiu (5 particles), Sucrose (4), Bennett (2.25), Kaeya (2.67), and Fischl (consistent through Oz). Sacrificial weapons double their output, while Favonius provides universal team energy.
Should I prioritize ER or damage stats? Always prioritize ER until you achieve consistent burst usage every rotation, then focus on damage. Exceptions: ER-scaling characters like Raiden and Mona, plus Emblem users where ER converts to damage up to 300%.
How do I actually know if I have enough ER? Test your rotations in Spiral Abyss or domains. Sufficient ER means all bursts are ready on cooldown consistently. Warning signs of insufficient ER: bursts not ready when needed, extended rotations, dependency on enemy orbs.
What weapons provide the best F2P energy generation? The Catch (45.9% ER plus burst bonuses), Prototype Amber (18 energy restoration), and Amenoma Kageuchi (36 energy restoration). Favonius weapons generate team energy through crits, while Sacrificial doubles skill usage frequency.


