

Look, I’ve been covering Genshin mechanics since launch, and Version 6.0’s Kuuvahki system? It’s genuinely different. Not just new content different—fundamentally alters how you move through the world different.
What Actually IS Kuuvahki Energy?
Forget everything you know about energy generation. Seriously.
This Isn’t Your Typical Particle System
Standard energy works per character, right? Xingqiu drops 5 Hydro particles per skill, Bennett gives you 2.25 Pyro particles on press, Raiden’s coordinated attacks spit out 0.5 Electro particles every 0.9 seconds. We’ve memorized these numbers for years.
Kuuvahki Energy? Completely environmental. You’re interacting with Moonshine Violets and these ethereal creatures called Kuuhenki scattered across three new islands: Hiisi Island, Lempo Isle, and Paha Isle. Instead of collecting particles, you enter an Empowered state through continuous interaction with these lunar-powered sources.
The system actually rewards exploration curiosity over rotation optimization. Wild concept, I know.
Getting Started (It’s Not That Simple)
You’ll need Mondstadt’s Archon Quest Prologue: Act III completed and Adventure Rank 28. Standard stuff. But here’s the kicker—this only works with at least one Nod-Krai character in your party. That’s Lauma, Flins, or Aino.
One Nod-Krai character gives you Nascent Gleam—suddenly your Bloom reactions can crit with 15% base CRIT Rate and 100% CRIT Damage. Two or more? Ascendant Gleam kicks in with +10% CRIT Rate and +20% CRIT Damage for these new Lunar-Bloom reactions.
And yes, this is as broken as it sounds.
Lunar-Bloom: When Dendro Finally Gets Respect
The Mechanics That Matter
Here’s what happens: Dendro + Hydro with an active Nod-Krai character creates Lunar Cores instead of regular Bloom cores. These aren’t just cosmetically different—they’re fundamentally superior.
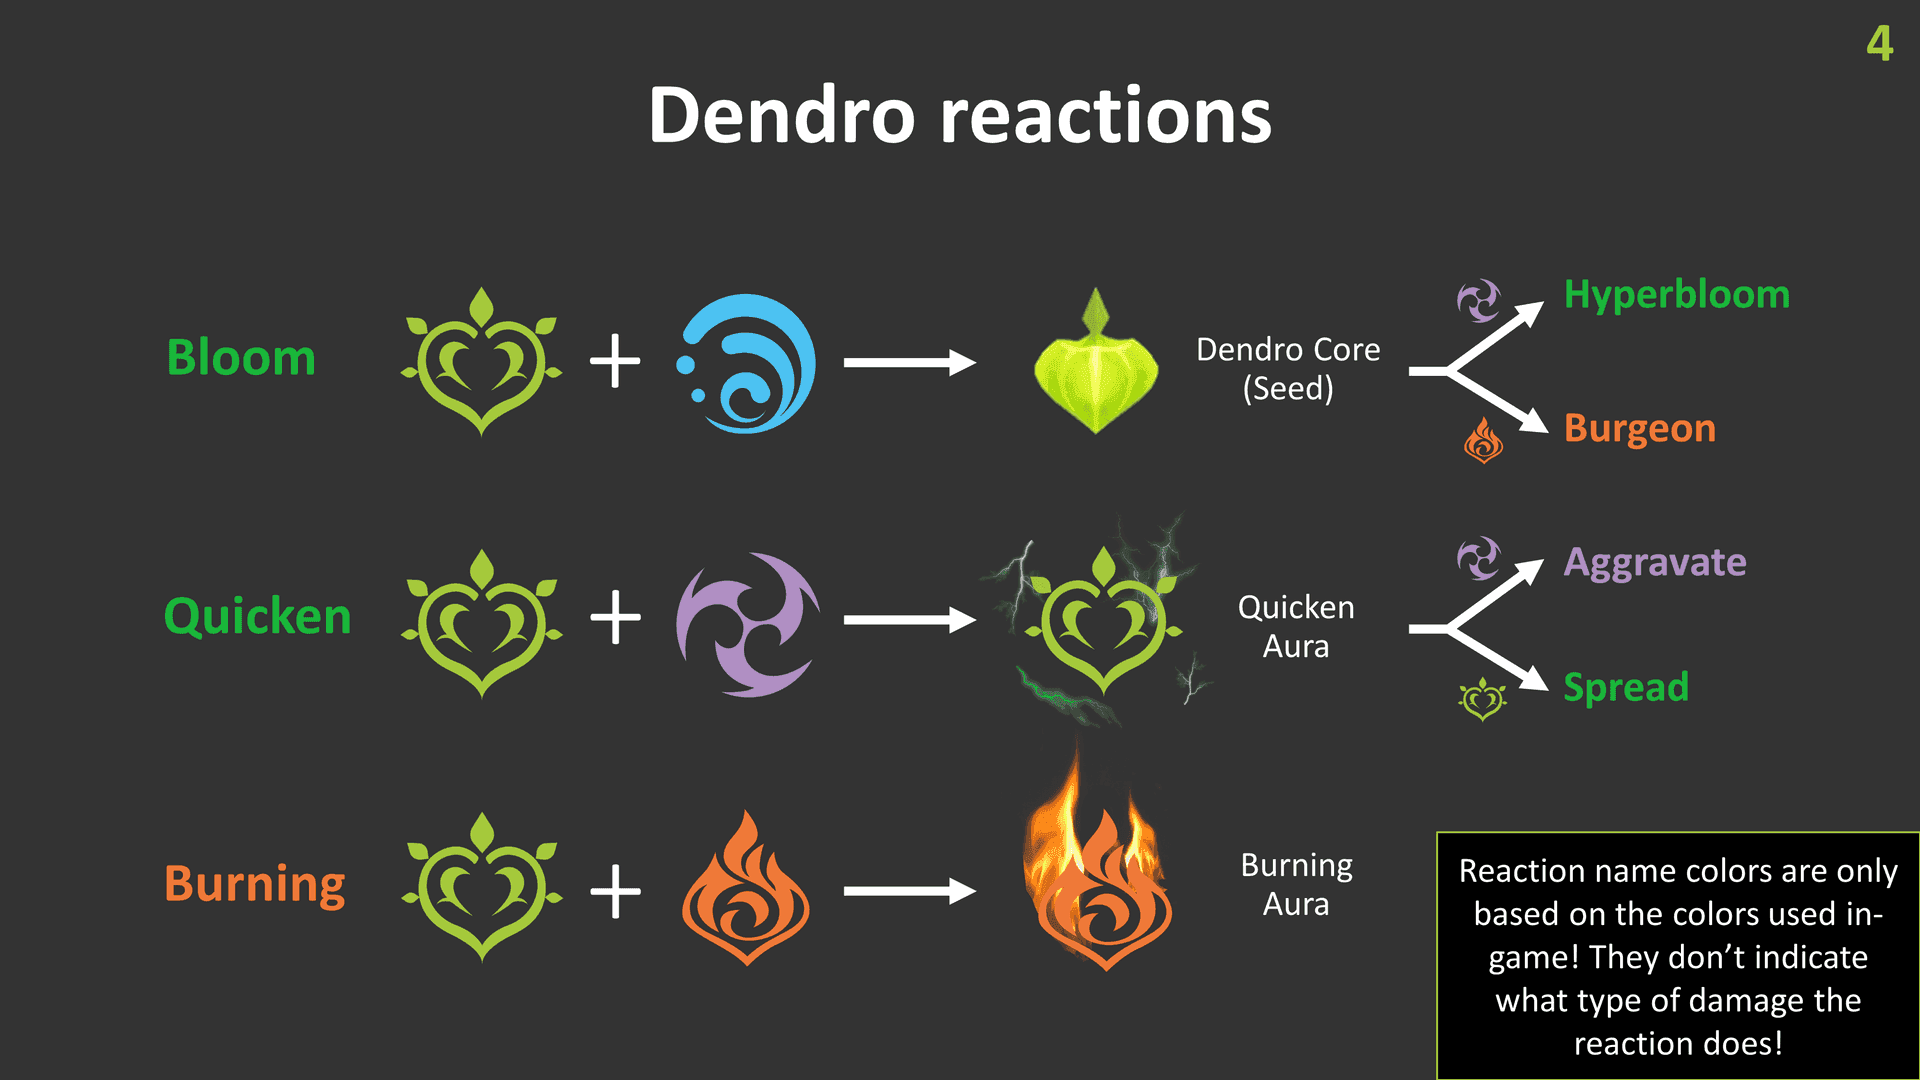
Lunar Cores pack a 1.7x base damage multiplier, explode in 1.2 seconds (versus the usual 2), and cover a 3.5-meter radius instead of 2 meters. More damage, faster timing, bigger boom. The trifecta.
But the real game-changer? These cores scale with CRIT Rate, CRIT Damage, and DMG% bonuses. Finally, a Dendro reaction that plays nice with traditional DPS stats.
The Lauma Factor
Lauma’s where things get spicy. Her Elemental Burst Azure Hymn adds flat damage to Dendro Core explosions equal to 460.8% of her Elemental Mastery. We’re talking dual-scaling here—EM for the flat bonus, traditional DPS stats for the crits.
She also consumes something called Verdant Dew to trigger additional Lunar-Bloom instances. It’s like having a Bloom reaction that actually wants to be a hypercarry.
The Math (Because Someone Asked)
Optimal builds want 800-1000 EM for that flat damage scaling, 60-70% CRIT Rate, and 140-180% CRIT Damage. Support characters can get away with 400-600 EM.
Quick calculation: 1000 EM Lunar Core hits for 5,632 base damage plus 4,608 flat bonus—that’s 24,576 before crits. With 70% CRIT Rate and 180% CRIT Damage? Average damage per core jumps to 68,812.
Per. Core.
Need Genesis Crystals for character pulls? Genshin Impact Top Up through BitTopup offers competitive rates and fast delivery. Trust me, you’ll want these Nod-Krai characters.
Traversal Revolution: Why Climbing is Dead
Unipolar Fields Change Everything
These red and blue electromagnetic objects scattered around follow simple physics: same colors repel, different colors attract. Step into one while empowered, and you’re launching into high jumps that reach previously inaccessible areas.

Strategic positioning lets you chain these aerial sequences, completely bypassing climbing and gliding limitations. It’s like having a permanent Venti burst for exploration.
Moonlane Gliding is Ridiculous
Kuuhenki interactions unlock free-form gliding along these Moonlanes—essentially aerial highways that ignore terrain completely. No stamina consumption. Indefinite duration. Better maneuverability than standard gliding.
I’ve crossed entire map sections without touching the ground. It’s genuinely faster than most teleport routes.
Island-Specific Applications
Lempo Isle features dense Unipolar Field networks around Nasha Town and the Voynich Guild—perfect for vertical exploration. Hiisi Island emphasizes Moonlane traversal with worship sites containing concentrated Kuuvahki sources. Paha Isle? That’s where things get challenging, with Fatui installations requiring precise field navigation.
The mist patch interactions on Moonlanes provide directional control that exceeds traditional gliding maneuverability while maintaining that indefinite duration. It’s almost unfair.
Character Tier List: Who Actually Matters
The Big Three
Lauma (5-star Dendro Catalyst): The crown jewel. Converts standard Dendro Cores to enhanced Lunar Cores, provides massive flat damage scaling through EM, and her C1 offers healing based on 500% EM when triggering Lunar-Bloom.

She’s not just good—she’s essential.
Flins (5-star Electro Polearm): Dual Elemental Burst modes with a lower-cost alternative for faster rotations. Ascension materials require the Precision Kuuvahki Stamping D-uck-ie from the new Knuckle Duckle world boss. (Yes, that’s the actual name.)
Aino (4-star Hydro Claymore): Free through the Archon Quest, provides consistent Hydro application, and helps activate Ascendant Gleam. Budget-friendly entry point into the system.
Team Synergy That Works
The premier composition? Lauma/Aino/Furina/Kazuha. Activates Ascendant Gleam while maximizing external bonuses through Furina’s HP scaling and Kazuha’s EM distribution.
Here’s something interesting—non-Nod-Krai characters contribute up to 36% Lunar Reaction damage bonus based on their highest stat (ATK, HP, DEF, or EM). The system actually rewards mixed compositions.
Gear Optimization: What You Need to Know
Artifacts That Actually Matter
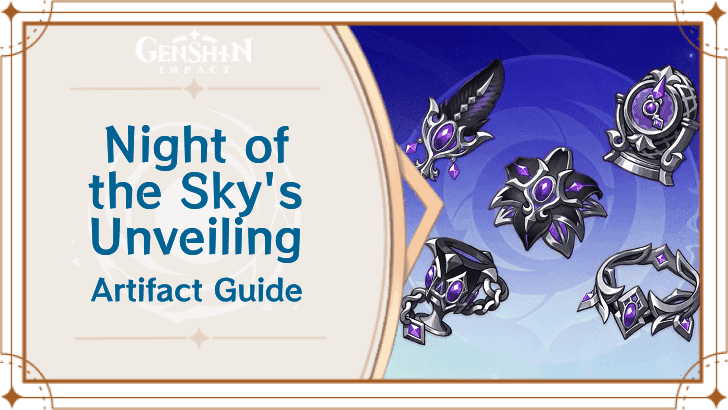
Night of the Sky’s Unveiling is best-in-slot for main DPS with 2+ Nod-Krai characters—30% CRIT Rate bonus when Ascendant Gleam is active.
For Lauma specifically, Silken Moon’s Serenade increases EM while providing up to 10% additional damage based on Lunar reaction frequency.
Weapon Considerations
Lauma’s signature Nightweaver’s Looking Glass provides +120% Bloom damage, +80% Hyperbloom/Burgeon damage, and +40% Lunar-Bloom damage when both effects are active. The budget option Blackmarrow Lantern offers 12% Lunar-Bloom damage increase as a craftable 4-star.
Flins’ signature weapon features 674 base ATK, 22.1% CRIT Rate, and a 36% Lunar-Charged damage increase for 3.5 seconds after burst, plus 28% CRIT Damage and 12 Energy restoration.
Stat Priorities (The Real Numbers)
For Lauma: EM Sands, Dendro DMG% Goblet, CRIT Rate/Damage Circlet. Substat targets hit 60-70% CRIT Rate, 140-180% CRIT Damage, and 800-1000 EM for optimal flat damage scaling.
Looking to optimize your builds? Buy Genesis Crystals Online through BitTopup for weapon banners and constellations at competitive rates.
Advanced Applications: Where It Gets Interesting
Spiral Abyss Performance
Lunar-Bloom teams absolutely demolish Abyss content. The 3.5-meter explosion radius provides superior area coverage, while CRIT scaling enables damage that competes with traditional hypercarry compositions. Plus, the system operates independently of buff windows—consistent performance across varied encounters.
New World Boss Mechanics
The Radiant Moonfly world boss hits your entire party with a debuff: -40% damage dealt, -40% incoming healing, and -100% CRIT Rate until characters heal to maximum HP. Then it flips to +15% CRIT Rate and +50% damage dealt. It’s all about efficient healing management.
Knuckle Duckle features 80% resistance when shielded and requires 10 Electro-Charged or Lunar-Charged hits to eliminate its Duck mechanics. Yes, this directly encourages Lunar-Charged compositions.
Common Mistakes (And How to Avoid Them)
The Timing Trap
Most frequent error? Improper elemental application timing resulting in standard Bloom instead of Lunar variants. This happens when you apply Dendro and Hydro without an active Nod-Krai character present.
Also—and this is crucial—CRIT-capable Bloom reactions deal critical self-damage. Non-critical hits around 800 damage jump to ~1,600 on critical hits. Bring a healer.
Energy Management Misconceptions
Kuuvahki operates through environmental interaction, not particle generation. Traditional Energy Recharge optimization doesn’t apply here. Remember: Raiden generates 0.5 Electro particles every 0.9 seconds, Noelle generates zero. Plan accordingly.
Positioning and Timing Issues
Lunar Core detonation uses a 1.2-second timer versus the standard 2 seconds—adjust positioning for that 3.5-meter explosion radius. Moonlane traversal requires precise Kuuhenki interaction timing to maintain momentum.
Having acquisition difficulties? Genshin Top Up Deals through BitTopup provide cost-effective premium resource access for smooth Lunar-Bloom capability enhancement.
Regional Meta Shifts
Fontaine Synergy
Lunar-Bloom teams excel in Fontaine’s Hydro-heavy content with abundant elemental application opportunities. The reduced stamina reliance benefits underwater exploration, while front-loaded damage through enhanced cores provides efficient enemy elimination without extended underwater rotations.
Sumeru Applications
The Dendro-rich environment creates ideal Lunar-Bloom conditions with abundant environmental sources, reducing team elemental burden. Desert regions particularly benefit from the area damage capabilities with that expanded explosion radius against grouped enemy formations.
FAQ: The Questions Everyone’s Asking
How exactly does Kuuvahki Energy differ from regular energy? It’s environmental versus character-based. You interact with plants and creatures in Nod-Krai instead of generating particles. Provides consistent benefits through environmental manipulation, enabling traversal abilities that operate independently of stamina.
Which characters work best with Lunar-Bloom? You need at least one Nod-Krai character—Lauma’s the premier enabler with that 460.8% EM flat damage addition. Optimal setup: 2 Nod-Krai + 2 non-Nod-Krai for Ascendant Gleam. My top recommendation: Lauma/Aino/Furina/Kazuha.
Can Kuuvahki Energy actually improve traversal speed significantly? Absolutely. Unipolar Fields enable high jumps that bypass climbing entirely. Kuuhenki-powered Moonlane gliding provides free-form aerial movement without stamina consumption—consistently outperforms standard methods.
Which artifacts enhance Lunar-Bloom effectiveness?Silken Moon’s Serenade for Lauma (EM increase plus 10% damage based on reaction frequency). Night of the Sky’s Unveiling for main DPS (30% CRIT Rate with Ascendant Gleam active).
How should I optimize energy regeneration for Kuuvahki? Focus on environmental interaction—learn Moonshine Violet locations and Kuuhenki points. For standard energy management: same-element particles provide 2.7 energy on-field versus 0.8 off-field for different elements.
What are the best team compositions for Lunar-Bloom? Premier setup: Lauma/Aino/Furina/Kazuha for Ascendant Gleam activation with elemental resonance. Alternatives include Zhongli for survivability or Bennett for ATK scaling. Balance that 2 Nod-Krai requirement with traditional synergies to get that 36% damage bonus from non-Nod-Krai characters.


