Character Overview: The Pyro Powerhouse Showdown
Role and Playstyle - Two Different Philosophies
Here's where things get interesting. Arlecchino operates as this high-risk, high-reward 5-star Pyro Polearm DPS that basically says forget healing, let's go nuclear. Her Bond of Life mechanic? It's essentially trading your safety net for a massive +120.4% damage bonus right at talent level 1.

You need those Bond stacks above 30% Max HP to unlock her Pyro infusion - and trust me, when it clicks, it really clicks. The catch? You're looking at 140-150% Energy Recharge in solo Pyro setups, plus you absolutely need shields because, well, no healing.
Diluc, on the other hand, is like that reliable friend who always shows up. His 5-star Pyro Claymore approach centers around this satisfying three-hit Skill sequence and an 8-second Burst infusion that just works. No complex resource juggling - just consistent Vaporize reactions with only 100-115% Energy Recharge when Bennett's around.
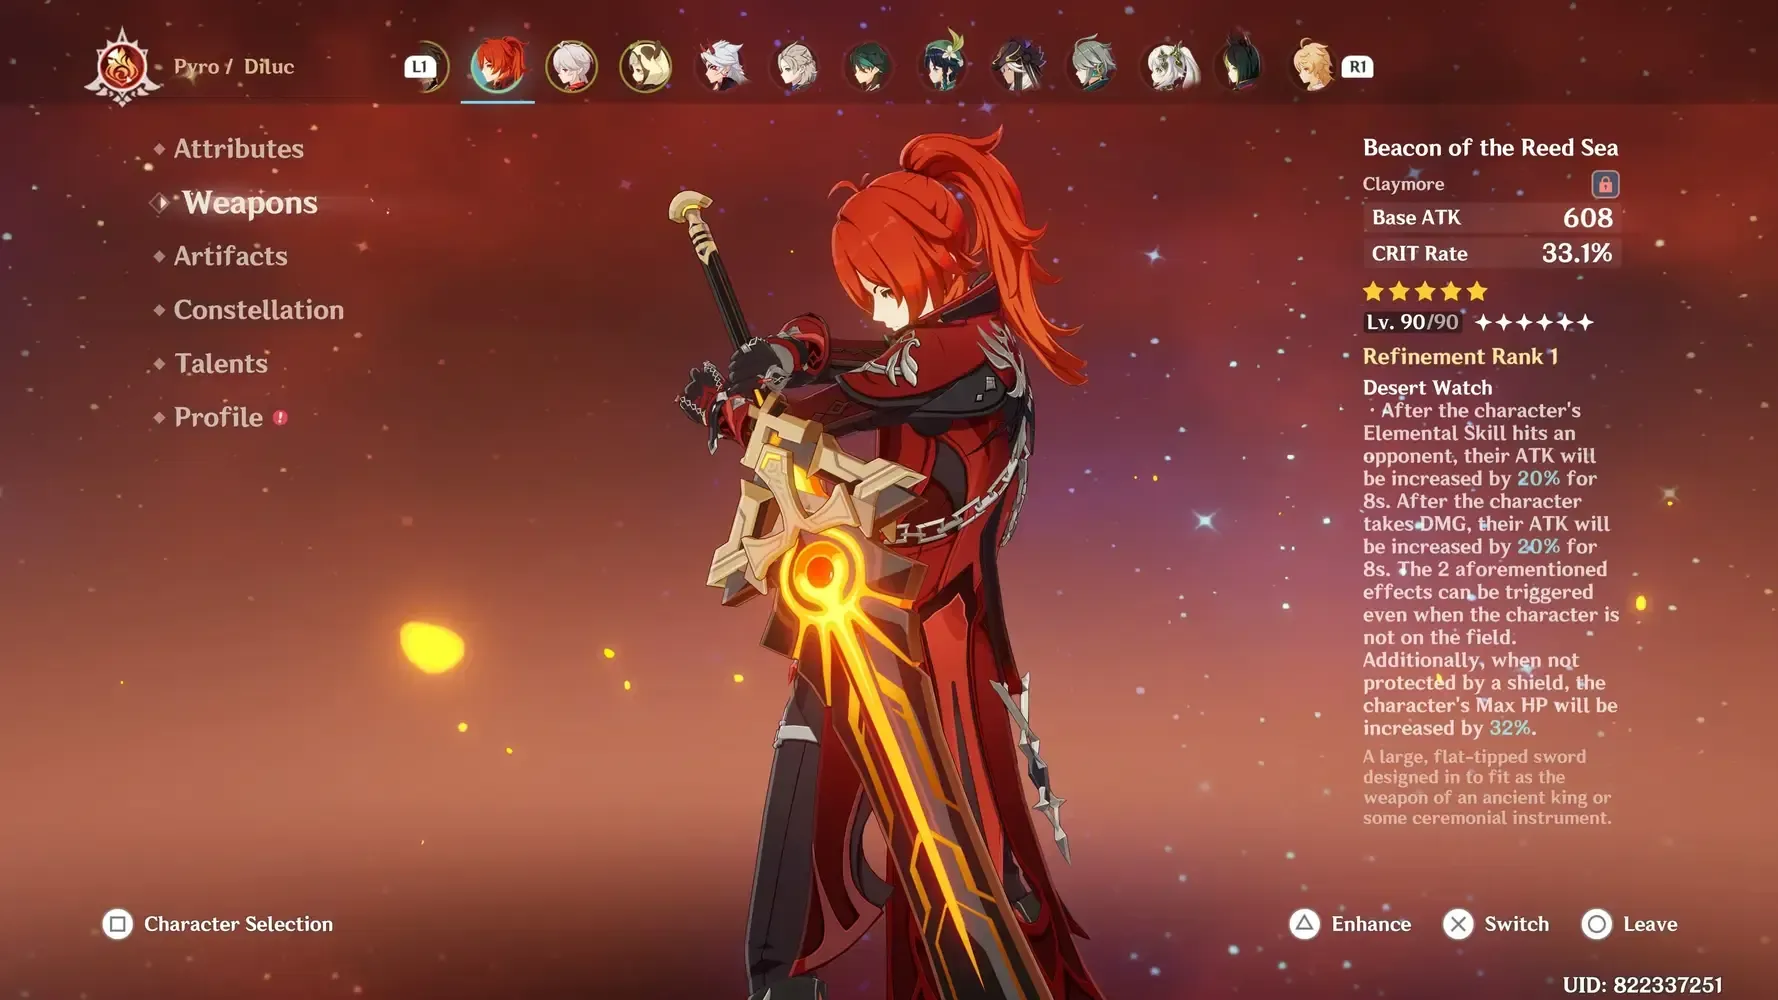
It's honestly refreshing how straightforward he is in a game that's gotten increasingly complex.
Kit Breakdown - The Devil's in the Details
Arlecchino's All Is Ash marks enemies with DoT every 5 seconds. Absorbing those marks generates Bond stacks equivalent to 145% Max HP - which sounds complicated because it is. Her Balemoon Rising clears Bond stacks, heals for 150% ATK, and resets Skill cooldown for 60 energy. Normal Attacks hit 6 times ranging from 47.5% to 85.4% ATK.
Diluc keeps it simple. Searing Onslaught chains three Pyro slashes (94.4-129% damage) with 4-second intervals between uses. His Dawn Burst delivers 204% slash damage plus 60% DoT and 204% explosion damage for just 40 energy. That fourth Normal Attack hit peaks at 265% ATK.
Sometimes simple is better.
For players looking to secure these characters during banner rotations, purchase Genesis Crystals Genshin Impact deals through BitTopup offers competitive pricing and instant delivery.
Where They Stand in 2025's Meta
Arlecchino holds S-tier Main DPS status in Version 6.1's November 2025 meta, which is impressive considering Nod-Krai's limited synergy options. She's hitting 80-85% meta efficiency even without Chevreuse support and can push 200K+ single-target damage in optimized teams.
The hyperinvestment requirement is real, but she's showing strong resistance to power creep.
Diluc? He's sitting comfortably in B-tier territory. Not cutting-edge, but he's got this 90% uptime advantage at C0 that Arlecchino can't match without C1. The meta's shift toward frontloaded Lunar reactions isn't doing either character any favors, but Arlecchino's superior scaling gives her better adaptation potential.
Single-Target DPS - Where the Numbers Tell the Story
Rotation Damage Reality Check
Arlecchino's optimal rotation looks like this: Skill activation → Charged Attack for Bond absorption → Normal Attack sequence → Burst for healing and reset. When everything aligns in Vaporize compositions, you're looking at 180-200K damage with those crucial 2.5-second pauses for Hydro aura reapplication.
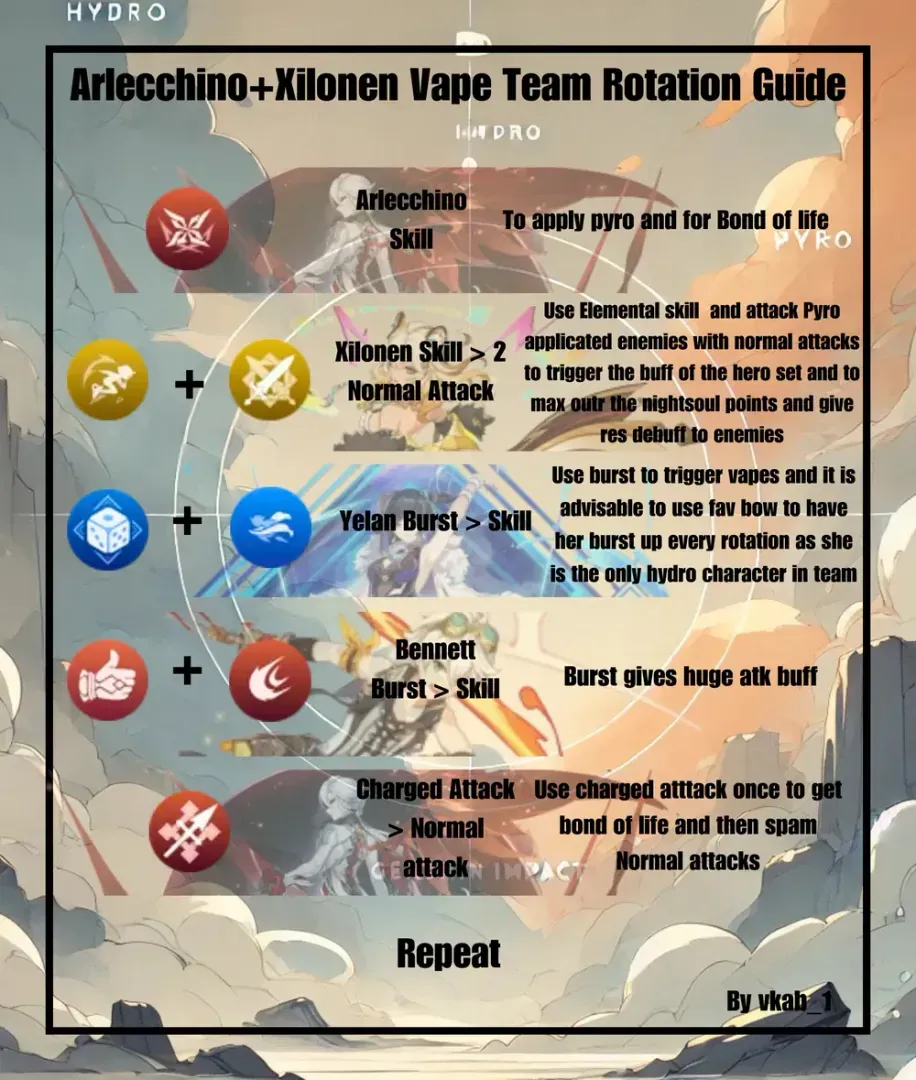
It's precise. Maybe too precise for some players.
Diluc's Vaporize rotation follows a more forgiving pattern: Bennett Burst → Xingqiu Skill → Diluc Burst (8-second infusion) → N2 → Skill twice → repeat. He maintains 70% field time while achieving ~18K DPS over extended encounters. The damage stays consistent regardless of whether you're having an off day.
Mathematically, Arlecchino wins by 20-30% in single-target scenarios. But here's the thing - that edge requires execution that not everyone can maintain consistently.
Combo Mastery - The Skill Gap
Arlecchino's advanced technique involves snapshot buffing before swaps, maximizing Bennett's ATK boost and Kazuha's Elemental Mastery sharing. Miss those dash-cancels post-N3? You're looking at an 18% DPS loss.
That's... significant.
Diluc benefits from N2 + Skill weaving for a 15% DPS increase compared to basic rotations. Animation canceling through dash or jump inputs after the third Normal Attack prevents enemy displacement. Wall positioning before Burst activation eliminates knockback issues.
The difference in skill floor is night and day.
DPS Screenshots - The Build Targets
Arlecchino optimization targets: 2,000+ ATK, 70-80% CRIT Rate, 160%+ CRIT DMG, 150-165% Energy Recharge. Her 88.4% CRIT DMG ascension bonus enables 100K+ screenshot damage in Melt compositions with C1 support.
Diluc's benchmarks are more forgiving: 2,000-2,400 ATK, 60-70% CRIT Rate, 130-155% CRIT DMG, 120%+ Energy Recharge. That 24.2% CRIT Rate ascension reduces artifact farming complexity by 20-30%, making optimal builds genuinely more accessible.
AoE Damage - The Crowd Control Question
Multi-Target Reality
Arlecchino can push 200K+ DPS through Overload compositions with those Normal Attack multipliers ranging from 47.5% to 85.4% ATK across 6 hits. Plunge damage scales from 63.9% to 159.7% ATK.
But here's the frustrating part - enemy knockback reduces effectiveness in post-patch content despite those superior individual hit multipliers.
Diluc's AoE relies on that Dawn Burst delivering 204% slash damage, 60% DoT, and 204% explosion damage across grouped enemies. The inherent pushback creates positioning challenges, but he clears Abyss Floor 12 approximately 15% faster than Arlecchino in pure AoE scenarios. That 40-energy cost advantage really shows.
Grouping Dependencies
Arlecchino's optimal AoE performance depends heavily on enemy positioning within Normal Attack range - making Kazuha or Sucrose practically essential. Her Charged Attack's 90.8% dash damage provides mobility, but that 25 stamina cost limits sustained chase potential.
Diluc's three-hit Skill sequence naturally tracks different targets. Less elegant, maybe, but it works without strict positioning requirements. Sometimes good enough beats theoretically perfect.
Team Building - The Support Ecosystem
Core Support Requirements
Arlecchino's optimal Vaporize team runs Yelan or Xingqiu for Hydro application, Bennett for ATK buffing, Xilonen/Zhongli/Kazuha for resistance shred and shielding. Those 2.5-second pauses for Hydro aura reapplication are non-negotiable for achieving 180-200K damage.
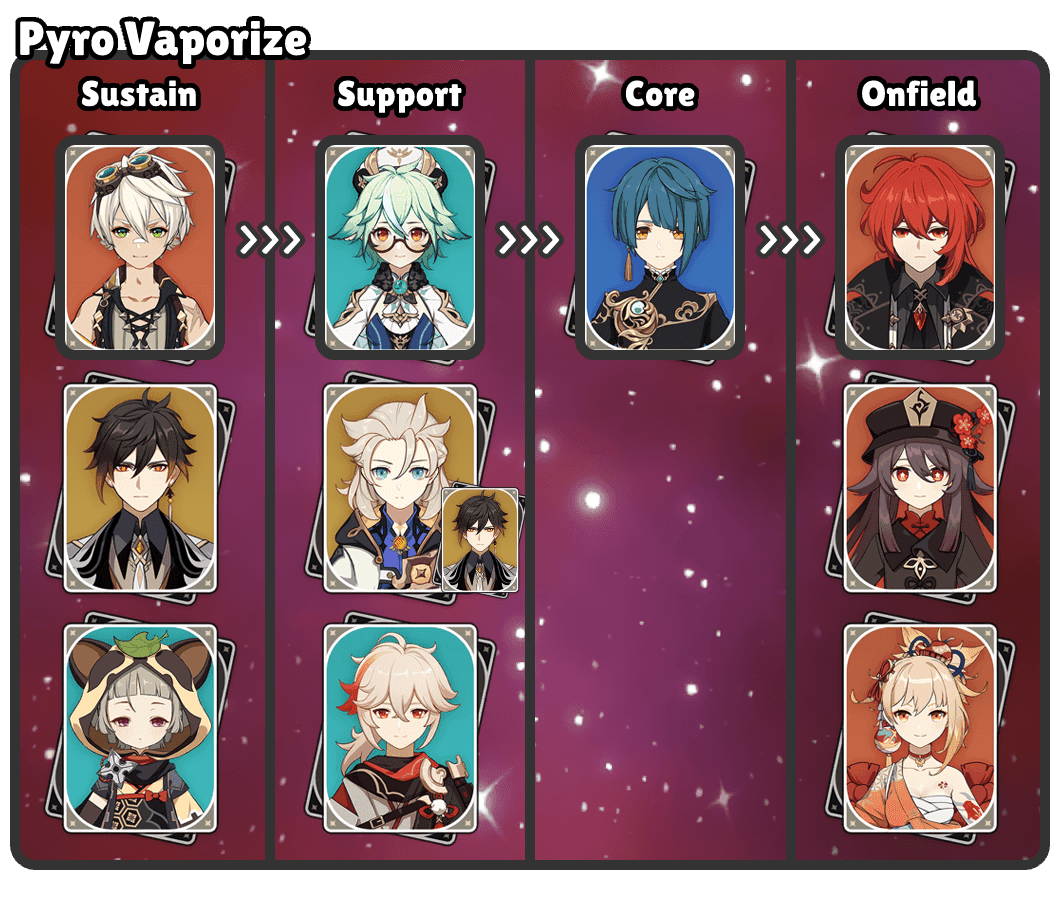
You're basically locked into 5-star characters like Yelan for optimal performance.
Diluc's classic setup is refreshingly accessible: Xingqiu for consistent Hydro application, Bennett for ATK buffing and Energy Recharge support, Kazuha for Viridescent Venerer shred and grouping. He maintains 70% field time with reliable 1.5x Vaporize amplification and achieves 85-90% efficiency with 4-star supports.
That saves approximately 2-3M Mora versus Arlecchino's premium requirements.
Flexible Options - Adapting to Your Roster
Arlecchino shows surprising versatility across Vaporize (single-target), Melt with Rosaria/Citlali (burst damage), and Mono-Pyro with Xiangling (consistent resonance). The Bond mechanic adapts to different support rotations, though shielding remains essential. F2P options with Xingqiu, Sucrose, and Bennett achieve 80-85% meta performance.
Diluc's flexibility centers on Vaporize with Hydro supports, Melt with Cryo enablers like Kaeya, or Plunge compositions with Xianyun for 2x multiplier access. Those lower Energy Recharge requirements (100-115% with Bennett) provide genuine artifact flexibility.
F2P alternatives with Kaeya, Barbara, Sucrose, Noelle create functional teams for ~3M Mora investment.
For optimizing team compositions, top up Genshin Impact Primogems safely through BitTopup ensures secure transactions and competitive rates for acquiring necessary support characters.
Investment Cost - The Real Talk
Character Acquisition
Arlecchino requires targeted pulling during limited banner reruns (Version 6.1 Phase 2: November 11 - December 2, 2025). The 50/50 system means ~90 pulls for guaranteed acquisition - that's 14,400 Primogems for new players. Dedicated saving and banner timing required.
Diluc's Standard Banner availability provides flexible acquisition without 50/50 risk during featured periods. His permanent presence allows acquisition through accumulated Standard Fates, reducing direct Primogem investment.
It's honestly one of his biggest advantages.
Weapon Investment Tiers
Arlecchino's signature Crimson Moon's Semblance (674 ATK, 22.1% CRIT Rate) provides +25% Max HP Bond generation and +12-24% damage scaling. Staff of Homa achieves 90-95% performance as an alternative. F2P White Tassel reaches 80% of signature performance.
Diluc's Redhorn Stonethresher (542 ATK, 88.2% CRIT DMG) with +40% Normal/Charged damage, or Wolf's Gravestone for team buffing. Craftable Prototype Archaic provides 80% of BiS performance.
Weapon investment costs favor Diluc by 20-30% through craftable alternatives.
Artifact Farming - The Resin Reality
Arlecchino requires 4-piece Fragment of Harmonic Whimsy (+18% ATK, +18-54% damage from Bond stacks) with ATK% Sands, Pyro Goblet, CRIT Rate/DMG Circlet. You're looking at ~200+ domain runs for optimal pieces.
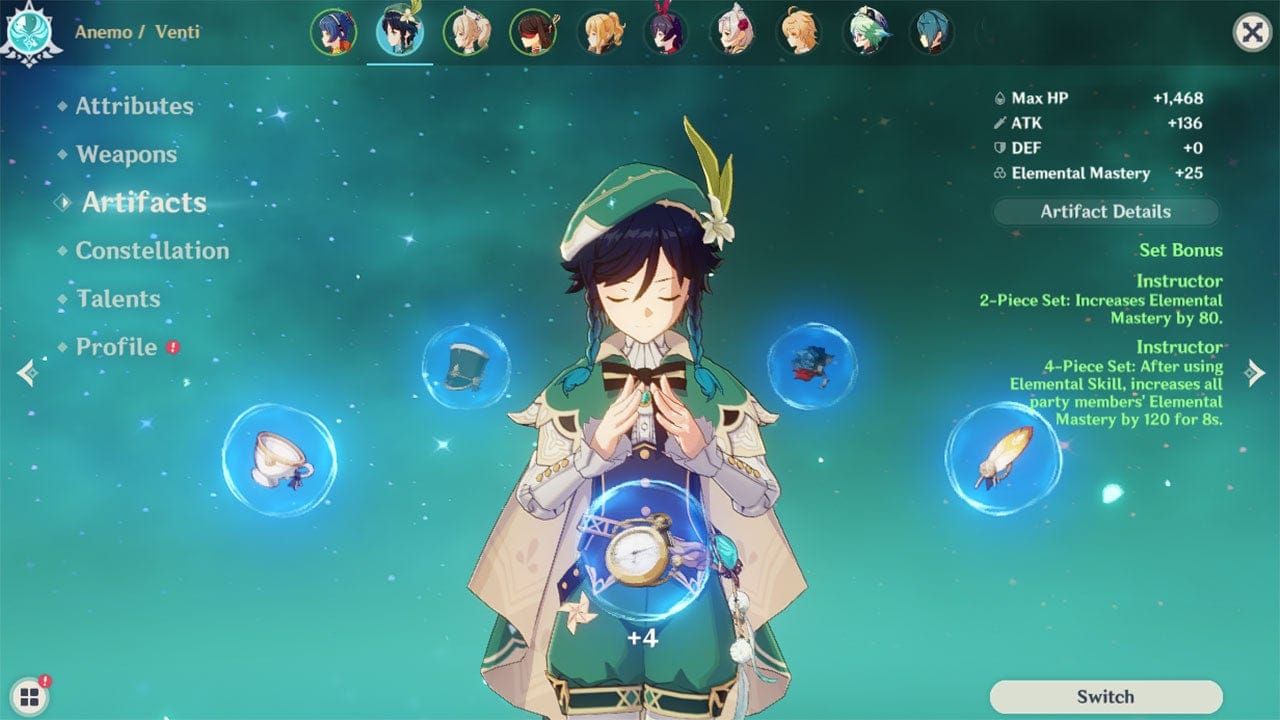
Diluc utilizes 4-piece Crimson Witch of Flames (+15% Pyro damage, +40% reaction damage) with EM or ATK% Sands, Pyro Goblet, CRIT DMG Circlet. Typically requires 100+ runs, but the domain overlap with other characters reduces resin investment by 25%.
Constellation Value - The Upgrade Path
Arlecchino's Constellation Priority
C1 Masque of the Red Death increases Bond damage bonus to 120% (from 80%) and provides interruption resistance - that's a solid 3-star rating. Adds 15% Abyss uptime and 10-15% DPS improvement through uninterrupted rotations.
C6 provides +700% ATK scaling and +10% CRIT Rate/70% CRIT DMG, achieving 20-30% DPS increase in single-target scenarios.
C0 remains fully functional at 85-90% maximum potential. The primary limitation is interruption vulnerability, but core mechanics stay intact.
Diluc's Constellation Worth
C1 Relentless provides +15% damage against enemies above 50% HP (3-star rating). C6 Flaming Sword, Nemesis of the Dark eliminates interruption on Normal Attacks and increases ATK Speed by 30% for 6 seconds.
That C6 is genuinely transformative - 5-star value for gameplay improvements.
C0 to C6 represents 25-30% performance improvement through animation smoothing rather than raw damage multipliers. Standard Banner availability makes constellation acquisition unpredictable but provides long-term value.
Weapon and Artifact Optimization - The Build Guide
Best-in-Slot Weapons
Arlecchino's Crimson Moon's Semblance: 674 ATK, 22.1% CRIT Rate with +25% Max HP Bond generation and +12-24% damage based on HP thresholds. Staff of Homa alternative achieves 90-95% signature performance.
Diluc's Redhorn Stonethresher: 542 ATK, 88.2% CRIT DMG with +28% DEF and +40% Normal/Charged damage from DEF scaling. Wolf's Gravestone provides team-wide +20% ATK and +40% party buff against low-HP enemies.
F2P Weapon Reality
White Tassel for Arlecchino: 401 ATK, 23.4% CRIT Rate with +24% Normal Attack damage, achieving ~80% signature weapon performance. Prototype Archaic for Diluc: 565 ATK, 27.6% ATK with 50% chance for +240% AoE damage every 15 seconds.
F2P accessibility strongly favors Diluc through craftable 4-star options and shared weapon types.
Artifact Set Comparisons
Arlecchino's 4-piece Fragment of Harmonic Whimsy: +18% ATK and +18% damage per Bond stack change (maximum 54%). Requires ATK% Sands, Pyro Goblet, CRIT Rate/DMG Circlet.
Diluc's 4-piece Crimson Witch of Flames: +15% Pyro damage, +15% Vaporize/Melt damage, stacking +15% Pyro damage per Skill use (maximum 45%). This versatile set works across multiple Pyro characters, reducing farming inefficiency.
Spiral Abyss Performance - The Endgame Test
Floor 12 Clear Times
Arlecchino achieves 80-85% meta DPS in Floor 12 without Chevreuse support, clearing single-target chambers with 200K+ damage rotations. Requires hypercarry investment and precise execution but consistently delivers 36-star potential with C1 interruption resistance.
Diluc clears Floor 12 ~15-20% faster in AoE scenarios due to Burst's wide coverage, but performs 20-30% slower overall in 2025 meta conditions. That 70% field time requirement and consistent damage provide reliable clear potential.
Not cutting-edge, but reliable.
Enemy Matchup Analysis
Arlecchino excels against single-target bosses and grouped enemies where Normal Attack sequence maintains consistent hits. Bond mechanics provide sustained damage scaling with enemy HP pools.
Diluc performs better against scattered formations due to Skill's sequential targeting and Burst's wide AoE coverage. Pushback effects provide crowd control benefits against certain enemy types, though they limit sustained damage against mobile opponents.
Ease of Use - The Player Experience
Animation Canceling Requirements
Arlecchino requires precise dash-canceling after N3 to avoid 18% DPS loss. Those timing windows demand practice for consistent execution, plus 2.5-second pauses for Hydro aura reapplication while managing Bond stacks and positioning.
It's a lot to track simultaneously.
Diluc benefits from N2 + Skill weaving for +15% DPS improvement, but his base rotation remains functional without animation canceling. Forgiving timing windows and lower precision requirements make him accessible to players preferring straightforward combat.
Rotation Complexity
Arlecchino's optimal rotation involves multi-step sequences: Support setup → Skill marking → Charged Attack absorption → Normal Attack chains with reaction timing → Burst reset management. Each step requires specific timing and positioning awareness.
Diluc's rotation follows simpler patterns: Bennett Burst → Xingqiu Skill → Diluc Burst + N2 + Skill sequence → repeat. Straightforward nature and forgiving timing windows make rotation accessible to new players.
Mobile vs PC Performance Gap
Arlecchino's performance gap between mobile and PC reaches 10-15% due to precise timing requirements for dash-canceling and reaction management. Touch controls make Bond stack monitoring and positioning more challenging.
Diluc maintains consistent performance across platforms due to forgiving rotation timing and lower precision requirements. Straightforward attack patterns translate well to mobile controls.
Future Meta Considerations - Looking Ahead
Power Creep Resistance
Arlecchino demonstrates strong resistance through scalable Bond mechanics and high damage multipliers remaining competitive as new characters release. S-tier positioning in 2025 reflects sustained relevance despite meta shifts.
Diluc's vulnerability stems from straightforward kit design lacking unique mechanics to differentiate from newer Pyro options. B-tier status reflects functional but outpaced performance with limited potential for significant improvement.
Long-term Investment Value
Arlecchino's investment value remains high due to unique mechanics, strong scaling potential, and power creep resistance. Constellation value and weapon synergies provide clear upgrade paths.
Diluc's long-term value centers on accessibility and consistency rather than peak performance. F2P-friendly weapon options, shared artifact sets, and Standard Banner availability create lower barriers to functional builds.
FAQ
Is Arlecchino better than Diluc in 2025? Yes, Arlecchino significantly outperforms with S-tier ranking versus Diluc's B-tier. She delivers 20-30% higher single-target DPS and maintains 80-85% meta efficiency, though requiring higher investment and mechanical skill.
What's the DPS difference between Arlecchino and Diluc? Arlecchino achieves 180-200K damage in optimized Vaporize teams while Diluc reaches ~18K DPS over 20-second rotations. This translates to 20-30% higher damage output for Arlecchino in single-target scenarios.
Which character has better AoE damage? Arlecchino excels with 200K+ DPS potential through swift Pyro strikes, but Diluc clears grouped enemies 15% faster due to Burst's wide coverage. Arlecchino requires better positioning while Diluc provides more consistent AoE performance.
How much does it cost to build each character? Both require ~5M Mora for complete builds, but Diluc costs 2-3M less due to F2P-friendly weapons and shared artifact domains. Arlecchino demands premium supports and specialized farming, increasing investment by 20-30%.
Should I pull for Arlecchino if I have Diluc? Yes, if you want cutting-edge Pyro DPS and can invest in proper teams and execution. Arlecchino provides substantial damage upgrades and meta relevance but requires significantly higher skill and resource investment.
Which character is easier to play? Diluc is considerably easier with low skill floor, simple rotations, and forgiving timing. Arlecchino requires precise Bond management, dash-canceling, and reaction timing that can result in 18% DPS loss if executed poorly.


