

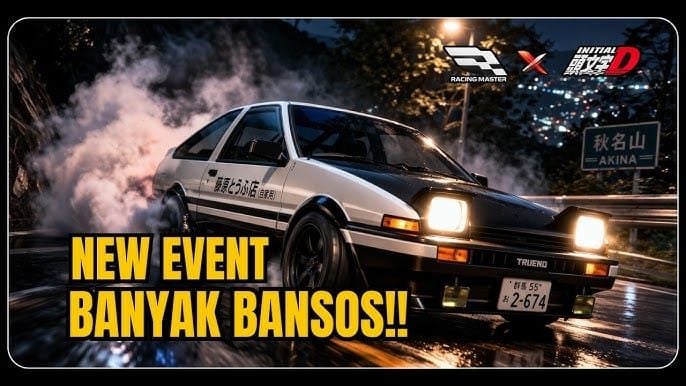
Event Overview
This isn't a reskin — it's Racing Master SEA's biggest collab, overlapping with the 1st Anniversary. Two reward tracks run simultaneously. Splitting attention between them is the most common way players bleed resources.
Key Dates
| Date | What Happens |
|---|---|
| March 26, 2026 | Event launches, mission board unlocks, free pulls begin |
| March 26 – April 20 | Creator Event active (up to 4,800 diamonds) |
| March 26 – April 22 | Main collab — all missions, shop, milestones |
| April 22 (UTC+8) | Event ends — unclaimed rewards gone permanently |
The Creator Event closes two days before the main event. Submit content before April 20, not April 22.
All Exclusive Rewards
| Reward | Type | F2P? |
|---|---|---|
| Toyota AE86 Trueno (Takumi) | Car | Yes — free pulls + exchange tickets |
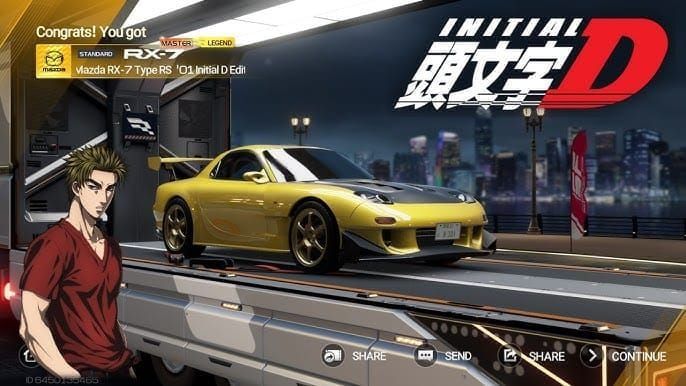
| Mazda RX-7 FD3S (Keisuke) | Car | Yes — free pulls + exchange tickets |
| Nissan Skyline R32 GT-R | Car | Yes — Ranked drops + shop |
| Honda NSX (Go Hojo) | Car | Yes — Ranked drops + shop |
| Exclusive Signature Liveries | Cosmetic | T7 milestone — requires spend |
| Chrome Badges | Cosmetic | Limited — shop priority |
| Driver Cards (Initial D) | Collectible | Ranked drops + Tofu Delivery |
| Lamborghini Aventador SVJ 19 | Car (T5) | Requires 2,100 gems cumulative top-up |
Hard pity on the AE86/RX-7 banner sits around 70 pulls (~7,000 gems). Free daily 10-pulls don't carry over — miss a day and that pull is gone.
How Event Tokens Work
Tokens are farmed from Tofu Delivery (Mount Akina Downhill), Gum Tape Deathmatch, and Ranked matches. They exchange for blueprints, car materials, cosmetics, and driver cards in the Event Shop. Tokens don't convert to RC or gems — use them before April 22 or lose them.
Step 1 — Pre-Event Setup
Thirty minutes of preparation on March 26 saves hours of catch-up later.
Most important Day 1 action: Complete the first Initial D story stage immediately. This unlocks the mission board and starts your token flow. Delay by even one day and that day's token income is gone with no recovery.
F2P vs Spender: Set Realistic Goals Now
| Player Type | Realistic Outcome | Est. Gems Over 28 Days |
|---|---|---|
| Pure F2P (consistent daily) | Base AE86 + RX-7 | 2,100–3,500 gems |
| Light spender | T5 milestone + Aventador SVJ 19 | 2,100 gems top-up |
| Moderate-heavy spender | T7 meta car + signature livery | 5,000–6,500 gems top-up |
The gap between F2P and T7 is real. Know where you stand on Day 1 — the worst mistake in collab events is spending halfway and hitting neither the F2P rewards nor the paid milestones.
Returning players: Hit the one-time achievement tree first. Community data puts this at 2,000–3,000 gems — the highest single-session return in the entire event for qualifying accounts.
Step 2 — Daily Missions & Login Bonuses
Daily missions yield 30–50 gems in 15–20 minutes. Over 28 days, that's 840–1,400 gems — a meaningful chunk of your total F2P budget.
| Mission | Time | Notes |
|---|---|---|
| Complete 3 races | ~8 min | Stack with Ranked or event stages |
| Tune one component | ~2 min | Fastest daily checkbox |
| Complete one Knockout | ~5 min | Part of daily gem total |
| Daily login (free 10-pull) | 1 min | AE86/RX-7 banner — zero carryover |
| Total | 15–20 min | 30–50 gems + 1 free pull |
The free 10-pull resets daily with no carryover. Over 28 days, perfect attendance means 280 free pulls. Community observation puts soft pity well before the 70-pull hard pity, so consistent daily pulls are your best F2P path to the headline cars.
Missing four days costs 120–200 gems and four banner pulls — no catch-up exists. Set a phone reminder for your local UTC+8 daily reset equivalent.
One thing players consistently get wrong: rewards don't auto-claim. Manually collect from the Events tab every session. Uncollected milestones at event end are unrecoverable.
Step 3 — Weekly Challenges & One-Time Missions
Weekly challenges are where the real gem volume lives. Community testing shows 50–100 gems per reset, with two resets per week (Monday and Thursday). Full chain completion across the event projects to 600–1,200 gems — potentially more than your entire daily mission income.
The full chain must be completed each reset. Partial completion yields partial rewards but loses the chain bonus. Prioritize weekly missions on reset days even if it means a longer session.
One-time story and collab missions are especially valuable for returning players. New players: complete the first Initial D story stage on Day 1, then work through one-time missions in order of gem value.
Collab Car ECU Buff — The Mechanic Most Guides Miss
Collab cars receive a temporary full ECU buff during the event period. Your freshly unlocked AE86 at ECU 0 performs as if fully upgraded in event-specific modes. Don't rush to invest upgrade materials into the AE86 — use the buffed base car for event farming and direct materials toward your permanent garage cars instead. After April 22, the buff expires and the AE86 returns to base ECU level.
Community data confirms the buffed AE86 at ECU 0 outperforms many standard cars in Ranked during the collab window. That competitive window closes April 22 — use it actively for Ranked farming while it lasts.
Core tuning principle: Max one car's ECU fully before spreading resources. A fully buffed AE86 clears event stages more efficiently than two half-upgraded cars, which directly improves your tokens-per-hour rate.
Step 4 — Token Farming: Methods Ranked by Efficiency
Method 1: Tofu Delivery + Gum Tape Deathmatch (Best)
These are the primary Event Token sources. Tofu Delivery on the Akina Downhill theme track is consistently the best tokens-per-minute method. Run both daily before touching other modes.
Method 2: Ranked Matches
Ranked drops diamonds and driver cards simultaneously. Driver cards redeem for additional diamond rewards — don't ignore them. The R32 GT-R and NSX are the most competitive Ranked cars in this collab, so Ranked grinding serves triple duty: tokens, diamonds, and driver cards in parallel.
Method 3: Mission Stacking
Structure sessions to overlap objectives. Three races for the daily mission can be Ranked matches (covering daily mission + Ranked farming) or event stage runs (covering daily mission + Tofu Delivery tokens). Never run a race that only completes one objective when it could complete two.
Method 4: RC-Funded Refreshes
Spend RC on fuel refreshes only during confirmed double-reward periods. Outside those windows, the token-per-RC ratio doesn't justify it. Community advice is consistent: wait for double-reward confirmation before refreshing fuel with RC.
Total F2P Token Projection
| Source | Estimated Gems Over 28 Days |
|---|---|
| Daily missions (consistent) | 840–1,400 |
| Weekly challenges (full chain) | 600–1,200 |
| One-time achievements | 2,000–3,000 (returning players) |
| Creator Event (content creation) | Up to 4,800 diamonds |
| F2P Total — hardcore, returning | ~3,500 gems + pulls |
| F2P Total — casual, new player | ~2,100 gems + pulls |
The 2,100 gem floor lands exactly at the T5 milestone threshold. That's not a coincidence — it's how the event is designed.
Step 5 — Milestone Reward Track
| Milestone | Gem Requirement | Reward |
|---|---|---|
| T4 | 1,050 gems (top-up) | Limited skin |
| T5 | 2,100 gems (top-up) | Lamborghini Aventador SVJ 19 (760 HP, Extreme) |
| T7 | 5,000–6,500 gems (top-up) | Meta car + signature livery |
Declare your T5 gem floor untouchable on Day 1. Calculate your pull budget from whatever's left above that floor. The most common milestone failure: spending gems on pulls and falling 200 gems short of T5 with three days left.
Pacing for T5 via F2P
- 2,100 gems over 28 days = 75 gems per day
- Daily missions yield 30–50 gems, so weekly challenge income bridges the gap
- Missing more than 4–5 days of dailies puts T5 at risk without supplemental income
If you're falling behind by Week 3, the Event Pass becomes a legitimate catch-up tool.
Is the Event Pass Worth It?
Buy in this order:
- First-recharge pack (70+4 gems) — best per-gem value, one-time only
- Monthly Card / Deluxe Pass — sustained daily income that compounds across 28 days
- T5 milestone top-up if needed
- Banner pulls — only after the above are secured
The sustained daily gem income from the pass compounds in a way that single pull purchases don't. For SEA server players looking to bridge the gap to T5 or secure the AE86 before April 22, Racing Master (SEA) top up through BitTopup offers competitive rates for the region.
Step 6 — Event Shop Priority
Most players grab cosmetics first because they look good, then run out of tokens before securing blueprint cars. Here's the correct sequence:
S-Tier: Buy First, No Exceptions
- AE86 Trueno blueprints — time-limited, not returning in this form
- RX-7 FD3S blueprints — same reasoning, stronger competitive car
- Car materials needed to complete blueprint exchanges
A-Tier: Get These If Tokens Allow
- Chrome badges — limited cosmetics that don't return
- Driver cards (Initial D themed) — redeem for diamond rewards
- Exclusive liveries — high collector value
B-Tier: Skip If Token-Limited
- Fuel — poor ratio outside double-reward periods
- Standard materials available in the regular shop
- Generic cosmetics available in future events
Don't deviate from S-Tier first. Blueprints are the only items with a hard expiration that future events can't compensate.
Step 7 — Unlocking the AE86 Trueno
Step 1: Complete the first Initial D story stage on Day 1 — unlocks the mission board. Step 2: Pull daily on the AE86/RX-7 banner, every single day. No exceptions. Step 3: Farm Tofu Delivery and Gum Tape Deathmatch daily for Event Tokens. Step 4: Accumulate exchange tickets through mission completion and milestone rewards. Step 5: Prioritize AE86 blueprints in the Event Shop the moment you have enough tokens. Step 6: Complete blueprint exchange to add the AE86 permanently to your garage.
AE86 vs RX-7: Which Should You Target?
The AE86 is a technical specialist — nimble, drift-friendly, strong on Akina Downhill-style tracks, and genuinely competitive at ECU 0 in Ranked during the event window. But it's not a universal meta car. The RX-7 FD3S is the stronger overall pick for competitive play outside event-specific stages. The R32 GT-R (AWD all-rounder) and NSX are the most competitive in standard Ranked.
If you can only concentrate pulls on one banner: RX-7 for competitive play, AE86 for Akina Downhill farming and collector value. Don't split pulls — build pity on one banner.
The Takumi signature livery on the AE86 is tied to the T7 milestone (5,000–6,500 gems). Not F2P achievable. If that livery is your primary goal, price out T7 honestly before committing.
Common Mistakes That Kill Reward Efficiency
Splitting free pulls across multiple banners. Concentrate all daily 10-pulls on the AE86/RX-7 banner. Splitting dilutes pity progress on both and guarantees neither.
Missing daily logins. Four missed days = 120–200 lost gems and four lost pulls. No catch-up exists.
Assuming rewards auto-claim. They don't. Check the Events tab manually every session.
Spending RC on fuel outside double-reward periods. The ratio doesn't justify it. Wait for confirmed windows.
Splitting gems across overlapping events. The 1st Anniversary runs simultaneously. Pick your primary objective, protect your gem floor for it.
Ignoring the Creator Event. Up to 4,800 diamonds for car reviews and Akina Downhill recreations — submit before April 20. Even one submission is worth the effort.
FAQ
Can I join late and still get rewards? Yes, but your F2P ceiling drops. The achievement tree and daily pulls are the biggest losses for late joiners. Join after Day 7? Hit the achievement tree immediately, establish the daily loop, and accept you may need exchange tickets to supplement pull shortfalls.
Do collab cars stay in my garage permanently? Yes. What expires April 22: event currency, unclaimed shop items, and the temporary ECU buff. The cars themselves are permanent.
Will the Takumi AE86 return? Community experience across similar collabs: limited IP collaborations rarely return in identical form. Treat this as a one-time window.
What's the minimum spend to unlock the AE86 if F2P falls short? Community estimates put the worst-case F2P shortfall at 200–500 gems (missed days, no achievement tree access). The first-recharge pack alone often covers this gap.
Is there co-op? Gum Tape Deathmatch has multiplayer. Ranked is competitive multiplayer. Tofu Delivery is primarily solo. No dedicated co-op mode, but Ranked serves double duty as token farming and driver card collection.
28-Day Checklist
| Week | Priority Actions |
|---|---|
| Week 1 (Mar 26–Apr 1) | Complete story stage Day 1, unlock mission board, hit achievement tree, establish daily loop, set gem floor |
| Week 2 (Apr 2–8) | Full weekly challenge chains, Tofu Delivery + Gum Tape daily, monitor token count vs shop costs |
| Week 3 (Apr 9–15) | Secure AE86/RX-7 blueprints in shop, Ranked for driver cards, submit Creator Event content before Apr 20 |
| Week 4 (Apr 16–22) | Final shop push, claim all milestone rewards manually, leave zero tokens unclaimed |
Fifteen to twenty minutes per day, every day, with smart shop sequencing. That's the entire F2P strategy. Everything else here is optimization on top of that foundation.


