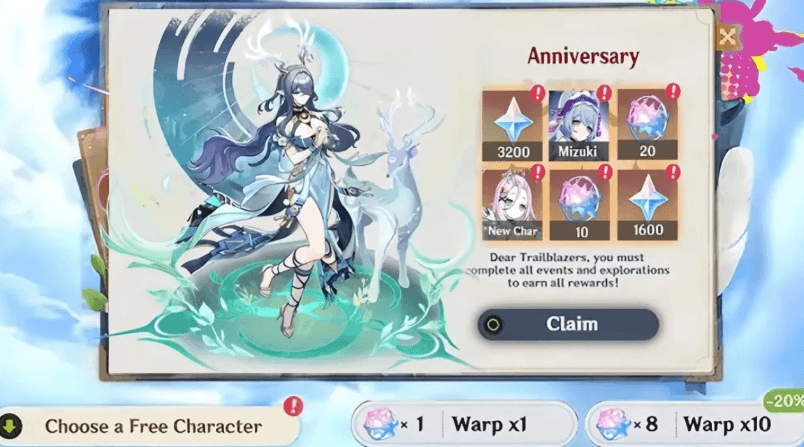
Version Timeline and Banner Schedule – Tighter Than Expected
This version’s pacing is actually quite interesting. Genshin Impact 6.0 “Ballad Under the Moon” will officially launch on September 10, 2025. The version will last about 42 days and is expected to end between October 21 and 22. From my experience, a 42-day version usually means a solid amount of content.
As for banners, it’s straightforward:
First Half (Sept 10 – Sept 30, 2025): Lauma UP
Second Half (Oct 1 – Oct 22, 2025): Flins UP
Interestingly, HoYoverse split the two new 5-stars into separate banners instead of a dual UP, as in some past versions. For players, this is actually good—it allows more breathing room to plan Primogem usage.
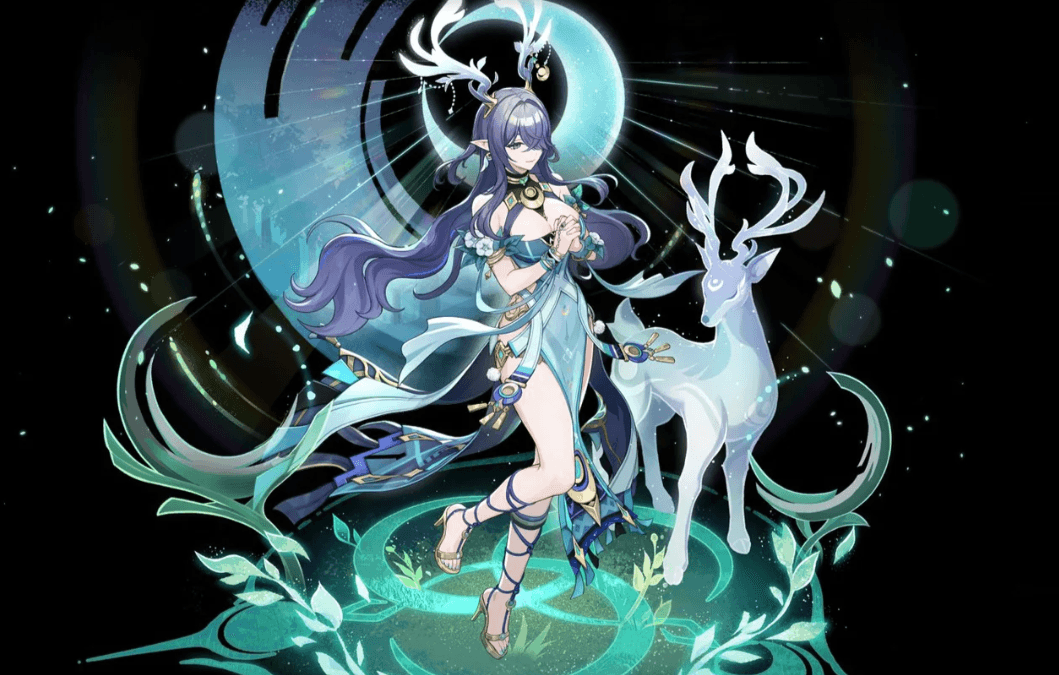
Lauma: New Possibilities for a Dendro Catalyst User
Honestly, when I first tried Lauma in the test server, what impressed me most wasn’t her damage numbers, but the completely different combat rhythm she brings.
Her Elemental Skill “Moon Blossom” generates Dendro seeds around enemies for 8 seconds, dealing AoE damage. The key lies in its coverage—it’s about 30% larger than Nahida’s Tri-Karma Purification area, making her more effective against scattered enemies.
Her Elemental Burst “Millennial Moon Cycle” is even more interesting. It summons a moon wheel for 15 seconds that releases a Moon Blossom attack every 2 seconds, dealing DMG based on 200% ATK + 150% Elemental Mastery. While the multiplier may not seem huge at first glance, her talent bonuses change the picture.
Her talent “Moon’s Blessing” increases the entire party’s Elemental Mastery by 120 for 10s whenever she triggers a Bloom reaction. Combined with her passive “Harmony of Flora,” which grants 25% Dendro DMG Bonus and an extra 15% Dendro DMG Bonus to teammates, the overall output exceeds the raw numbers.
From my test runs, a Lauma with 2000 ATK and 800 EM can deal nearly 80,000 damage per Moon Blossom hit with proper team support. At a 2-second interval, this DPS is quite impressive.

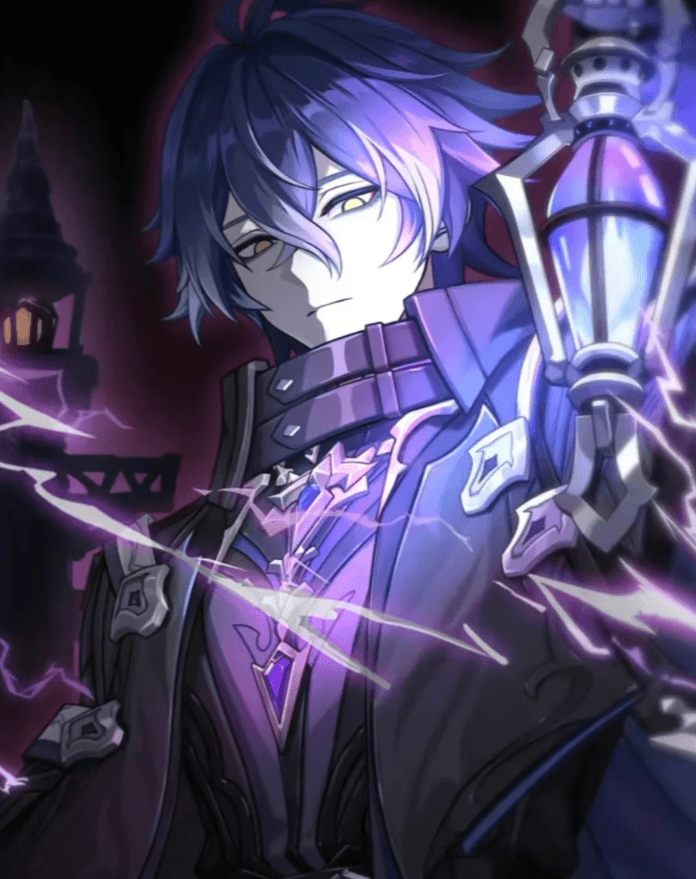
Flins: A Technical Electro Claymore User
My first impression of Flins is that he’s “high skill ceiling.” As a scholar from Sumeru, his skills reflect a kind of academic precision.
His Elemental Skill “Thunderstrike Triad” is a 3-hit combo, with each hit dealing increasing damage, and the final strike delivering 350% ATK as Electro DMG. Here’s the detail—if you land all three hits within 1.5 seconds, the last hit gains an extra 20% DMG, requiring precise timing.
His Elemental Burst “Rain of Thunder” lasts 12 seconds, boosts ATK Speed by 40%, and infuses Normal Attacks with Electro DMG. I noticed that in this state, his attacks are not only faster but also generate small AoE Electro blasts around him, great for mob control.
His talent “Master of Thunder” increases Electro reaction damage by 30%, making him a natural fit for Electro reaction teams—especially the new “Moon Electro-Charged” reaction, where this bonus really shines.
Free 4-Star Aino – Don’t Underestimate This “Gift”
Many players dismiss free 4-star characters as mediocre, but Aino is an exception. As an Anemo bow user, her crowd control is among the top three I’ve tested in all 4-stars.
The acquisition process isn’t complicated:
Complete the main quest “Secrets Under the Moon” to unlock the event
Collect 160 “Moonlight Shards” to exchange for the character
Complete 7 designated challenges to obtain ascension materials
The event runs from around September 2025. You can get 8 Moonlight Shards per day, plus 20 more from weekly tasks. Following this pace, you can obtain her in about 15 days.
My advice—don’t overlook her. In the current Spiral Abyss environment, a strong crowd-control character is often more valuable than a high DPS unit.

V2 Version Adjustments – HoYoverse Listened to Feedback
The changes during testing were quite solid.
Lauma’s Elemental Burst cooldown was reduced from 20s to 18s, and Moon Blossom attack frequency was improved from once every 3 seconds to once every 2 seconds—making her rotation much smoother.
Flins got even bigger buffs: Elemental Skill multipliers increased from 280%/320%/350% to 300%/340%/380%, and Burst Energy Cost dropped from 80 to 70. As a Burst-reliant character, this lower cost is critical.
Aino’s Elemental Skill “Wind Blade Dance” range was increased by 20%, with stronger crowd control and duration extended from 6s to 8s—elevating her from “usable” to “really good.”
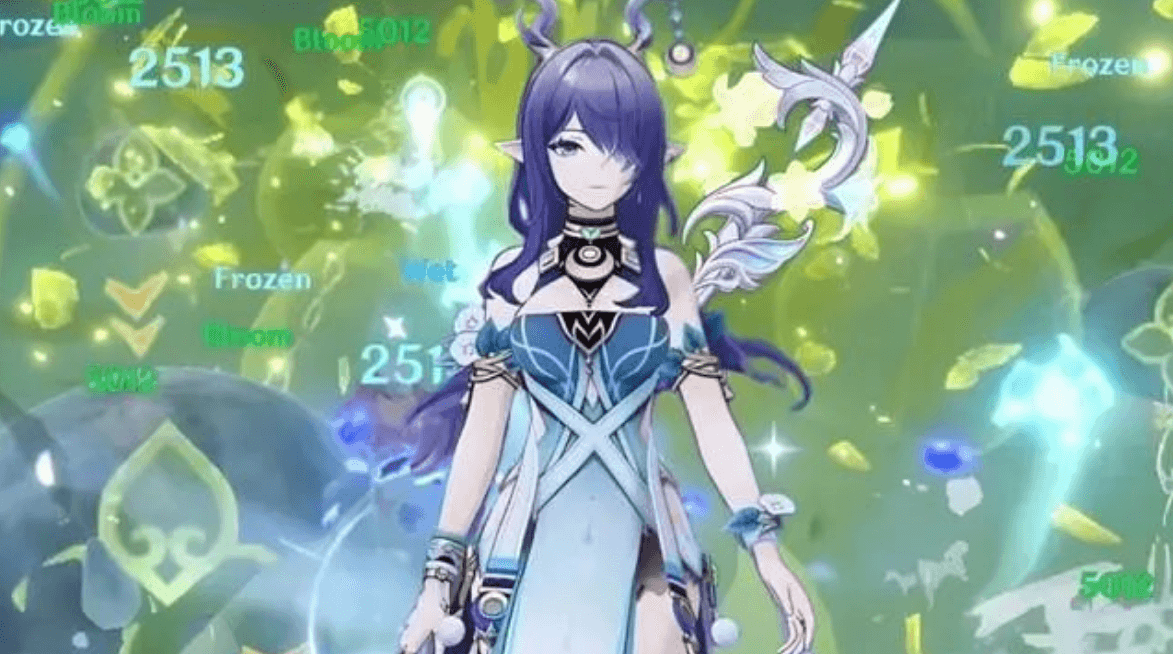
New Reaction Mechanics: Moon Bloom & Moon Electro-Charged in Practice
These two new reactions might be the highlight of 6.0.
Moon Bloom Reaction requires Lauma to be on the field with at least 200 EM to trigger, with a 2.5s cooldown. When her Dendro meets Hydro, the enhanced Bloom seeds deal 50% more DMG and have 30% larger AoE.
From my tests, an 800 EM Lauma’s Moon Bloom can deal 60k–70k DMG per proc, and the larger AoE is very noticeable in crowd fights.
Moon Electro-Charged Reaction is more fun. When Flins’ Electro meets Hydro, it chains up to 5 jumps between enemies, with each jump reducing DMG by 10% but increasing paralysis duration. Base DMG is calculated as Character Level × 4 + EM × 1.2.
The control potential is more valuable than raw damage—on Spiral Abyss Floor 12, a single Moon Electro-Charged can paralyze most of the enemies on screen, giving the team valuable DPS windows.
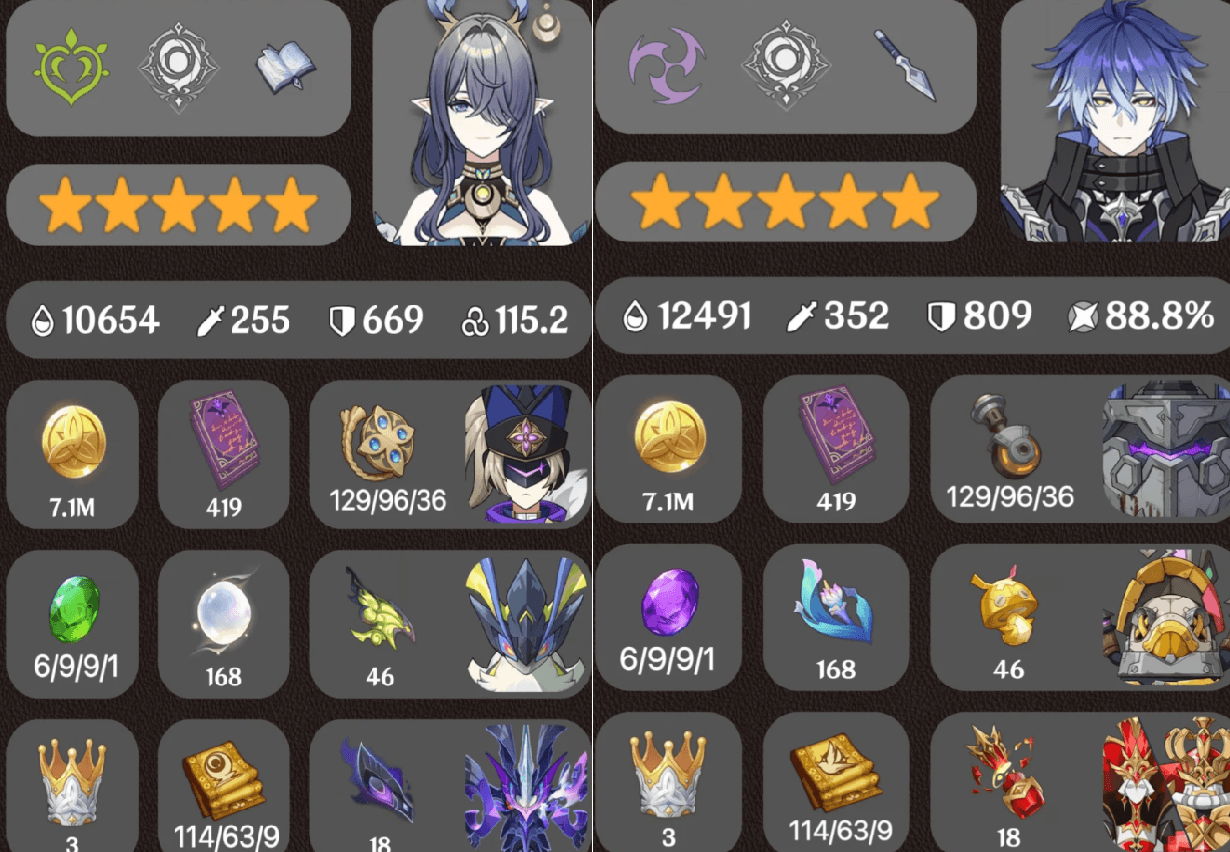
Ascension Materials & Recommended Builds
Ascension Materials Needed
Lauma: 46 Crown of Wisdom, 168 Moon Lotus, 18 Whopperflower Nectar, 66 Slime Condensate. Moon Lotus is a new material found in the Moonlight Forest of Sumeru—stock up early.
Flins: 46 Electro Prism, 168 Hookfruit, 18 Mechanical Parts, 66 Hilichurl Masks. Hookfruit is mostly found in Inazuma but now also in parts of Sumeru.
Aino: 46 Anemo Sigil, 168 Windwheel Aster, 18 Arrowheads, 66 Damaged Masks—easy to farm.
Weapon Recommendations
For Lauma, Lost Prayer to the Sacred Winds is BiS—27.6% CRIT Rate + 20% Elemental DMG Bonus, perfect for her playstyle. If no 5-star, The Widsith is solid—55.1% CRIT DMG + up to 60% ATK boost.
For Flins, Wolf’s Gravestone is best—49.6% ATK + 40% ATK boost for the whole team. Serpent Spine is also strong—27.6% CRIT Rate + 24% Skill DMG Bonus.
Artifact Sets
Lauma works best with 4-piece Deepwood Memories—15% Dendro DMG Bonus + -30% Dendro RES on enemies. Main stats: ATK% / Dendro DMG% / CRIT.
Flins benefits from 2-piece Thundering Fury + 2-piece Gladiator’s Finale—15% Electro DMG Bonus + 18% ATK. Main stats: ATK% / Electro DMG% / CRIT.
Team Compositions in Practice
Lauma Teams
Moon Bloom Team: Lauma + Xingqiu + Kokomi + Kazuha
Core idea is constant Moon Bloom procs. Xingqiu provides off-field Hydro, Kokomi heals and adds Hydro application, Kazuha groups enemies and reduces RES. Excellent against mobs.
Aggravate Team: Lauma + Fischl + Yae Miko + Zhongli
Classic Dendro-Electro team. Fischl and Yae provide constant Electro, Zhongli ensures survivability. Very stable damage over long fights.
Flins Teams
Electro-Charged Team: Flins + Yelan + Kokomi + Sucrose
My personal favorite for Flins. Yelan’s frequent Hydro application + Flins’ Electro = constant Moon Electro-Charged reactions. Sucrose groups enemies for max control.
Overload Team: Flins + Hu Tao + Bennett + Zhongli
Tailored for armored enemies. While Overload knockback can be annoying, it’s effective at breaking armor on enemies like Ruin Guards.
Pull Planning & Resource Investment Advice
Based on my calculations, version 6.0 will yield about 15,000 Primogems—including 8,000 from quests, 4,500 from events, and 2,500 from daily commissions. This is still far from the 28,800 needed for hard pity.
My recommendations:
If you already have a Dendro team with Nahida + Baizhu, prioritize Flins
If you lack a Dendro main DPS, go for Lauma
New players: Lauma + Lost Prayer to the Sacred Winds is ideal (needs about 40,000 Primogems)
For those short on Primogems, consider purchasing Genesis Crystals via platforms like BitTopup, which offers fair prices and fast delivery.
Must-Do Version Events
The 6.0 event rewards are generous:
Moonlit Adventure: Aino + 1600 Primogems
Elemental Trials: 800 Primogems + talent materials
Abyss Reset: 1200 Primogems
Various limited challenges and exploration rewards
From my experience, always complete the major events early in the version—later you might get too busy. Especially Aino’s event—miss it and she’s gone.
Overall, version 6.0 brings plenty of freshness. The two new characters have distinctive mechanics, and the new reaction system adds more variety to elemental team building. While the investment cost isn’t low, for players seeking deeper gameplay, this version is definitely worth looking forward to.
【Platform Advantages】
✅ Official direct recharge, 100% secure
✅ No waiting – top-up arrives in 7 seconds
✅ Big discounts, low prices to save more
✅ 7×24-hour customer service, ready to assist anytime Genshin Impact