


Why Furina Freeze Dominates 5.3 TCG Meta
TCG meta 5.3 favors aggressive Pyro strategies aiming to eliminate opponents before defensive setups stabilize. Furina Freeze counters this by exploiting Freeze's unique mechanic: immobilizing targets while adding +1 damage to follow-ups and +2 to Physical/Pyro hits.
Furina earned SS-tier ranking (December 17, 2025) through versatile state-switching. Her Elemental Skill Salon Solitaire operates in two modes:
- Pneuma state: Singer of Many Waters heals 1 HP to all characters, +1 HP to most injured if ≤5 HP
- Ousia state: Salon Members deals 1 Hydro DMG + 1 Piercing DMG to least damaged if ≥6 HP
This flexibility adapts to different matchups. The Freeze archetype gained prominence in Version 4.5 (May 12, 2025). Players can genshin impact genesis crystals top up through BitTopup for fast, secure transactions to unlock essential cards faster.
Freeze Mechanic as Natural Counter to Speed Decks
Freeze immobilizes targets for one full action cycle, disrupting Pyro Aggro's precise sequencing. When Hydro meets Cryo, the opposing Character Card can't perform Normal Attacks, Elemental Skills, or switches during their next turn. This tempo loss compounds across rounds, letting Freeze decks dictate engagement timing.
The reaction's damage amplification transforms defense into offense. Each Frozen target takes increased damage from subsequent hits, turning aggressive positioning into a liability.
Furina's Kit Advantages
Furina's Normal Attack Soloist's Solicitation costs 1 Hydro + 2 Unaligned Dice to deal 2 Physical DMG while creating 1 Seats Sacred and Secular once per Round. This passive generation switches states without resource investment, maintaining constant board presence.
Her Elemental Burst Let the People Rejoice (4 Hydro + 2 Energy) creates Universal Revelry for 2 Rounds. This adds 1 Revelry stack after any damage/heal, granting +1 DMG per stack to all actions. Combined with Freeze's amplification, this accelerates game-ending sequences.
Complete Furina Freeze Deck List
Character Cards:
- Furina (Hydro Sword, 10 HP base, 12 HP with Pneuma)
- Mona (SS-tier Support, December 3, 2025)
- Ganyu (Cryo bow, AoE pressure)

Alternative: Substitute Kamisato Ayaka for Ganyu vs single-target opponents. Ayaka gains Cryo Infusion on Normal Attacks after switching.
Equipment Cards (5):
- Kanten Senmyou Blessing x2 (2 Cryo Dice, +1 Cryo DMG, 0-Dice switches to Ayaka)
- Heart of Depth x1 (Hydro damage boost)
- Blizzard Strayer x1 (Cryo damage bonus)
- Sacrificial Sword x1 (+1 DMG to Sword characters, 1 free Elemental Dice on Skill)
Support Cards (14):
- Paimon x2 (dice conversion)
- Liben x2 (0 cost, 1 dice/round for 2 Omni + 2 cards)
- Liu Su x2 (Burst Energy on switch)
- Katheryne x2 (first switch = Fast Action)
- Dawn Winery x2 (1 free Switch/Round)
- Liyue Harbor Wharf x2 (resource generation)
Event Cards (13):
- Strategize x2 (card draw)
- Toss-Up x2 (dice manipulation)
- The Bestest Travel Companion x2
- When the Crane Returned x2
- Elemental Resonance: Woven Ice x2
- Prophecy of Submersion x2 (Hydro reaction boost)
- Undivided Heart x1
Equipment & Talent Selections
Furina's Talent Hear Me — Let Us Raise the Chalice of Love allows Salon Solitaire usage once while applying Center of Attention, accelerating state-switching.
Sacrificial Sword synergizes with Furina's Sword type, creating free Elemental Dice on Salon Solitaire activation. This offsets the 3 Hydro cost, enabling aggressive early sequencing.
Card-by-Card Breakdown
Furina's Role & Priorities
Turn Priority:
- Deploy Seats Sacred and Secular via Normal Attack (1 Hydro + 2 Unaligned)
- Activate Salon Solitaire based on matchup (3 Hydro)
- Build to Burst when Universal Revelry maximizes damage (4 Hydro + 2 Energy)

Against Pyro Aggro, prioritize Ousia (Salon Members) for consistent Hydro + chip damage. The summon's End Phase deals 1 Hydro + 1 Piercing to least damaged if ≥6 HP, plus 1 Hydro (2-Usage, max 4 stacks).
Switch to Pneuma (Singer of Many Waters) when opponent damage threatens eliminations. Healing summon's End Phase restores 1 HP to all, +1 HP to most injured if ≤5 HP.
Cryo Enablers
Ganyu's Frostflake Arrow deals 2 Cryo + 2 Piercing to all standby characters, creating multi-target Freeze when Mona applies Hydro. This AoE forces opponents to defend backline, disrupting sequencing.
Mona's Mirror Reflection of Doom summons Reflection, inflicting Hydro on opposing cards. Standard strategy: Mona establishes Hydro, switch to Cryo for immediate Freeze.
Ayaka's Cryo Infusion activates on switch, converting Normal Attacks to Cryo. With Kanten Senmyou's 0-Dice switch, this creates resource-efficient Freeze in later rounds.
Support Cards Maximizing Freeze
Dawn Winery's free Switch + Katheryne's Fast Action first switch enable reactive positioning without dice expenditure. This maintains Freeze pressure across multiple characters.
Liu Su provides Burst Energy to characters lacking it after switches, accelerating Furina's path to Let the People Rejoice. Earlier Burst activation compounds advantages.
Liben's 0-cost deployment (1 dice/round for 2 Omni + 2 cards) solves dice management. Hydro strategies demand consistent colored dice—Liben's Omni generation enables flexible responses.
Why This Crushes Pyro Aggro
Freeze mechanics directly neutralize speed-based win conditions. Pyro Aggro executes precise damage sequences within narrow windows—Freeze extends those windows while punishing aggressive positioning.
Freeze vs Fast Damage
When Mona's Reflection applies Hydro and Ganyu delivers Cryo, Freeze immobilizes the target. The character can't act next turn, granting a free round for additional control.
Freeze's +1 damage bonus (+2 to Physical/Pyro) transforms defense into offense. Pyro Aggro concentrates damage on single targets—Frozen targets take amplified damage from these attacks, accelerating their defeat.
Disrupting Critical Turn Windows
Pyro Aggro plans eliminations around specific thresholds: Round 2-3 for first knockout, Round 4-5 for game-ending sequences. Freeze disrupts timelines by forcing extra turns for repositioning.
Each Freeze costs Pyro Aggro one action cycle. Maintaining Hydro through Mona's summon + Cryo every 1-2 rounds means opponents lose 30-40% of actions to immobilization. This tempo deficit compounds as Universal Revelry stacks accumulate.
Surviving Early Pressure
Furina's Pneuma (Singer of Many Waters) provides healing to survive Rounds 1-3 Pyro burst. The summon's End Phase triggers automatically, restoring 1-2 HP/round without active turn investment.
Sacrificial Sword's free Elemental Dice on Furina's Skill allows defensive Salon Solitaire without sacrificing offensive dice pools. This enables simultaneous healing deployment and Cryo setup.
Mid-Game Control
By Round 4, Furina Freeze establishes board states where opponents can't execute original plans. Mona's persistent Hydro, Ganyu's AoE Cryo, and Universal Revelry stacks create damage amplification outpacing Pyro burst.
The approach shifts from reactive defense to proactive elimination. Once Universal Revelry reaches 3-4 stacks, even Normal Attacks deal significant damage to Frozen targets, conserving resources for defensive responses.
Mulligan Strategy
Proper mulligan determines survival against Pyro Aggro's critical opening rounds. Starting hand must balance immediate defense with mid-game setup.
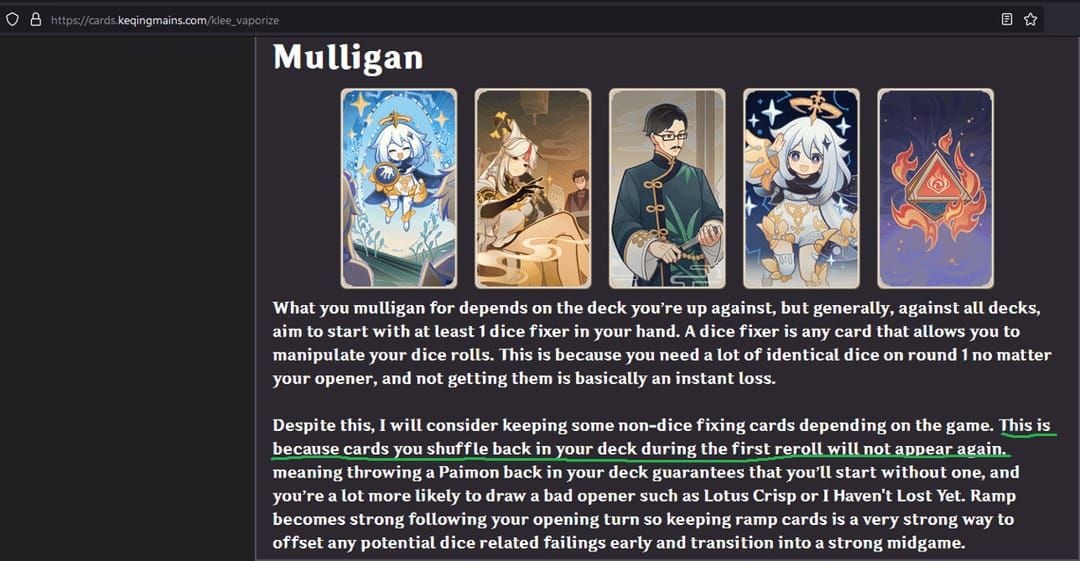
Always Keep vs Pyro Aggro
Priority Keeps:
- Liben (0-cost, immediate resource acceleration)
- Dawn Winery (free switches, reactive positioning)
- Katheryne (Fast Action first switch, same-round responses)
- Kanten Senmyou Blessing (if Ayaka in lineup, 0-Dice switches)
These establish the resource engine for consistent strategy execution. Liben's 2 Omni + 2 cards/round justifies keeping even with suboptimal dice colors.
Situational Keeps
If opponent deploys aggressive Equipment Round 1, keep Prophecy of Submersion to enhance Hydro reaction damage, turning defensive immobilization into offense.
Against opponents establishing Support Cards first, prioritize Strategize for card draw. Pyro Aggro investing Round 1 in setup provides breathing room to assemble optimal hands.
Dice Color Priority
Optimal Starting Distribution:
- 3-4 Hydro (enables Furina Salon Solitaire)
- 2-3 Cryo (allows Ganyu Skill or Ayaka setup)
- Remaining Unaligned (flexible responses)
Mulligan hands with 5+ Unaligned and no colored dice matching character elements. Relying entirely on Support Cards for colored dice creates vulnerability.
Turn-by-Turn vs Pyro Aggro
Round 1: Board Presence
Action Sequence:
- Deploy Liben (0 cost, Round 2 acceleration)
- Deploy Dawn Winery or Katheryne (switch flexibility)
- Activate Mona's Mirror Reflection of Doom (summons Reflection for Hydro)
- Use remaining dice for defensive Equipment
Dice Allocation: Reserve 3 Hydro for Round 2 Furina. Spend Unaligned/excess on Support deployment.
Common Mistake: Using all dice Round 1 leaves no resources for Round 2 Freeze setup. Always maintain 3-4 dice for next round.
Round 2-3: Freeze Pressure
Round 2:
- Trigger Liben (spend 1, gain 2 Omni + 2 cards)
- Switch to Cryo using Dawn Winery's free switch
- Trigger Freeze on Hydro-applied target from Reflection
- Activate Furina's Salon Solitaire (Ousia for Salon Members)
Round 3:
- Reapply Hydro via Mona or switch back
- Use Ganyu's Frostflake Arrow for AoE Cryo (2 Cryo + 2 Piercing to all standby)
- Freeze multiple targets if Hydro spread across team
- Build Energy for Furina's Burst
Key Timing: Freeze before opponent's damage actions. Use Katheryne's Fast Action for reactive switches.
Round 4+: Closing
Win Condition:
- Activate Let the People Rejoice (4 Hydro + 2 Energy, creates Universal Revelry)
- Maintain Freeze to amplify Universal Revelry's stacking bonuses
- Each damage/heal adds +1 Revelry stack, increasing all damage +1/stack
- Combine Freeze's +1/+2 bonus with Revelry stacks for eliminations
Resource Management: Liben's 2 Omni + 2 cards/round provides resources for simultaneous Freeze pressure and Revelry stacking. Prioritize actions dealing damage AND healing to maximize stacks.
Adapting to Counters
If opponents switch to defensive Equipment mid-game, shift Furina to Pneuma (Singer) for healing while maintaining Freeze through Mona/Ganyu. Healing summon's automatic End Phase sustains extended games.
Against opponents targeting Mona early, use Liu Su for Burst Energy to backup Hydro appliers or switch Furina to primary Hydro. Furina's Salon Members provides sufficient Hydro for Freeze without Mona.
Advanced Techniques
Dice Management
Omni Element Priority:
- Cover character-specific colored dice shortfalls
- Activate Fast Action switches via Katheryne
- Deploy 0-cost Support Cards like Liben
- Convert for Elemental Bursts
Never spend Omni on actions accepting Unaligned. Furina's Normal Attack accepts 2 Unaligned—using Omni wastes conversion flexibility.
Sacrificial Sword Timing: Activate Furina's Skill when equipped to generate 1 free Hydro Dice, reducing Salon Solitaire from 3 Hydro to 2 Hydro + 1 free.
Card Draw & Hand Size
Strategize costs dice but accelerates draw. Optimal timing: after deploying critical Supports but before needing specific Events for reactive plays.
Hand Size Targets:
- Rounds 1-2: 4-5 cards (reactive flexibility)
- Rounds 3-4: 6-7 cards (specific answers)
- Rounds 5+: 3-4 cards (execute win condition)
Liben's 2 cards/round can overflow hand limits. Spend Events proactively Rounds 3-4 to maintain quality while benefiting from generation.
Predicting Pyro Cards
Common Threats:
- Equipment granting +2 Pyro DMG: Freeze these characters immediately
- Events providing extra actions: Maintain dice reserves for reactive Freeze
- Supports accelerating Energy: Prioritize Freezing Burst-ready character
When opponents deploy aggressive Equipment, respond with Freeze on that character before enhanced attacks activate. Immobilization prevents capitalizing on bonuses for one turn.
Switch vs Commit to Damage
Switch When:
- Opponent targets current active with elimination damage
- Current character lacks dice for meaningful actions
- Switching triggers benefits (Ayaka Cryo Infusion, Liu Su Energy)
Commit to Damage When:
- Universal Revelry stacks reach 3+ (amplification justifies investment)
- Opponent's character ≤4 HP with Freeze (elimination opportunity)
- Final rounds where switching provides no advantage
Dawn Winery's free switch/round should be used proactively, not saved. It regenerates each round—unused = wasted value.
Common Mistakes
Over-Committing Early
Mistake: Spending all dice Rounds 1-2 on multiple Supports, leaving no resources for Freeze when Pyro Aggro begins damage.
Fix: Deploy max 2 Supports Round 1, reserve 3-4 dice for Round 2 reactive plays. Liben's 0-cost makes it ideal Round 1 since it generates resources.
Freeze Priority Timing
Mistake: Applying Cryo before confirming Hydro on target, wasting Cryo without triggering Freeze.
Fix: Always verify Hydro via Mona's Reflection or Furina's Salon Members before committing Cryo. Hydro status appears as visible indicator on opposing cards.
Neglecting Defense
Mistake: Maintaining Furina in Ousia (Salon Members) throughout, ignoring healing until critical HP.
Fix: Switch Furina to Pneuma (Singer) when any character drops below 6 HP. Healing summon's automatic End Phase provides sustainable recovery without active turns.
Poor Dice Conversion
Mistake: Converting Omni to Unaligned for Normal Attacks, wasting Omni flexibility on actions accepting any dice.
Fix: Reserve Omni for Skills, Bursts, Equipment requiring specific colors. Use Unaligned for Normal Attacks and Supports accepting any type.
Matchup Analysis
Performance vs Top Decks
vs Control Mirrors (60-40 Favorable): Universal Revelry provides damage scaling to break defensive setups. Control mirrors extend to Rounds 6-8, allowing max Revelry stacks. Singer of Many Waters sustains through incremental damage.
vs Electro-Charged Aggro (50-50 Even): Electro-Charged competes for Hydro application, creating reaction priority conflicts. Success depends on sequencing Freeze before Electro-Charged triggers. Maintain Hydro through multiple sources (Mona + Furina) for Freeze availability.
vs Geo Shield Stall (40-60 Unfavorable): Geo constructs block Piercing DMG, reducing Ganyu's effectiveness. Freeze still immobilizes, but damage amplification matters less vs high-HP Shields. Tech additional direct damage Events for this matchup.
Difficult Matchups
Dendro Reaction Decks challenge because Dendro + Hydro creates Bloom, consuming Hydro before Freeze triggers. Against Dendro-heavy metas, substitute 1-2 Events for Dendro counters or additional Hydro sources.
Alternative Characters:
- Replace Ganyu with Ayaka vs single-target opponents
- Substitute Mona with alternative Hydro if facing Support disruption
- Include Keqing for Electro-Charged hybrid strategies
Meta Adaptation
TCG 5.3 tier list positions Furina Freeze as SS-tier, but meta shifts require evolution. Monitor these signals:
Adaptation Indicators:
- Increased Geo Shield prevalence (add direct damage Events)
- New Pyro cards with Freeze immunity (shift to alternative control)
- Support disruption becoming common (increase redundancy in key Supports)
Version updates occur every 6 weeks. Review deck performance after each patch's first week to identify emerging threats requiring tech adjustments.
Building Your Collection
Priority Cards
Tier 1 Essentials:
- Furina Character Card (Version 4.7)
- Mona Character Card (SS-tier Support)
- Liben x2 (resource engine)
- Dawn Winery x2 (switch flexibility)
Tier 2 Optimization:
- Ganyu or Ayaka Character Card (Cryo damage)
- Kanten Senmyou Blessing x2 (switch cost reduction)
- Sacrificial Sword (dice generation)
- Katheryne x2 (Fast Action)
Tier 3 Refinement:
- Prophecy of Submersion x2 (reaction boost)
- Elemental Resonance: Woven Ice x2 (Cryo synergy)
- Specific Events for meta adaptation
Efficient Resource Spending
Players accelerating collection building can buy genesis crystals online through BitTopup's secure platform. BitTopup offers competitive pricing, instant delivery, and reliable customer service for Genshin Impact purchases, enabling faster access to Character Card packs and event-limited cards.
Budget Alternatives
Budget Substitutions:
- Replace Sacrificial Sword with generic Sword Equipment (+1 DMG without dice generation)
- Substitute Liyue Harbor Wharf for premium Supports early
- Use Elemental Resonance: Woven Ice as primary Cryo synergy vs multiple Equipment
- Run single copies of expensive Events (increases variance, reduces cost)
Core strategy functions with Furina + Mona + any Cryo character. Optimization cards improve consistency but aren't mandatory for intermediate competitive play.
FAQ
How does Furina Freeze counter Pyro Aggro in Genshin TCG? Freeze immobilizes Pyro Aggro characters for one action cycle, disrupting damage sequencing. The reaction adds +2 damage to Pyro attacks against Frozen targets, turning aggression into liability. Furina's Singer of Many Waters sustains through early burst while Mona applies persistent Hydro for consistent Freeze.
What are the best character cards for Furina Freeze deck 5.3? Furina (Hydro Sword), Mona (Hydro Support), Ganyu (Cryo bow). Mona's Mirror Reflection summons Reflection for automatic Hydro, Ganyu's Frostflake Arrow deals AoE Cryo for multi-target Freeze, Furina provides healing, damage amplification via Universal Revelry, and flexible state-switching.
Which action cards are essential for Freeze strategy? Liben x2 (2 Omni + 2 cards/round for 0 cost), Dawn Winery x2 (free switches), Kanten Senmyou Blessing x2 (0-Dice switches to Ayaka, +1 Cryo DMG), Sacrificial Sword (free Elemental Dice on Furina's Skill, offsetting 3 Hydro cost).
How to play Furina Freeze vs fast Pyro decks? Round 1: Deploy Liben/Dawn Winery, activate Mona's Mirror Reflection. Round 2: Switch to Cryo using free switch, trigger Freeze on Hydro target, activate Furina's Salon Solitaire (Ousia). Round 3: Reapply Hydro, use Ganyu's Frostflake for AoE Freeze, build Energy. Round 4+: Activate Universal Revelry, maintain Freeze for stacking damage bonuses.
What are Furina Freeze weaknesses? Geo Shield Stall blocks Piercing DMG and sustains extended games, reducing Freeze tempo. Dendro Reaction decks consume Hydro with Bloom before Freeze triggers. Electro-Charged Aggro competes for Hydro, creating reaction priority conflicts. Tech cards and alternative characters address these but require deck space trade-offs.
How to manage dice efficiently? Reserve Omni for colored dice shortfalls, Bursts, Fast Action switches—never spend on actions accepting Unaligned. Activate Furina's Skill with Sacrificial Sword for 1 free Hydro. Use Liben's 2 Omni for flexible responses while spending character-specific dice on planned actions. Maintain 3-4 dice between rounds for reactive Freeze.
Ready to dominate TCG meta? Get Genesis Crystals and Welkin Moon through BitTopup for best rates and instant delivery. Build your ultimate card collection faster and start climbing ranks with Furina Freeze today!


