

Understanding NIKKE’s Burst System for F2P Success
Let’s be honest—NIKKE’s burst system can feel overwhelming at first. But once you get the hang of it? It’s actually pretty elegant.
Burst Gauge Mechanics
Here’s the deal: every unit falls into one of three categories—Burst 1 (B1), Burst 2 (B2), or Burst 3 (B3). The magic happens when you land hits and generate burst gauge energy, triggering this satisfying chain: B1 → B2 → B3. Simple enough, right?
Now, here’s where weapon choice gets interesting. Rocket Launchers with clip reload mechanics (think Anis, Centi) absolutely dominate burst generation. Shotguns with clip reload systems come in second. Sniper Rifles? Solid performers. But SMGs and Machine Guns? They’re… let’s just say they’re not doing you any favors in the burst department.
The range game matters more than most players realize. When your crosshair turns blue, you’re in the sweet spot: Shotguns work best at 0-25 range, SMGs at 15-35, Assault Rifles at 25-45, Machine Guns at 35-55, and Sniper Rifles way out at 45-100. Rocket Launchers don’t care about range—which is honestly pretty convenient.
Chain Burst Fundamentals
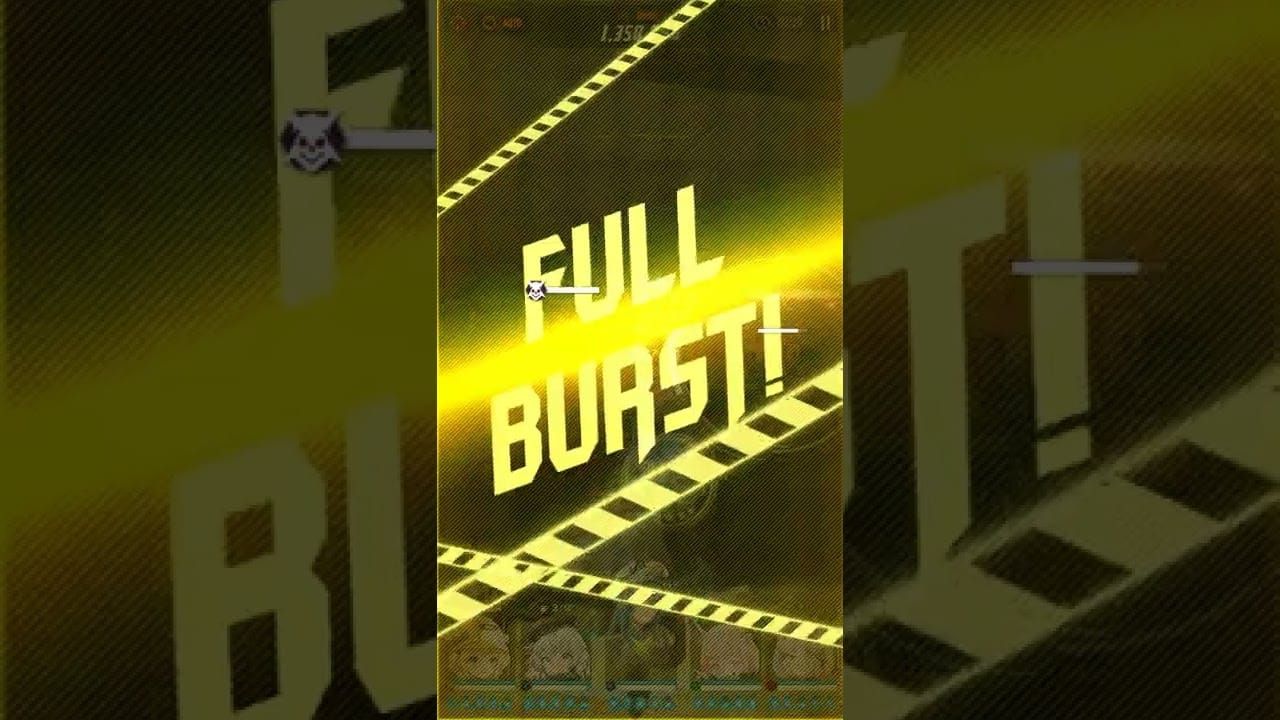
Complete that full burst sequence and you’ll trigger the golden 10-second ‘Full Burst’ mode. This is when all your AI units suddenly become laser-focused on whatever you’re targeting. It’s your window to punch way above your Combat Power weight class.
Here’s a neat trick: in auto mode, the leftmost character of each burst type activates first. Strategic positioning isn’t just for show—it actually matters.
The elemental system gives you a clean 10% damage bonus when you’ve got type advantage. Type disadvantage? You’ll take 10% more damage, but your outgoing damage stays the same. For players looking to accelerate their progress, buy nikke gems online through BitTopup’s secure platform—they’ve got competitive pricing and instant delivery that actually works.
Cooldown Management Basics
Most B1 and B2 units run on either 20-second or 40-second cooldowns. Your key 20-second B1 players include Liter, N102, Volume, Pepper, Dorothy, and Jackal. The 40-second crowd? Emma, Noise, Sakura, Rosanna. Rapunzel’s the outlier at 60 seconds.
For B2, your 20-second options are Centi, Anis, Rupee, Dolla, Guilty, Viper, and Mast. The 40-second tier includes Noah, Poli, and Aria. Blanc and Anne: Miracle Fairy also need that full 60 seconds.
All standard B3 units stick to 40-second cooldowns, which makes the proven 1-1-2-Flex composition work beautifully: one B1, one B2, two B3 units, and one flexible character for whatever the situation demands.
Essential F2P Character Analysis & Tier Rankings
Top SR Characters for F2P Teams
Starting out? Your bread-and-butter team should be N102 (B1), Anis (B2), Rapi (B3), Mihara (B3), and Belorta (B3). This setup will teach you the fundamentals through Chapters 5-6 without breaking the bank.
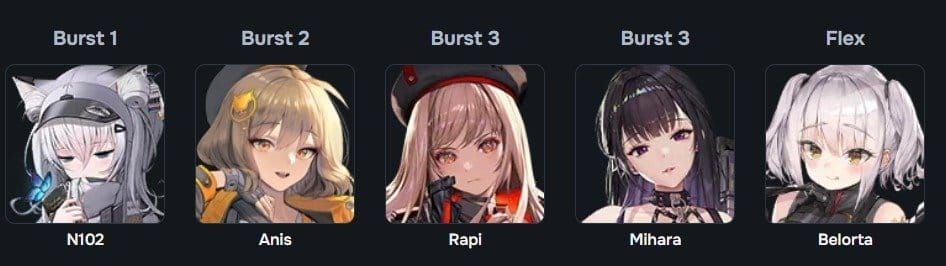
N102 does the job until you can grab Liter through that 100-pull guarantee. Anis brings reliable B2 functionality with solid rocket launcher burst generation. Rapi’s your straightforward B3 damage dealer—nothing fancy, but she gets the job done with minimal investment.
Accessible SSR Options
Liter should be your number one priority. Period. She’s the top-tier Burst I Supporter with 20-second cooldowns, team-wide attack buffs, burst cooldown reduction, and cover HP recovery. The 100-pull guarantee makes her realistic even for dedicated F2P players.
Crown’s ammo capacity boosts are genuinely game-changing for high-consumption DPS units. Her screen-clearing burst and taunt abilities add extra utility that keeps your damage dealers firing without those annoying reload interruptions.
Centi offers excellent B2 functionality as a Defender/Supporter hybrid—reliable team protection plus solid burst generation in one package.
Investment Priority Framework
Here’s something I’ve learned after watching countless players spread themselves too thin: concentrated investment in proven S-tier characters beats spreading resources across multiple units every single time. Core Dust is your most constrained resource, so treat it like gold.
Skill investment hierarchy goes like this: burst skills for primary DPS first, core passive skills that affect the whole team second, situational abilities last. Dorothy benefits from Attack and Elemental Damage stats, Crown wants Ammo Capacity, Liter focuses on Cooldown Reduction, Alice needs Charge Speed optimization.
For players wanting to accelerate their progression, nikke top up deals are available through BitTopup’s platform—secure transactions and genuinely excellent customer support.
Core Burst Rotation Strategies for Free Players
Basic 3-Character Rotations
The fundamental rotation is non-negotiable: B1 → B2 → B3. No shortcuts, no clever workarounds.
Dorothy: Serendipity teams work beautifully with Liter (B1) providing that crucial 20-second cooldown reduction and ATK buffs, Blanc (B2) for additional ATK buffs and ammo reset, then Dorothy’s devastating burst finale.
After your burst sequence, use normal attacks until that final bullet, activate S2 for reload, then prep your next cycle. This maximizes Dorothy’s ‘Swan Song’ buff stacking—we’re talking +30% damage per stack, three stacks maximum. The AoE damage potential is honestly ridiculous.
Budget alternatives? Emma (B1) and Neon: Blue Ocean (B2) work for ATK stacking when you’re still building your roster.
Advanced Chain Combinations
The ‘Alice Carry’ composition gets interesting: Liter (B1), Blanc (B2), Alice (B3), Maxwell (B3), Noir (Flex). This setup maximizes Alice and Maxwell’s DPS through careful skill management and weak point targeting—but fair warning, it demands significant manual play for optimal results.
Alice’s sniper specialization absolutely shines in boss fights and raids. Those piercing charge shots are devastating, but she needs heavy Skill 2 investment for charge speed optimization. Manual play becomes essential for consistently hitting enemy cores—the difference between moderate mob clearing and devastating single-target destruction.
The Blanc and Noir ‘Duo Bunny’ synergy is something special when both units are present. Blanc brings healing, shields, and damage reduction; Noir contributes significant ATK buffs and ammo replenishment.
Timing Optimization Techniques
Frame data optimization sounds technical, but it’s really about understanding animation lengths and skill queue timing. Advanced players minimize downtime between burst activations by pre-positioning units and queuing skills during animation windows.
Those crosshair color indicators aren’t just pretty—they help identify optimal engagement distances. Blue crosshairs confirm you’re in effective range. Attack outside these ranges and you’ll face damage and hit rate penalties for most weapon types.
The really advanced players achieve near-continuous Full Burst uptime by carefully managing cooldown reduction effects and alternating B3 unit activations. It’s beautiful when executed properly.
Team Synergy Fundamentals & Role Combinations
Elemental Synergy Patterns
The five-element system (Fire, Wind, Iron, Electric, Water) provides clean 10% damage bonuses with type advantage. Dorothy: Serendipity’s Water element works particularly well against Fire-type enemies, and her 20-second cooldown aligns perfectly with standard buffer rotations.
Type disadvantage means taking 10% more damage but doesn’t penalize your outgoing damage. This asymmetric system gives you flexibility—you can use off-element units when necessary without severe damage penalties.
Role-Based Team Building
That proven 1-1-2-Flex structure accommodates various role combinations while maintaining burst consistency. The flexible fifth slot is where you get creative—passive skill specialists like Privaty, long-cooldown utility units like Rapunzel, or situational specialists.
Tia and Naga form a powerful defensive core. Tia provides strong taunts and defensive buffs, while Naga specializes in healing, shielding, and core hit damage buffs. Together they create highly durable foundations that boost both team survival and damage output.
For specialized content like Gravedigger, consider the Shotgun team: Tove (B1), Dolla (B2), Sugar (B3), Drake (B3), Noir (B3).
Positioning and Formation Tips
Auto mode prioritizes leftmost characters of each burst type—strategic positioning for optimal skill rotations actually matters. Place your strongest units in leftmost slots to maximize automatic performance.
Tank positioning becomes crucial for high-damage content. Dedicated defenders like Crust provide essential damage absorption through taunts and shields. Understanding enemy attack patterns and positioning units to minimize damage while maintaining effective weapon ranges significantly improves team survival rates.
Proven F2P Team Compositions by Game Mode
Campaign Progression Teams
The meta Snow White carry team for high-deficit campaign clearing: Liter (B1), Centi (B2), Snow White (B3), Privaty (B3), Anne: Miracle Fairy (Flex). This composition revolves around Snow White’s burst skill potential to one-shot elite mobs and bosses—enabling significant Combat Power deficit clearing.
Snow White excels against bosses with breakable parts but requires substantial resource allocation. Worth it? Absolutely, if you can commit to the investment.
Red Hood ‘Duo Bunny’ lineup: Liter (B1), Blanc (B2), Noir (B3), Red Hood (B3), plus another top-tier DPS like Modernia, Alice, or Scarlet. Red Hood’s unique flexibility allows functioning as B1, B2, or B3, though her B1 and B2 skills can only be used once per battle.
Boss Fight Specialists
A2’s ‘Destruction Lineup’ for Solo Raids: Dorothy (B1), Modernia (B3), Blanc (B2), Noir (B3), A2 (B3). This emphasizes Parts Damage synergy with A2’s kit, while Modernia’s higher ATK stat allows functioning as a damage-drawing taunter.
A2’s ‘Mode B’ stance trades HP for increased ATK and Charge Speed—but it deactivates if HP drops below 40%. The Blanc/Noir duo provides essential healing and buffs to maintain A2’s HP above this threshold.
Scarlet: Black Shadow represents high-risk, high-reward gameplay with damage scaling dramatically at low HP levels. Not for the faint of heart.
Multi-Purpose Formations
The versatile Liter-Crown-Modernia core provides excellent performance across multiple content types. Liter’s cooldown reduction and ATK buffs, Crown’s ammo capacity boosts, and Modernia’s sustained AoE damage create a flexible foundation adaptable to various encounter types.
Modernia’s ‘Particle Storm’ burst skill excels at clearing enemy waves in campaign stages and mob-heavy content. Her ease of use makes her particularly suitable for beginners transitioning from starter teams to meta compositions.
Advanced Burst Timing & Animation Canceling
Frame Data Optimization
Understanding animation lengths and recovery frames enables minimizing downtime between actions. Burst skills have varying animation durations—learning to queue subsequent actions during these windows maximizes team efficiency.
A2’s forced firing animation reduces Charge Speed buff effectiveness, requiring specific timing adjustments. It’s one of those quirks you learn to work around.
Charge shot timing for units like Alice requires precise weak point targeting during specific animation windows. Manual play becomes essential for maximizing her potential—automated targeting rarely achieves optimal core hit consistency.
Burst Window Maximization
That 10-second Full Burst window represents peak damage potential. Pre-positioning units, managing ammo counts, and timing skill activations to coincide with Full Burst activation significantly increases damage output.
Cooldown reduction effects from units like Liter can create overlapping burst windows when timed correctly. It’s satisfying when you nail the timing.
Skill Queue Management
Learning to queue skills during animation windows prevents input delays and maintains smooth rotation flow. Understanding skill priority systems helps make optimal decisions when multiple abilities become available simultaneously.
Burst skills generally take priority over regular abilities, but situational exceptions require game knowledge. Resource management during extended encounters requires balancing immediate damage needs with long-term sustainability.
Resource Management for Sustainable F2P Growth
Upgrade Priority Systems
Core Dust scarcity demands strategic allocation to maximize long-term account value. Prioritizing established meta characters over experimental builds ensures sustainable progression and prevents resource waste.
Character replacement strategy involves gradually transitioning from starter SR units to superior SSR options. First priority typically involves replacing N102 with Liter, followed by upgrading Anis to Centi, Crown, or other superior B2 options.
Material Allocation Strategy
Different character types require varying investment levels to achieve effectiveness. Support units like Liter often provide significant value with moderate investment, while carry units like Alice or Snow White demand heavy resource allocation.
Mileage ticket accumulation through the guarantee system allows F2P players to target specific characters rather than relying purely on random pulls. This provides predictable character acquisition paths for long-term planning.
Long-term Planning
Account progression follows predictable patterns allowing strategic planning around banner rotations and resource accumulation. Understanding these cycles helps F2P players maximize limited gem income through optimal timing.
The ordinary recruit banner’s inclusion of Pilgrim units makes it preferable for rerolling compared to special recruit options. Building toward specific team compositions requires patience and resource discipline.
Common F2P Mistakes & How to Avoid Them
Team Building Pitfalls
Spreading resources across too many characters represents the most common F2P mistake—resulting in multiple weak units rather than focused strength. I’ve seen this countless times, and it’s painful to watch.
Concentrated investment in proven S-tier characters provides significantly better results. Ignoring burst type requirements leads to teams that cannot maintain consistent Full Burst uptime.
Prioritizing limited banner units over established meta characters often results in resource waste for new players. While limited units may offer unique capabilities, building a solid foundation with proven characters provides better long-term value.
Resource Waste Prevention
Upgrading equipment without understanding stat priorities wastes valuable enhancement materials. Each character type benefits from specific stat combinations—random upgrades rarely provide optimal results.
Skill level investment without understanding priority hierarchies can exhaust Core Dust reserves on low-impact abilities. Pulling on banners without sufficient mileage ticket accumulation reduces guarantee system effectiveness.
Meta Trap Awareness
Chasing every new character release prevents building cohesive team compositions. F2P players should focus on completing proven team archetypes rather than constantly pursuing the latest units.
Overvaluing individual character strength without considering team synergy leads to suboptimal compositions. Neglecting defensive utility in favor of pure damage often results in teams that cannot survive challenging content.
Testing & Optimizing Your F2P Team Performance
Damage Calculation Tools
Understanding damage formulas helps make informed upgrade decisions and team composition choices. Weapon type effectiveness, elemental bonuses, and skill multipliers all contribute to final damage output in predictable ways.
Combat Power calculations provide rough team strength estimates, but actual performance depends heavily on synergy, timing, and player skill. Comparing team performance across different content types reveals strengths and weaknesses that may not be apparent in single encounters.
Performance Metrics
Burst uptime percentage indicates team rotation effectiveness and identifies timing issues reducing overall performance. Consistent Full Burst activation every 20 seconds represents optimal execution for most team compositions.
Damage per second measurements during controlled testing scenarios help evaluate upgrade effectiveness and character performance. Survival rates in challenging content reveal defensive adequacy and identify situations where additional protection or healing may be necessary.
Iterative Improvement Process
Systematic testing of individual changes prevents confusion about which modifications provide actual benefits. Changing multiple variables simultaneously makes it difficult to identify effective improvements.
Recording performance data over multiple attempts accounts for RNG variation and provides more reliable assessment. Gradual progression through increasingly difficult content reveals team limitations and upgrade priorities.
Frequently Asked Questions
What are the most essential characters for F2P players to prioritize? Liter stands as highest priority due to universal applicability and 100-pull guarantee availability. Crown follows as premier B2 buffer, while Red Hood, Modernia, or Scarlet: Black Shadow provide excellent DPS options. Replace starter units systematically: N102 → Liter first, then Anis → Centi/Crown, followed by acquiring a top-tier B3 DPS unit.
How do I maintain consistent burst rotations with limited character options? Use the 1-1-2-Flex structure: one B1 unit (20-second cooldown), one B2 unit (20-second cooldown), two B3 units (40-second cooldowns) to alternate burst activations. Practice that B1 → B2 → B3 sequence timing in training modes before attempting challenging content.
Which weapon types should I prioritize for burst generation and team synergy? Rocket Launchers with clip reload provide highest burst generation rates, followed by clip-reload Shotguns. Sniper Rifles offer good generation for sustained damage dealers. Avoid loading up on Submachine Guns or Machine Guns—they generate burst gauge poorly.
How should I allocate Core Dust and other limited resources as a F2P player? Concentrate investment in proven S-tier characters rather than spreading resources thin. Prioritize burst skills for primary DPS first, then team-wide passive skills, finally situational abilities. Focus on one complete team composition before starting secondary projects.
What’s the optimal reroll strategy for new F2P accounts? Target Pilgrim attackers (Red Hood, Scarlet: Black Shadow, Modernia) as primary reroll goals for exceptional long-term value. Use the ‘Salted Email Method’ for multiple attempts—requires 30-35 minutes per attempt for 35-40 pulls. Focus on the Ordinary Recruit banner since it includes Pilgrim units.
How do I adapt my F2P team for different game modes and boss encounters? Build one versatile core team first (Liter + Crown + top DPS + appropriate supports) that handles most content types. For specialized encounters like Gravedigger, consider weapon-type specific teams. Campaign progression benefits from high single-target damage, while mob-heavy content favors AoE specialists.


